Giving an intramuscular injection is simple. But proper preparation is more complicated than it seems. In fact, in my practice I find my clients have more questions about how to prepare an injection than they do about how to give one. And a properly prepared injection is the most important factor for preventing infection at the injection site—one of the most common complications following an intramuscular injection. In this article, I’m going to show you 10 simple steps you should take to prepare an injection for your horse.
Sterile Prep
When preparing an injection for your horse, your goal should be to prevent contact between the injection materials you’ll use (medications, needle, and syringe) and the non-sterile environment where you’ll prepare it. Sterility is defined as being “free from living germs or micro-organisms.” But let’s get real—a barn is hardly the ideal environment for avoiding germs! The dirty environment of a barn makes it even more important that you pay attention and try your best to keep things clean when preparing medication. It’s critical that you avoid introducing bacteria in an injection site that might cause an abscess or infection under your horse’s skin.
Before you even begin your injection prep, gather your materials (medication bottle, needle, syringe, and anti-microbial wipes) and take them to a clean, uncluttered location. Consider laying a clean towel over a countertop (or even on top of a mounting block!) where you can work. Confirm that you have the correct medication (read the label carefully), and check the expiration date. Inspect the bottle carefully, and don’t use it if you see any signs of contamination (floaters) in the fluid. Finally, wash and dry your hands. You’re ready to begin.
1. Remove the plastic covering the top of the medication bottle. When doing so, take care to avoid touching the rubber underneath (called the “septum”). Even after washing, your hands are likely to be covered with millions of bacteria that all would be thrilled to jump aboard the needle to take a trip through your horse’s skin. (Note: Some medication bottles are covered with a small metal guard instead of a plastic cap. Simply lift the metal flap to access the rubber septum—again avoiding contact with the underlying rubber with your skin.)
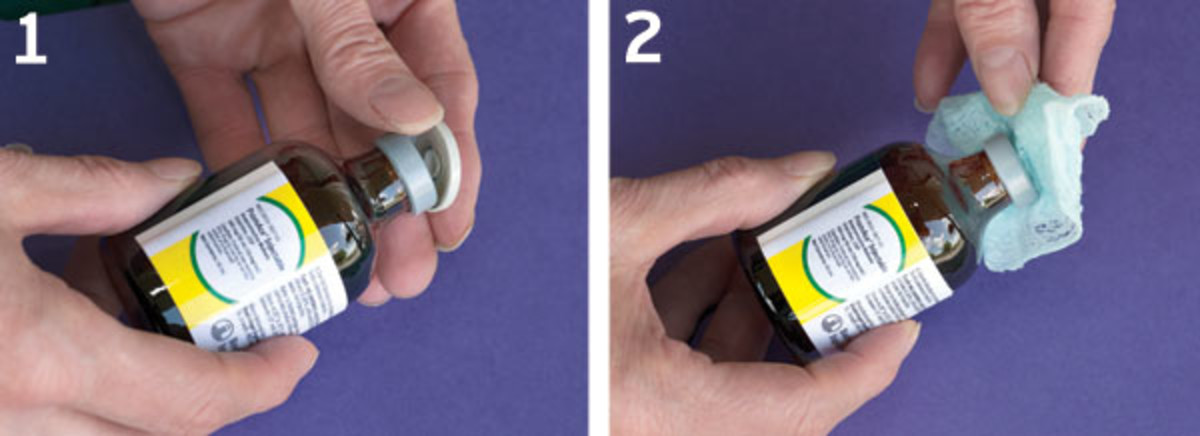
2. Swab the rubber top of the bottle with an antimicrobial substance, such as alcohol or chlorhexidine. Use a single swipe with a clean swab to avoid reintroducing any bacteria you’ve successfully swabbed away. When you set the bottle down to prepare your needle and syringe, put it on a clean surface, and lay a clean antimicrobial swab over the top to keep it clean.
3. Remove the plastic cap from the end of your needle. Avoid touching the exposed, open end of the needle with your fingers, or letting it come in contact with anything else in the environment before attaching it to the syringe. (Note: Some needles are packaged in a sterile plastic/paper wrap. When removing this type of needle from the packaging, again avoid touching the open end of the needle; hold the needle cap instead.) If you must set the needle down to prepare your syringe, place it on an antimicrobial swab.
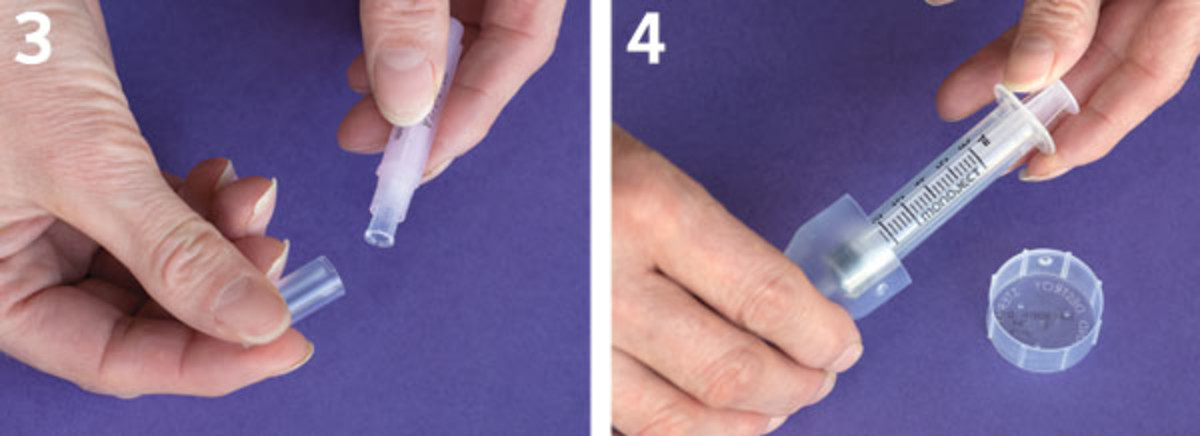
4. Remove the syringe from its plastic casing. As with the needle, avoid contacting the syringe’s needle-end with your fingers or with anything in the environment. (Note: Like needles, syringes may be packaged in a sterile plastic/paper wrap. Don’t touch the open needle-end when removing the syringe from its wrapper.)
5. Attach the needle to the syringe. Make sure to twist it on securely to avoid the common mishap of the syringe exploding off the needle when you apply pressure to inject. A loosely attached needle means you’ll likely administer the medication on, not in, your horse (especially a bummer if that syringe contains an expensive medication!). (Note: For administering thick or especially expensive substances, consider using a type of syringe called a “luer lock” that actually requires the needle be twisted onto the syringe via a screw thread.)
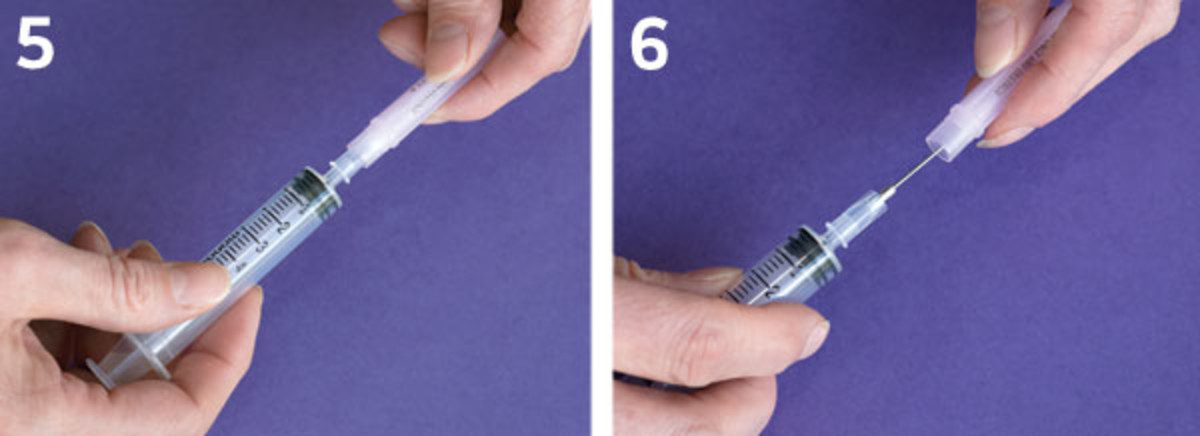
6. Remove the needle cap. Don’t touch the needle once it’s exposed, and don’t let it come in contact with anything in the environment. If you do (and accidents can happen) get a new needle before you proceed.
7. Hold the bottle upside down, and insert the needle into the bottle. Take care not to bend or touch the needle.
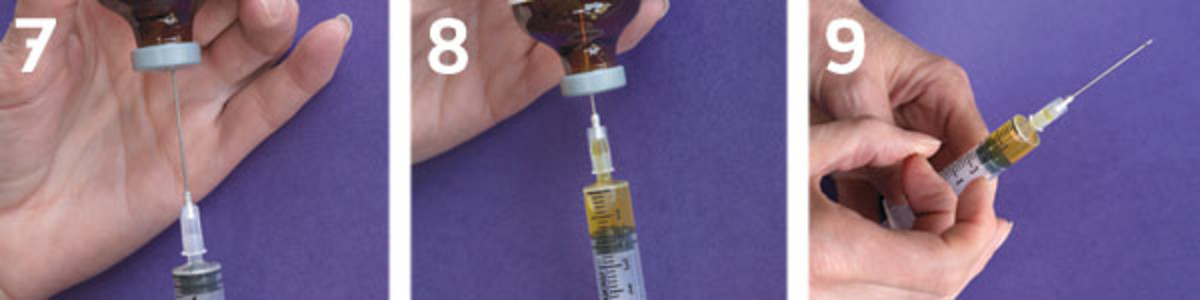
8. Draw back on the syringe to fill it with the required amount of medication. If you’re drawing from an “almost empty” bottle, be aware that you’ll need to pull the syringe back away from the bottle, bringing the tip of the needle toward the rubber septum in order to keep the tip submerged.
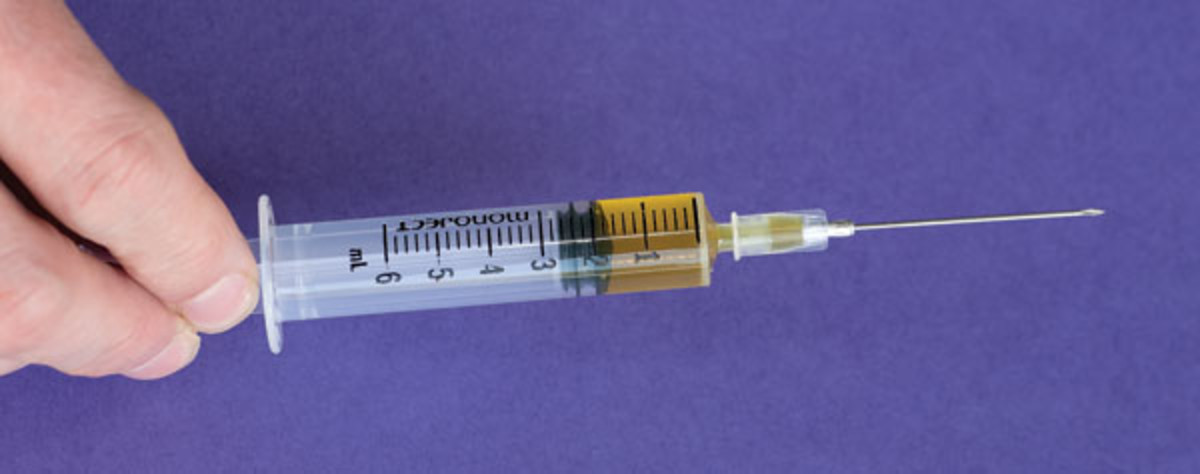
9. Hold the syringe needle-end up, and tap air bubbles to the top. Then depress the syringe slightly to expel the air.
10. Confirm your dosage amount. The rubber ring closest to the needle side should be lined up with the correct dosage—in this photo, 2 ml. Be aware that a “ml” (milliliter) and a “cc” (cubic centimeter) are the same.
You’re ready to inject! And once you’ve properly prepared the medication in the syringe, administering it to your horse is as simple as one, two, three.
a. Swab the area with an antimicrobial wipe to disinfect.
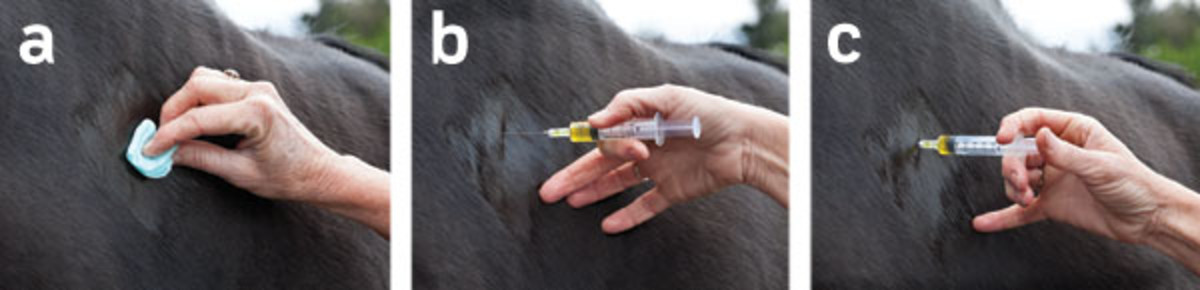
b. Slowly insert the needle into the skin (your horse will appreciate it if you insert slowly, without jabbing).
c. Draw back on the syringe briefly to make sure you aren’t in a vein (if you are, blood will appear and you must withdraw the needle), then simply push the plunger.


