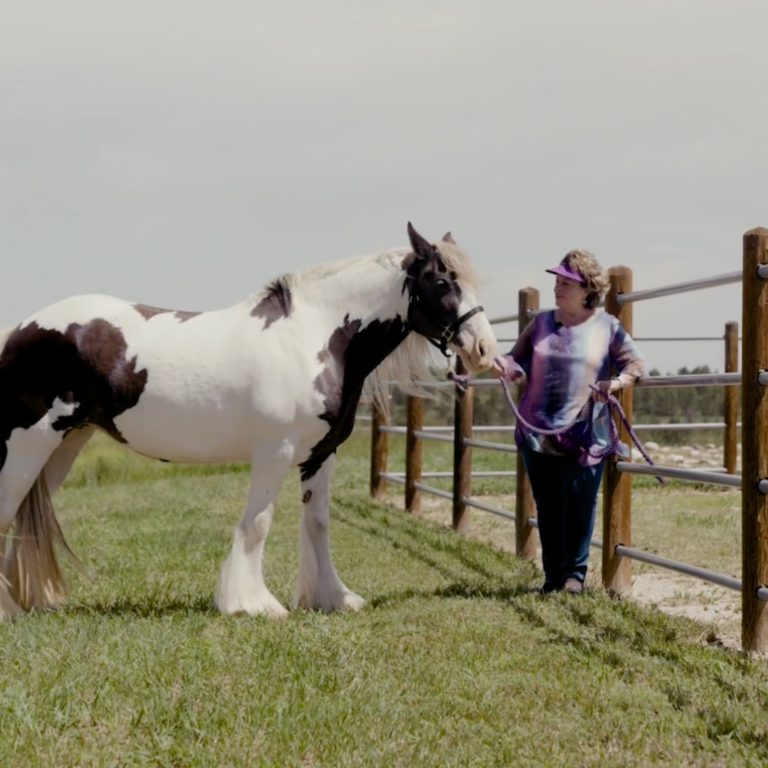
The ability to stop your horse with a voice command comes from the idea of safety. I’ve had a bridle come unscrewed in the middle of a class, and I can tell you, stopping my horse using “whoa” and body position meant a lot at that time. I didn’t panic when the bit fell right out of my mare’s mouth, rendering a pull from my reins useless. I sat down and said “whoa” as I always do, and she dropped her bottom in the dirt right there—because that’s what she was taught to do.
But horses don’t automatically know the word “whoa.” They have to learn that the word and associated body position don’t mean anything else other than stop—it’s not a multiple-choice cue. It doesn’t mean lope, trot, walk, or (especially) slow down. It means stop as if you’re on the edge of a cliff. A good stop should happen within one or two seconds of your asking for it.
In this lesson, I’ll discuss the anatomy of a stop, give you techniques to train it, then offer ideas for increasing the degree of difficulty once you master the basics.
Anatomy of a Stop
A good stop occurs when a horse’s back end is under him, whether he slides 2 inches because he really heard you or 6 feet because he’s a reiner and is wearing sliding plates. When he stops, it’s also about balance. His back end should be under him, and his front end will be a little bit mobile.
Sometimes conformation can make stopping a little harder for a horse. For example, if his legs are camped-out behind, it’ll be harder for him to get underneath himself. But he can overcome it. He might never slide like a reiner, but he can learn to stop correctly. If he’s back in the knees, it can be difficult at first for him to back up as required by the exercise I’ll explain here, but you can still work with him to achieve a good stop and back. All horses can do this.
Stopping requires two elements for success: your body English—that is, how you sit the stop and how you change your position from riding forward to not riding anymore—and saying “whoa.” With this exercise, we’ll eliminate the need to pull on the reins to achieve a solid stop.
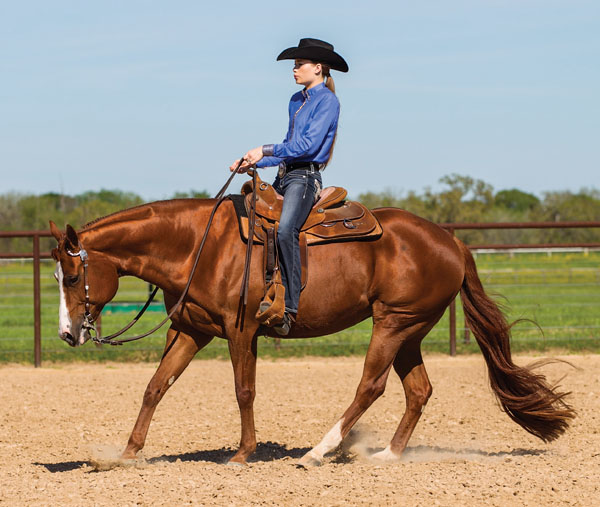
Think of you and your horse making a plus sign—the horse is the horizontal line, and you’re the vertical. When you stop correctly, both of you tilt slightly. The horse’s back end goes down and his front end goes up; your body correspondingly tilts back along the same angle. If you stay vertical to the ground, you’ll be on your horse’s front end, which makes it harder for him to balance in his stop. So be sure your body adjusts to the change in slope of your horse’s body.
Don’t say “whoa” to the air—say it to your horse. And it’s not “whoaaaa,” drawn out forever. He’ll lose the cue by the time you’re done saying it, and it takes away from the immediate response he’d give to your just saying “whoa.” However, you can stretch it out just a little so the horse can hear it. After you teach your horse this word, you’ll find that anything with an “oh” in it will stop him after that. So be careful what you say and when you say it.
When you stop your horse, think about how you stop when you’re walking. You probably don’t jam your feet into the ground. Instead, to balance, you either take one more step forward after stopping, or a single step back. You’ll want your horse to come back a step, because it keeps him from being strung out and out of balance.
Most of the time, when you stop your horse, you’re probably going to move fluidly into a few back-up steps. It’s easier for him to stay in motion moving from forward to backward as opposed to stopping, standing, and then backing. Additionally, that rocking back makes for a really nice-looking stop.
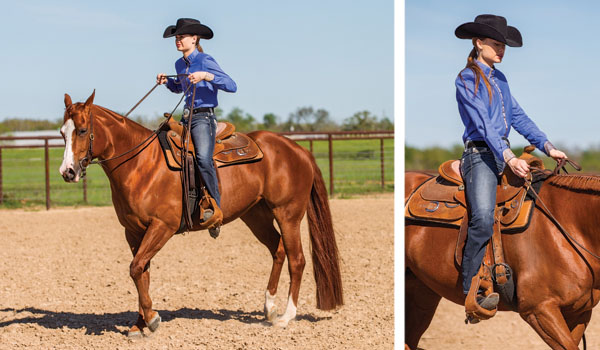
For this exercise, outfit your horse in a bit you can pull on without scaring him. For one horse, this could mean more bit, and he’ll be fine with it. But for a more sensitive horse, you might need a sweet snaffle. It depends on the horse and how lightly he responds to bit contact. You want to be able to pull the horse backward without causing him fear.
Teaching the Stop
This exercise teaches the stop and eliminates the need to pull your horse to achieve it, making it impressive because it looks invisible while maintaining correctness.
While this exercise is extremely repetitive, it’ll get you and your horse to that invisible stop. When performing this drill, remember these hints.
• Keep your hands down; if your hands are up in your chest, you’re pulling at the wrong angle.
• Don’t take too many strides in between stops.
• Repeat this exercise often during your training session. If you don’t enforce it every time, your horse won’t know when you mean it.
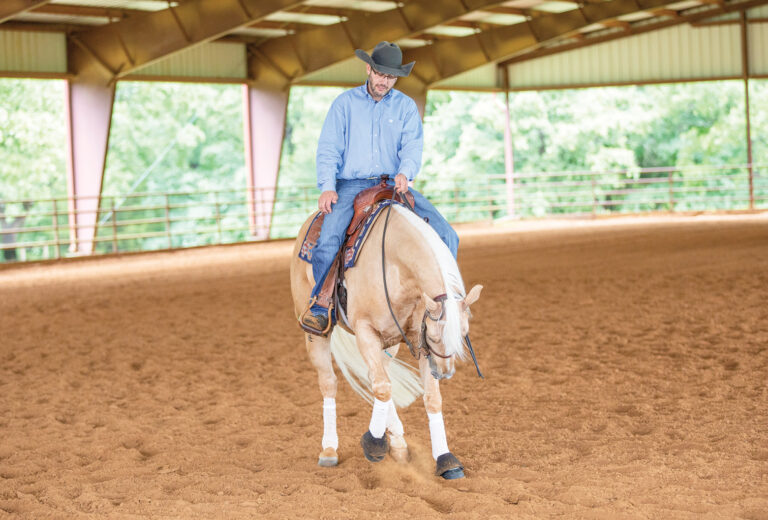
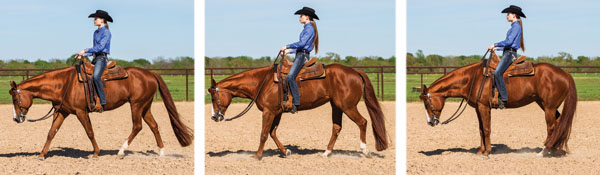
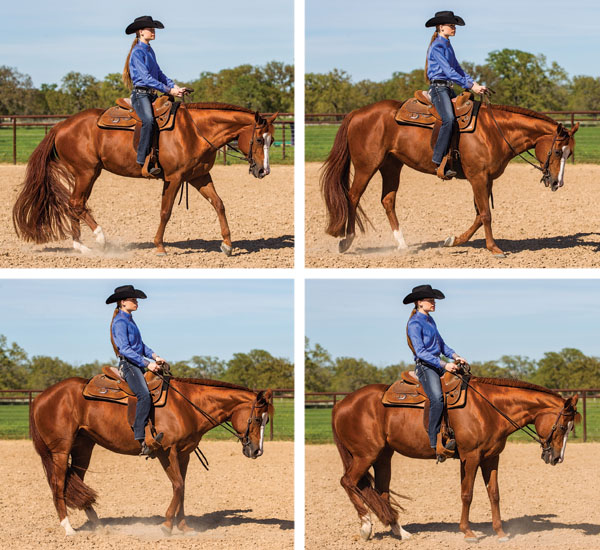
1. Begin riding two-handed at the walk. Keep your hands low with some width between them, keeping contact with your horse’s mouth. Your horse should give his face to allow his neck to go down a bit and his back to come up, with his hips underneath him. This gives his body a round shape.
2. Walk three or four steps in good riding position with your heels down. Then sit down in your seat and quit riding. As you do so, exaggerate your heels-down leg position, not by pushing on the stirrups, but by lengthening your legs to pull your seat into the saddle.
As you do this, say “whoa” and roll your seat bones underneath you and soften the small of your back. Maintain your body’s straight position, but with your hips rolled under.
3. Chances are, unless your horse already knows about “whoa,” he’ll walk right through the bridle. With your heels down, smoothly pull on the reins until your horse not only stops but also backs three or four steps. You can say “back,” you can cluck to cue for the back-up—whatever you choose to do is fine as long as you’re consistent with it. But make sure it’s a solid pull, not a bumping cue on the reins, and not alternating left and right rein.
Your horse might stand there like a burro, refusing to back. Wait with a solid pull on your reins. In some cases, you then can cluck or bump your reins by moving your elbows to “unstick” his front feet. If that still doesn’t work, ask him to step to the side to help unlock his knees, because maybe he doesn’t know how to back very well.
4. Once your horse backs three to four steps, release your cues and sit still. That’s the end of the exercise, but you’ll repeat it over and over: walk forward, say “whoa” and sit deep, back up, and stand still. I have my students line up at one end of the arena and practice this drill back and forth across the length of it, and it’s something I teach at every clinic.
Look for the slightest improvement from where your horse starts. Ideally, your horse should step back before your hand takes hold of his face. It’s repetitive, but remember: The goal is to eliminate the need to pull to stop. Your horse will catch on fairly quickly that if he stops and backs up quickly enough, you won’t pull on the reins, and then he can rest for a second. He’ll begin “hunting” for the cues. But in the beginning, you’ll need to use repetition of the same cues, or it won’t make sense to your horse. You’ll know when it’s time to quit the exercise for one session when he’s better than he was last time you rode.
Increasing Difficulty
Next, perform this drill at a jog. But again, don’t go very far—four strides maximum—between stops. Jog off from a standstill, go about four strides, and stop/back him up. Stand still for a few seconds to signal the end of the exercise, then jog off. (A bonus to this move is you also get to practice your jog departure.) Once your horse stops before you have to pull and you can start dropping your hand, you can be done with the exercise that day.
Also practice the stop from a lope, but don’t lope to a stop nearly as many times as you stop in the other gaits. Start off on either lead—it doesn’t matter which one. But don’t go very far before stopping four strides maximum. By now, your horse will start to see the light, and will begin to anticipate your stop cues.
Just remember, every time you say “whoa,” it needs to count. Your goal is the ability to be anywhere, doing anything, and when you drop your hand, sit down, and say whoa, your horse stops, period. In addition to enhancing your safety, it looks fancy, and it’ll set you apart in the show ring.
Nancy Cahill is an AQHA Professional Horsewoman with more than 47 years’ experience guiding youth and amateur riders in all-around competition. She has won several AQHA world championship titles, and her clients have competed successfully at the state and national levels. She resides in Madisonville, Texas, with her husband and near her two children and grandchildren.