Never in history has so much helpful information been available to horse lovers. Good books, clinics, and videos, along with the wonders of the Internet, make available the latest trends in horse training techniques and equipment. But we’ve lost some things, too.
Just a generation or two ago, horses were used more widely for work than they are today, and there was more likely to be an old, retired horseman next door who could offer stories and firsthand advice from which you could learn.
We’re likely to be quite well-informed about round-pen training techniques, but less capable than we should be when it comes to skills that help keep us safe with our horses in the backcountry.
Further, much of our horse’s potential as helpmate is lost if we don’t know how to better harness his power. Here’s a brief rundown of five useful skills: teaching your horse to drag objects, hobbling, tying up a hind foot, picketing, and knots.
Skill #1: Dragging Objects
The ability to hook onto something and safely exert pressure can be extremely valuable. You can drag a snag of dead firewood back to camp or pony a reluctant packhorse. In an emergency, a horse trained to drag might be able to pull a friend’s horse out of a bog. Plus, there are the recreational possibilities. Many ranch children have enjoyed a ride on a sled or on skis, pulled by a rope dallied to the saddle horn by an adult on horseback.
I learned the skills involved in dragging a load from the saddle horn by helping my father-in-law move stacks of irrigation boards twice daily when he changed dams in a ditch to irrigate alfalfa. He refused to damage his wet fields by making ruts with a vehicle, so he used his horse, Brownie, neatly stacking the two-by-eight-inch fir boards and encircling them with a series of half hitches, just as you do a manty. (See “A Packing Primer,” On-Trail Training, September/October ’05.)
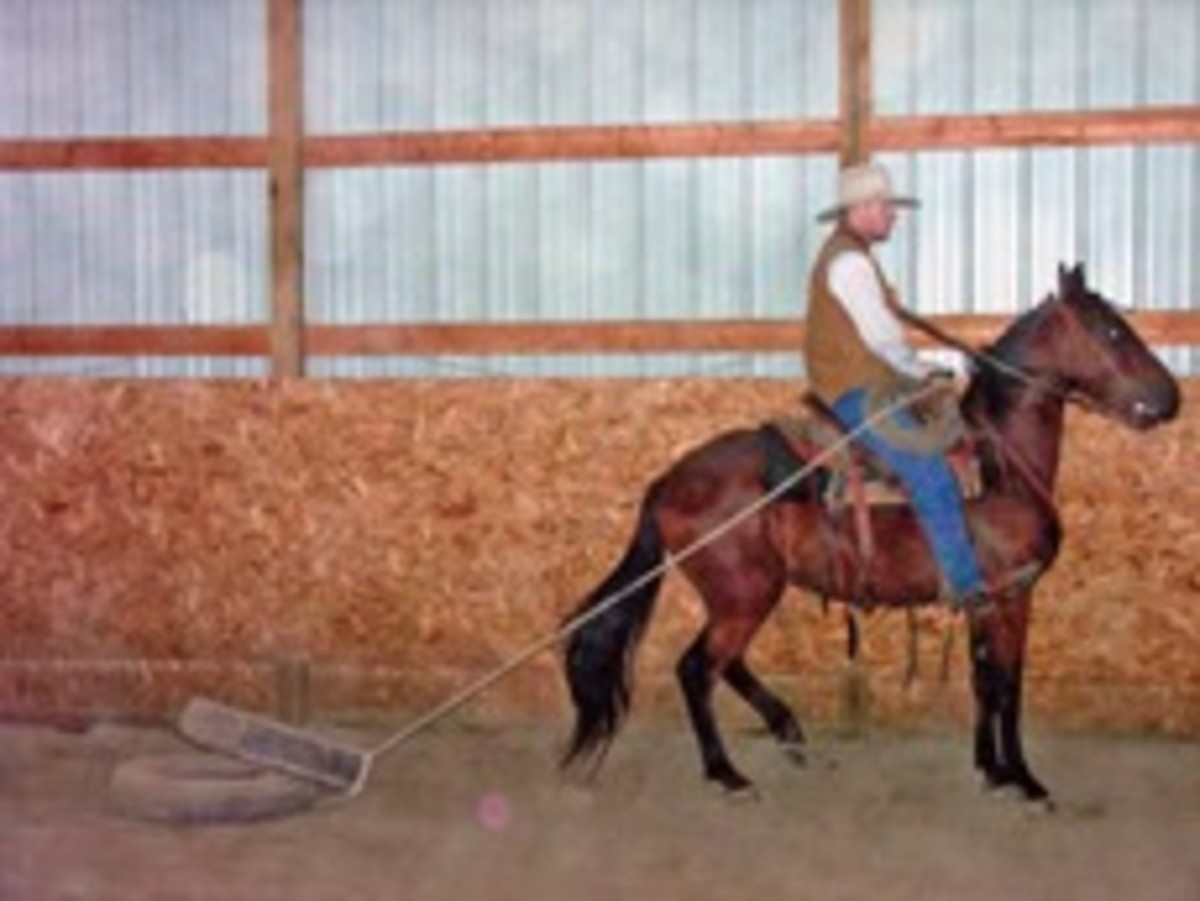
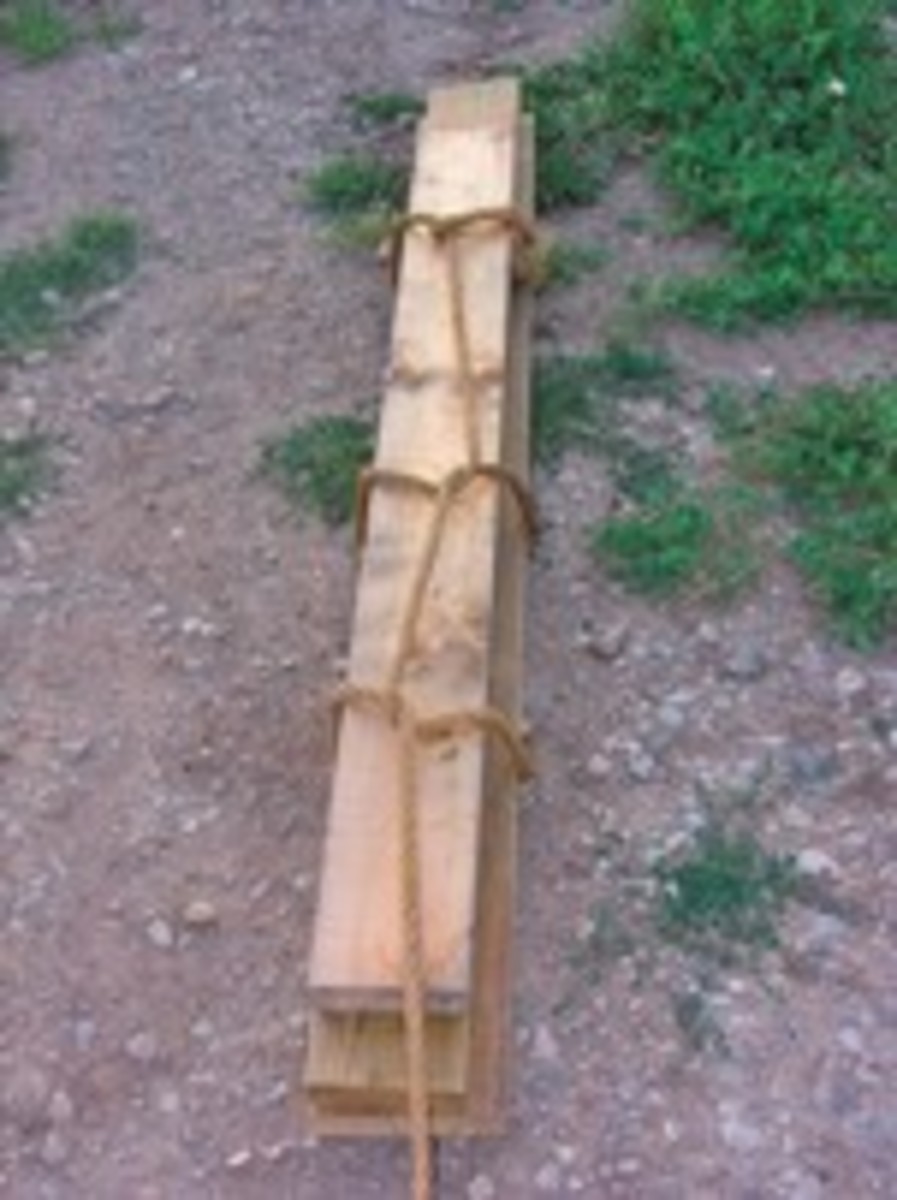
I was impressed not only with the horse’s ability to easily drag a couple of hundred pounds of boards, but by the way the half hitches drew the load together and kept individual boards from slipping out. Today, I use the same technique for dragging several corral poles or logs for firewood.
To get started, first you’ll need a Western saddle with a stout horn. (However, the horn need not be certified for roping.) It’s also best to have a breastcollar to help stabilize your saddle during pulls, although it isn’t absolutely required for lighter pulling. And you’ll need a dragging rope. I prefer a soft cotton rope to a lariat because it’s nicer on your hand and for the horse when it touches his skin.
Your horse must neck rein. (See “The Essential Neck Rein,” On-Trail Training, May/June ’05.) It’s extremely difficult to pull anything safely while riding a horse that requires both your hands for guidance. Further, he must be thoroughly desensitized to ropes touching every portion of his body and not be bothered by a rope creeping up under his tail.
Start in an arena or other safe enclosure. First, remind your horse of his desensitization by passing the rope all over his body from the ground, and then do the same from a mounted position. When he’s okay with that, progress to dragging the loose rope with no load attached, making sure it touches both sides of your horse’s rump. It’s important he be aware that it’s there.
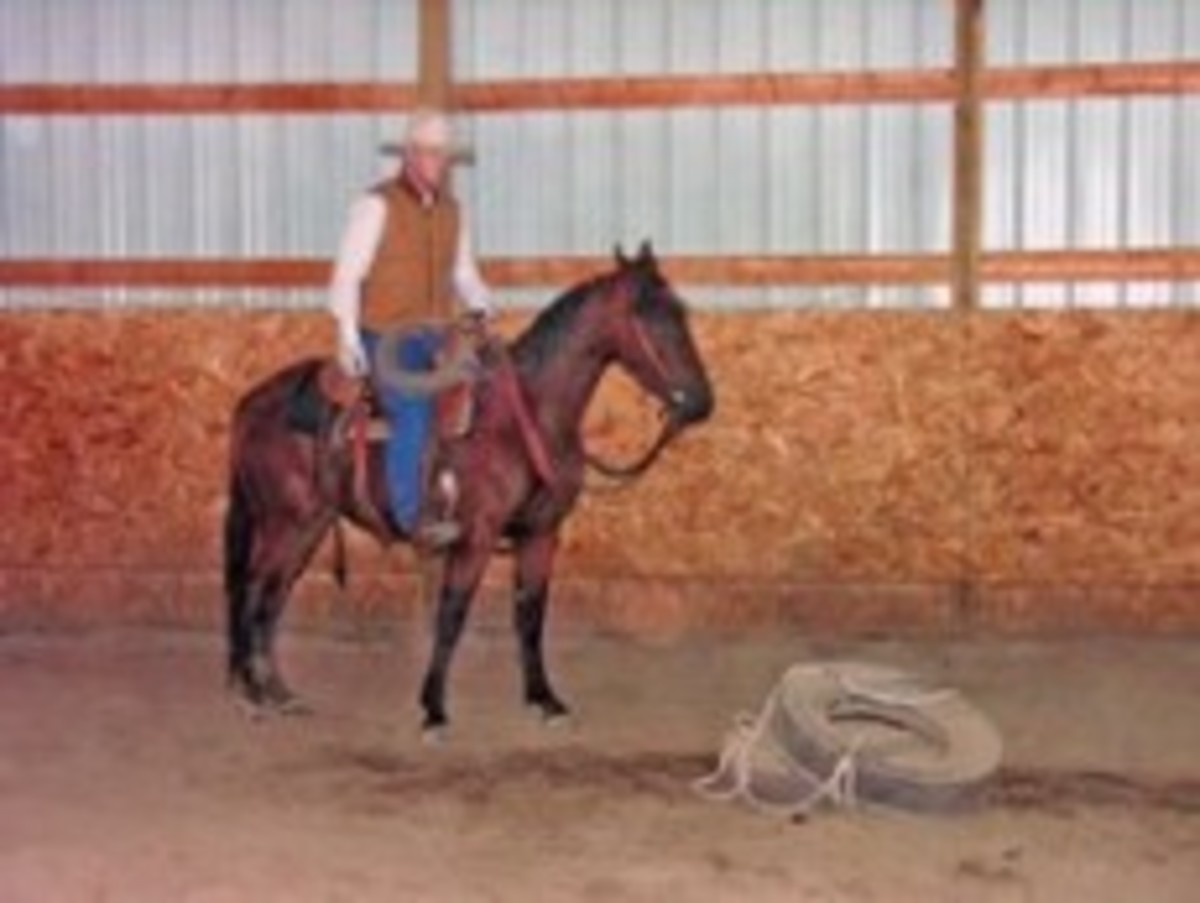
For the first real load, I like an old tire, because it’s safe and relatively quiet. First, ride up to the object and let your horse study it and smell it. The more familiar he is with the object, the less likely it’ll scare him when he watches it move, but do expect a start. What a horse typically finds frightening, more than the pull from the horn, is the sight of the object moving seemingly of its own volition. A horse has no idea that he’s supplying the power.
Dally the rope around the saddle horn. This simply means to wrap the rope around the saddle horn once or twice. Never tie your dragging rope to the horn or to any other part of the saddle. Simply take several wraps, then hold the rope with your thumb upward. This hand position tends to prevent injury should something go wrong, and you can quickly release, if necessary.
(Tip: Some saddle horns are too slippery to furnish the friction required when pulling heavy loads. If you need more traction, twist large rubber bands a number of times around the horn.)
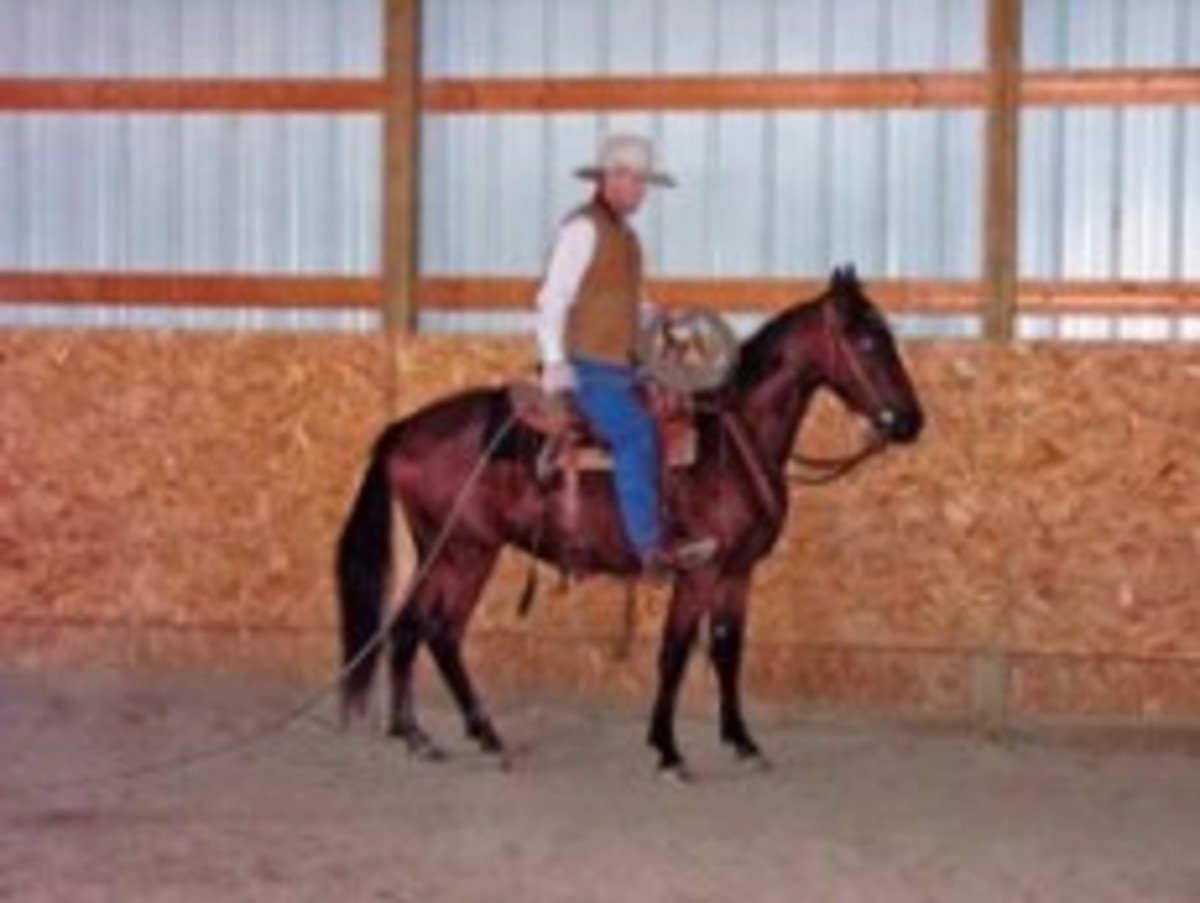
Facing the load, take the slack out of the rope and back your horse so that he feels the rope tighten and sees the load move. Expect a reaction. Take your time. Let him get used to the idea that a pull against the horn coincides with the tire’s movement. When he settles down, turn him to the left (if you’re dallied on his right side) so that his side is toward the load, and begin moving him forward.
Now your horse is getting used to a rearward pull on the horn, and assuming all is well, will step right out. Even a small tire pulls hard on a sandy arena surface, and it won’t take long until he’ll concentrate on the work he’s doing rather than the spookiness of an object traveling behind him on its own.
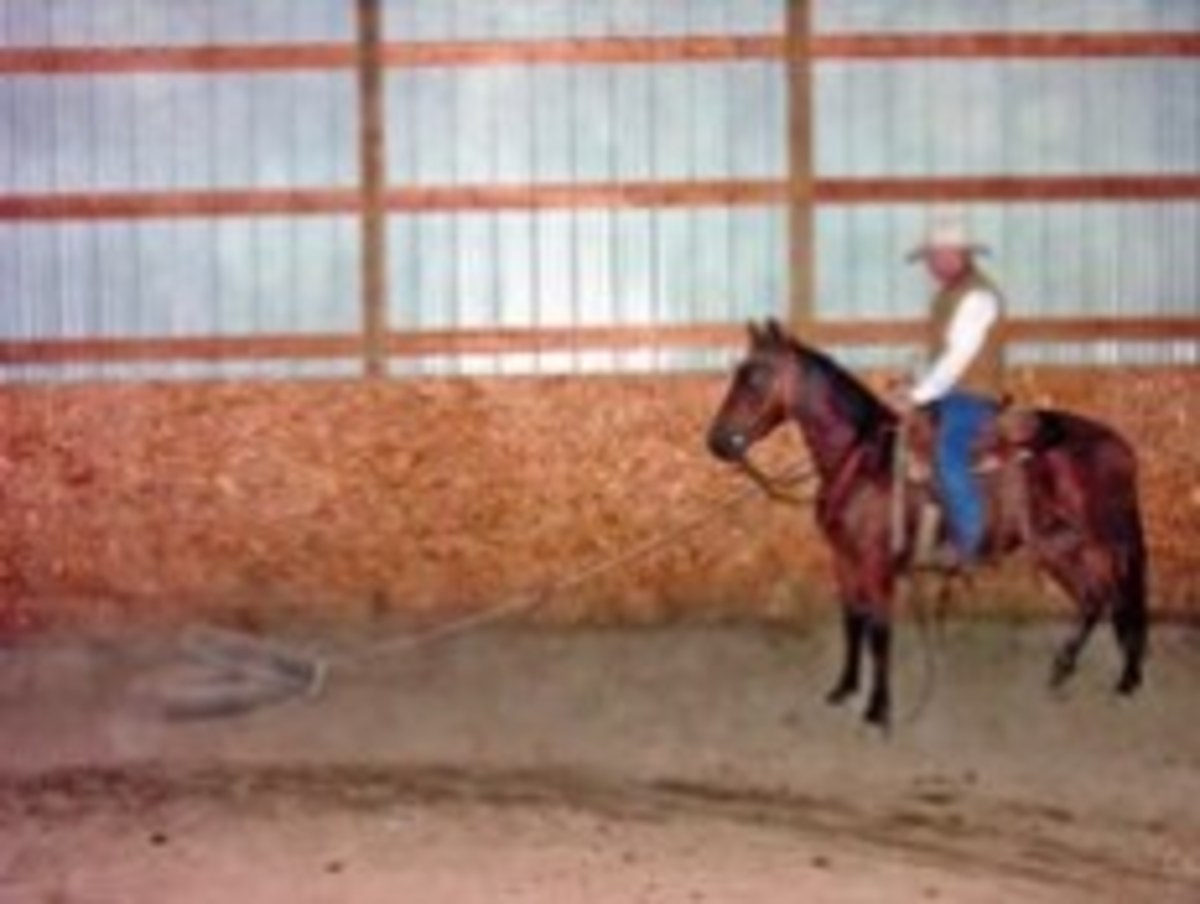
As your horse pulls, lean forward, and keep your center of gravity as low as possible. Be extremely careful. It’s far better to drop the rope and start over than to get into any sort of tangle.
Skill #2: Hobbling
If more trail riders routinely carried hobbles and used them to restrain their horses at rest stops, we’d probably have fewer damaged trees. If you use hobbles, you won’t have to tie your horse to a tree, which can harm branches and bark. If briefly tying him is the only alternative, hobbles can help keep him from pawing the tree, which can damage it around the trunk at the root tops.
Hobbles come in several types. Use the inexpensive nylon-strap type only on experienced horses, because they can chafe; a young horse will tend to struggle somewhat in hobbles until he’s used to them. Better for training and for extended use are the padded hobble halves, made from softer leather and joined by a chain.
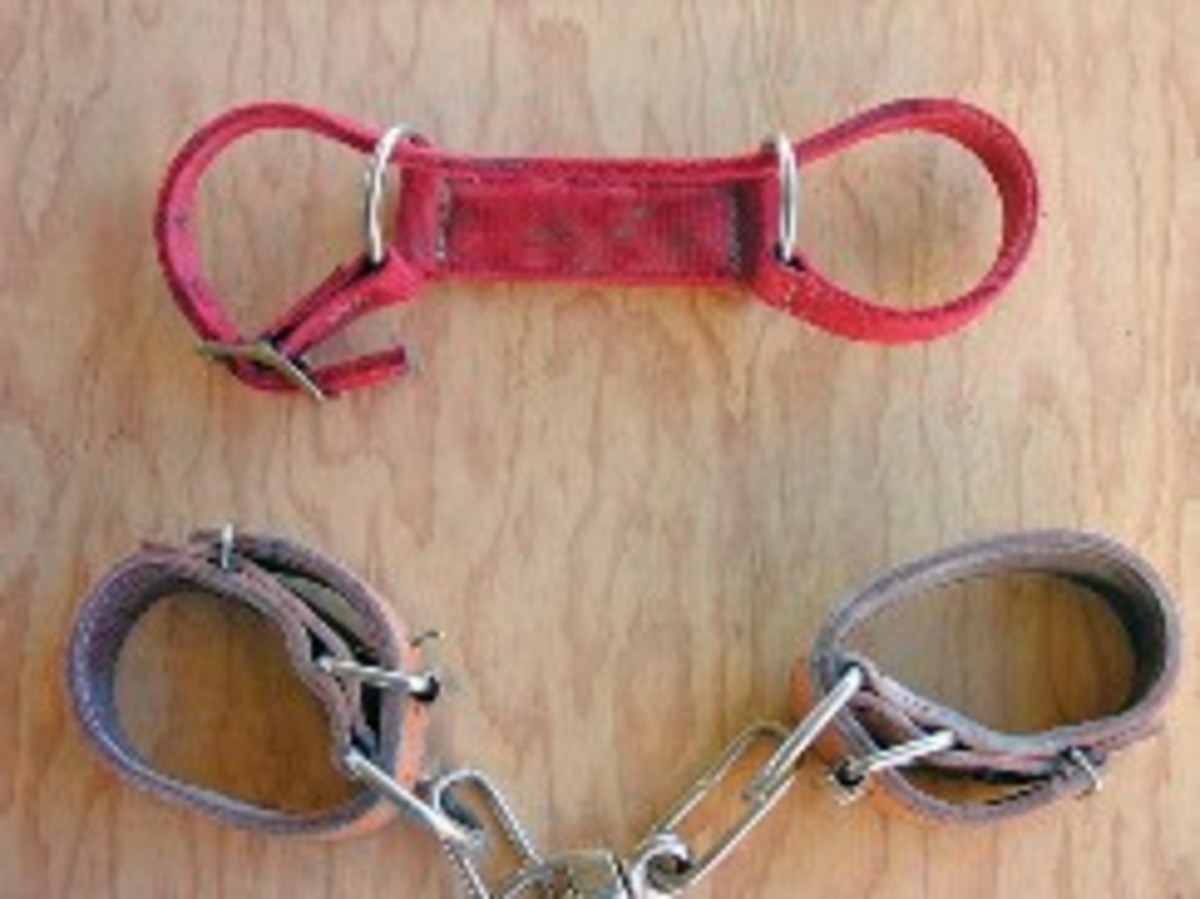
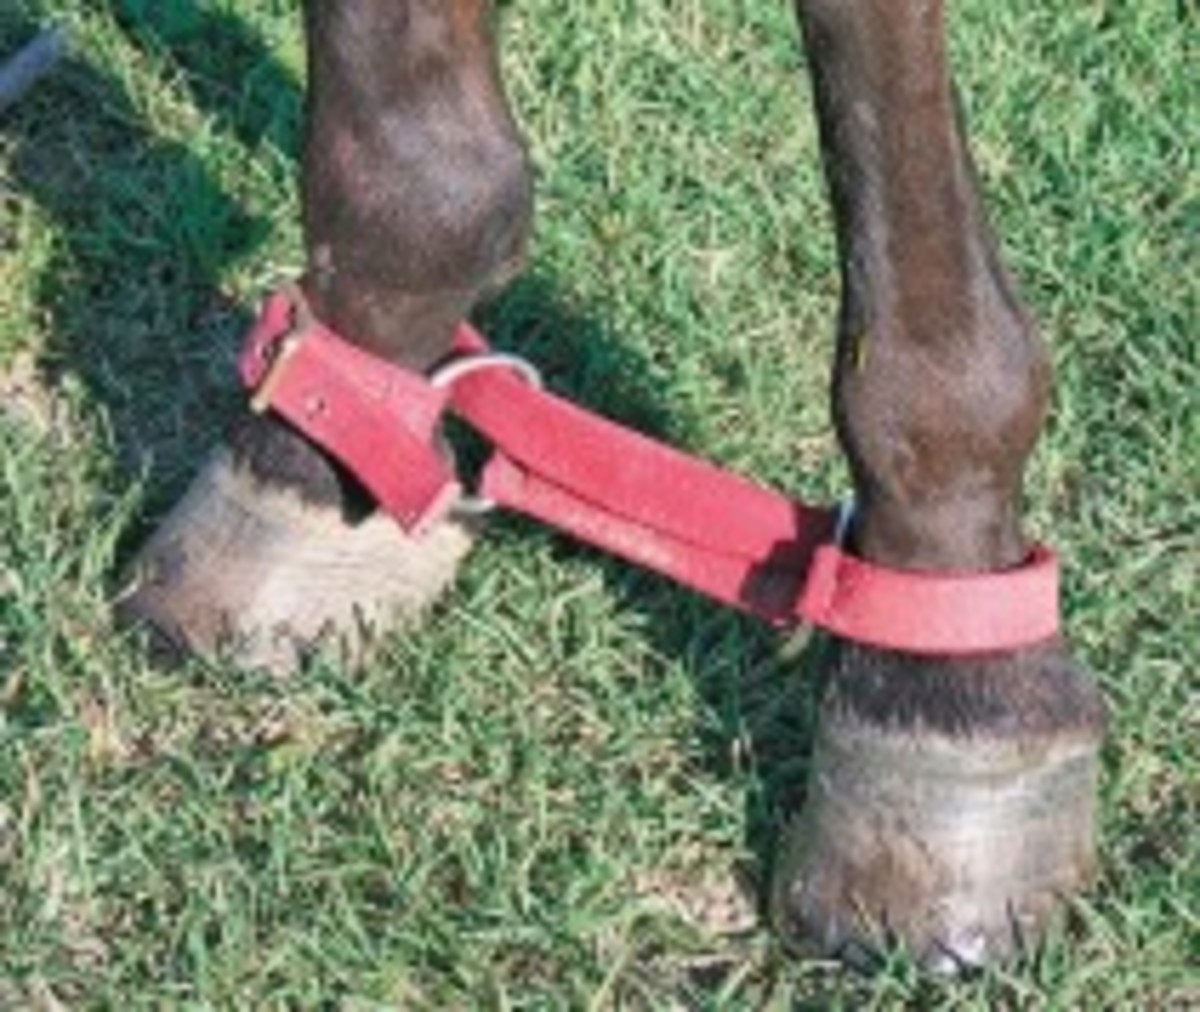
Teach your horse in a safe enclosure with a soft, stone-free surface. Attach the hobbles while working at his side, never in front of him (for safety’s sake). Be particularly careful at the moment you attach the second hobble: When your horse feels the restraint, he’s likely to react suddenly by lifting one foot, and you don’t want your fingers pinched in the hobble’s buckle. Attach hobbles to your horse’s pasterns, not his cannon bones. Pasterns give and flex in several directions; cannon bones don’t. Excess stress along the tendons that run along the cannon bones can damage the tendons. Such damage will take a long time to heal.
Once you put the hobbles in place, your horse must teach himself. You can’t help, so stay out of his way. He’ll soon learn the hobbles all too well and find he can move right along, the reason that in a camp situation you never hobble all your horses. Keep an “old reliable” tied to a highline or picketed so that if the rest of the group drifts away you can round them up.
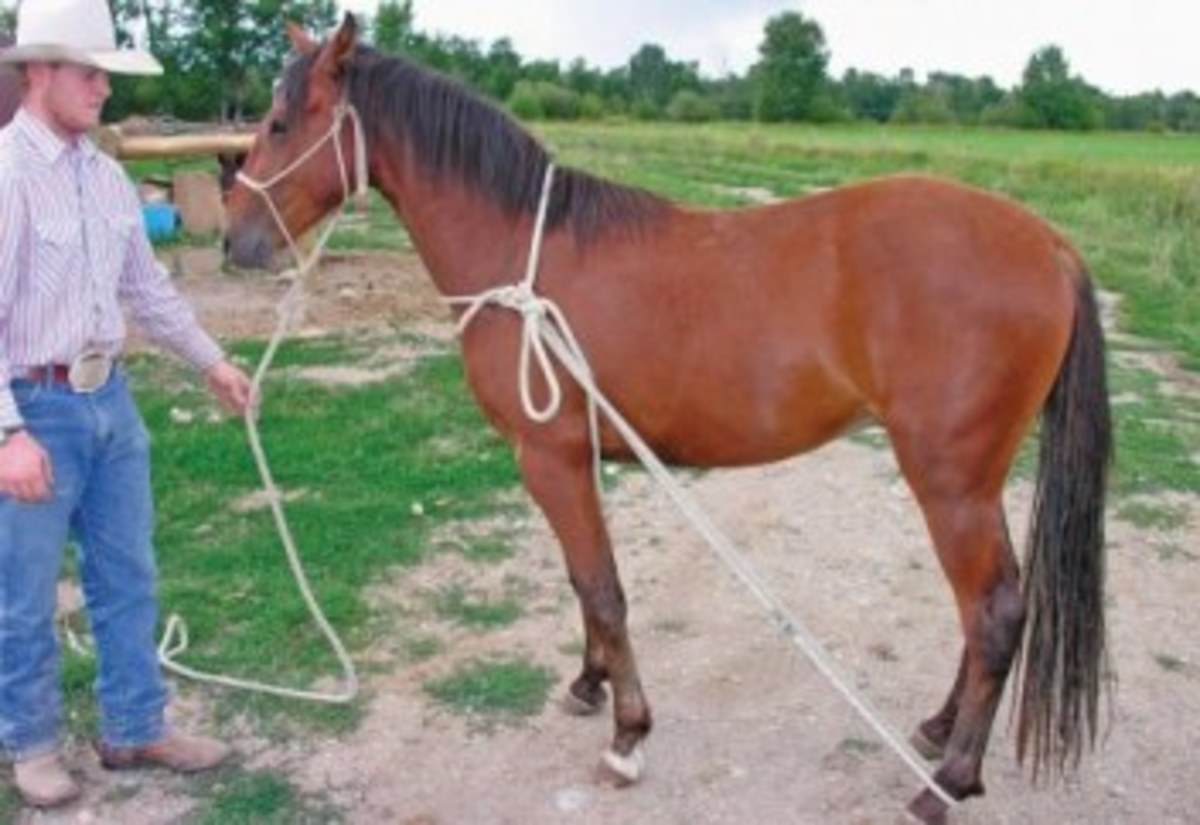
Skill #3: Tying Up a Hind Foot
This is a skill you may prefer never to use, but you may be required someday to restrain even the gentlest horse. Perhaps he’s inspected a porcupine too closely and you must remove the quills when the closest veterinarian is on the other side of the mountains. Maybe in an emergency you must put a packsaddle on a horse that’s never experienced it, and there’s neither a round pen nor an expert clinician anywhere in sight.
Short of such an occurrence, tying a foot up is good training for a young horse, teaching him to yield his foot readily, something your farrier will thank you for.
I prefer a soft cotton rope because it’s less likely to chafe your horse. If you have a hobble half, as described earlier, attach it to his hind pastern. If not, you’ll pass the rope itself around the rear of his pastern, the reason I prefer the kindness of cotton.
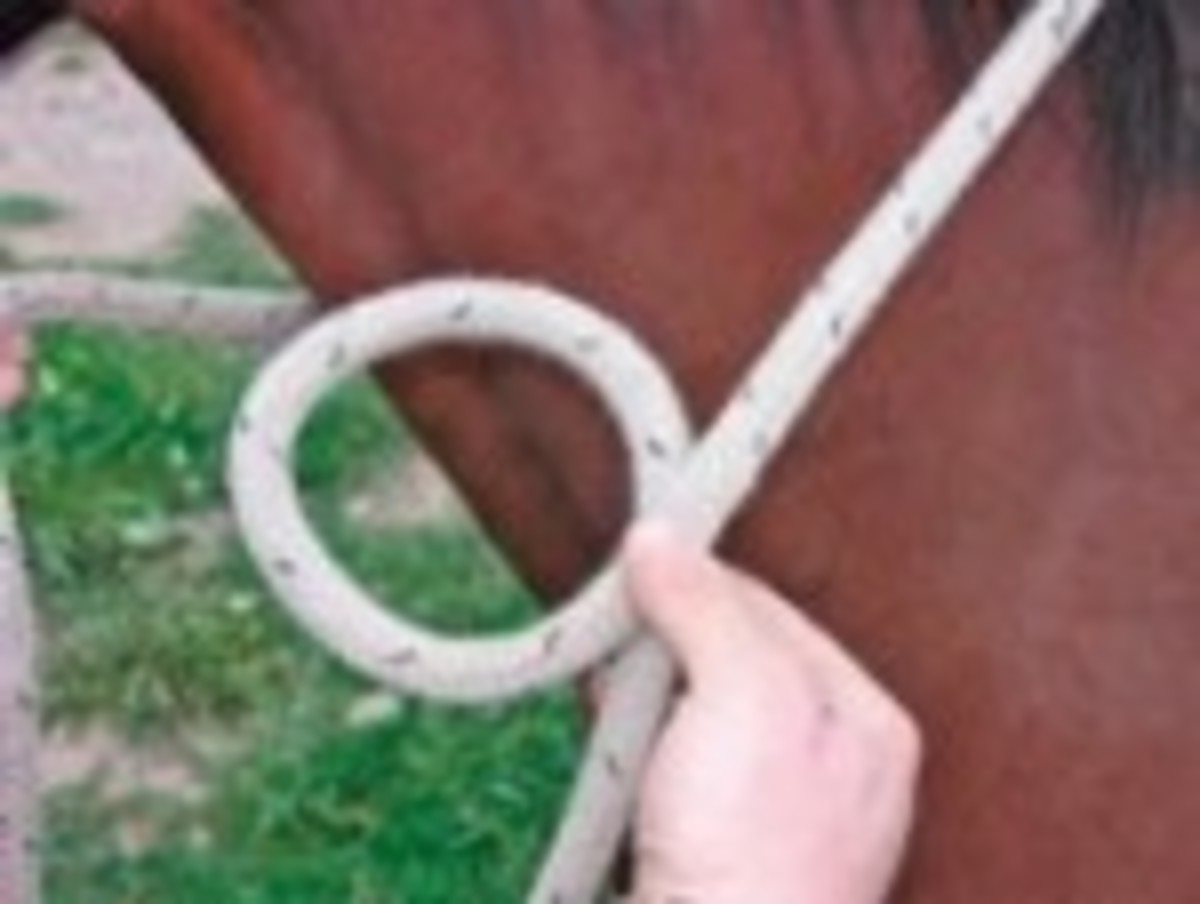
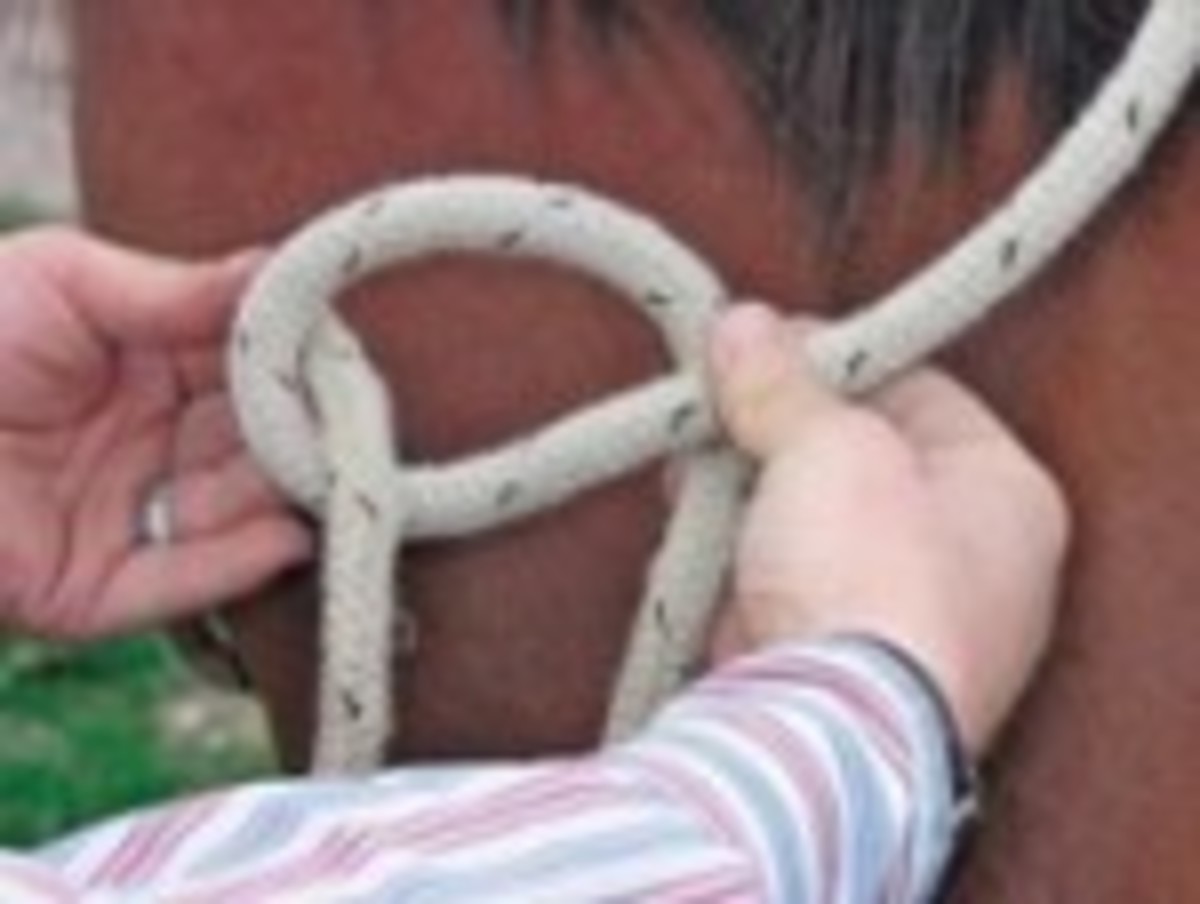
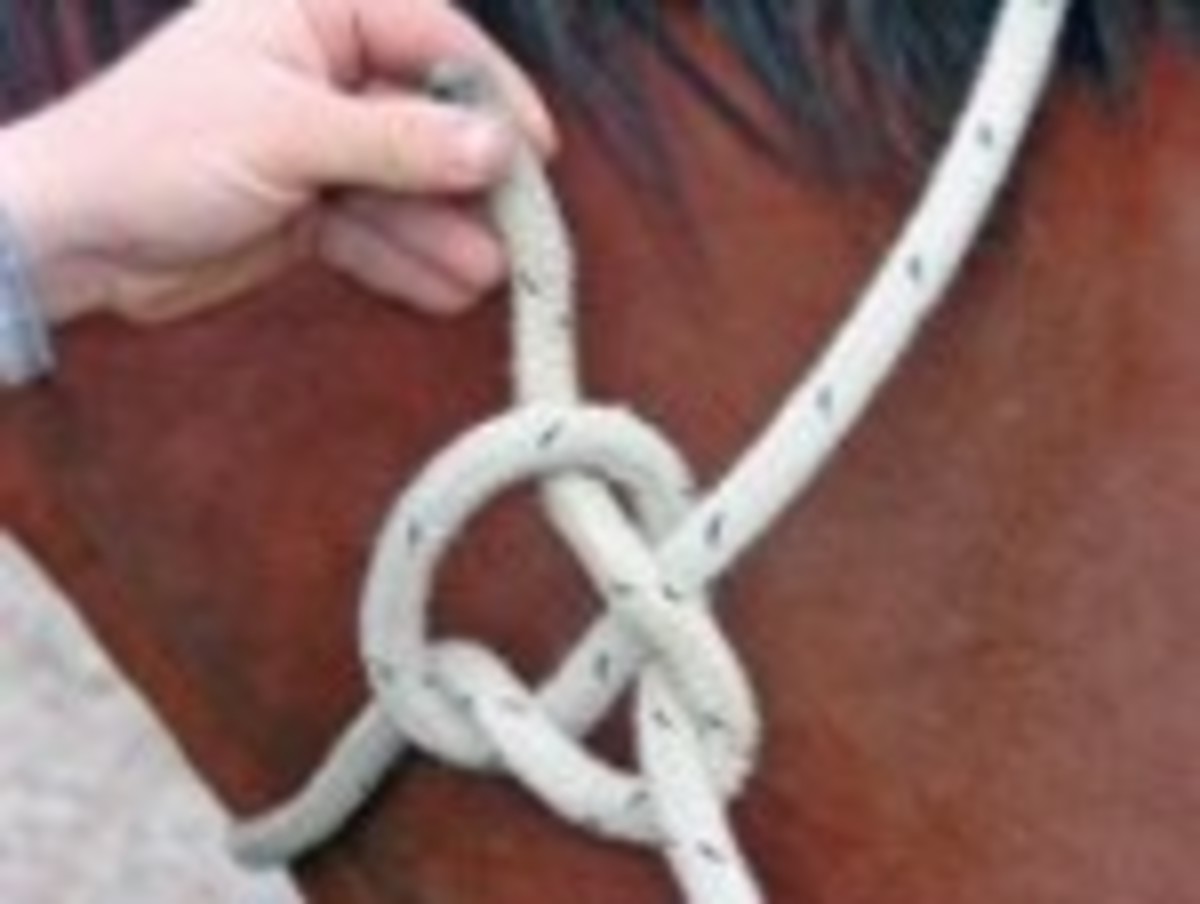
Place a loop of rope around the base of your horse’s neck, and tie it with a bowline. It must be a bowline. I know of no other knot that can be relied upon not to tighten up and perhaps choke a horse.
Then pass the rope’s loose end down along your horse’s flank, between his hind legs and out behind him. The rope should be long enough so that you can work safely behind him if necessary, well out of kick range. Place the rope end on the back of his pastern (or through a hobble ring).
Next, bring the rope up alongside your horse, slip it through the ring of rope you’ve tied around his neck, and pull his foot slightly off the ground. He’s likely to resist this, and may try to kick the rope off. However, you have a 2:1 leverage advantage. Let him kick back against the rope if he wishes. Hold onto the rope, but give a little slack as necessary to prevent hurting your hands. Horses whose feet have been handled frequently will quickly get over any resistance.
When your horse allows you to hold his foot off the ground, secure the rope end you’re holding with a quick-release half hitch. Once done, don’t assume he’s fully immobilized. But if you take one foot away, you’ll make him cautious, and he’ll be more likely to allow you to complete whatever unpleasant task is required.
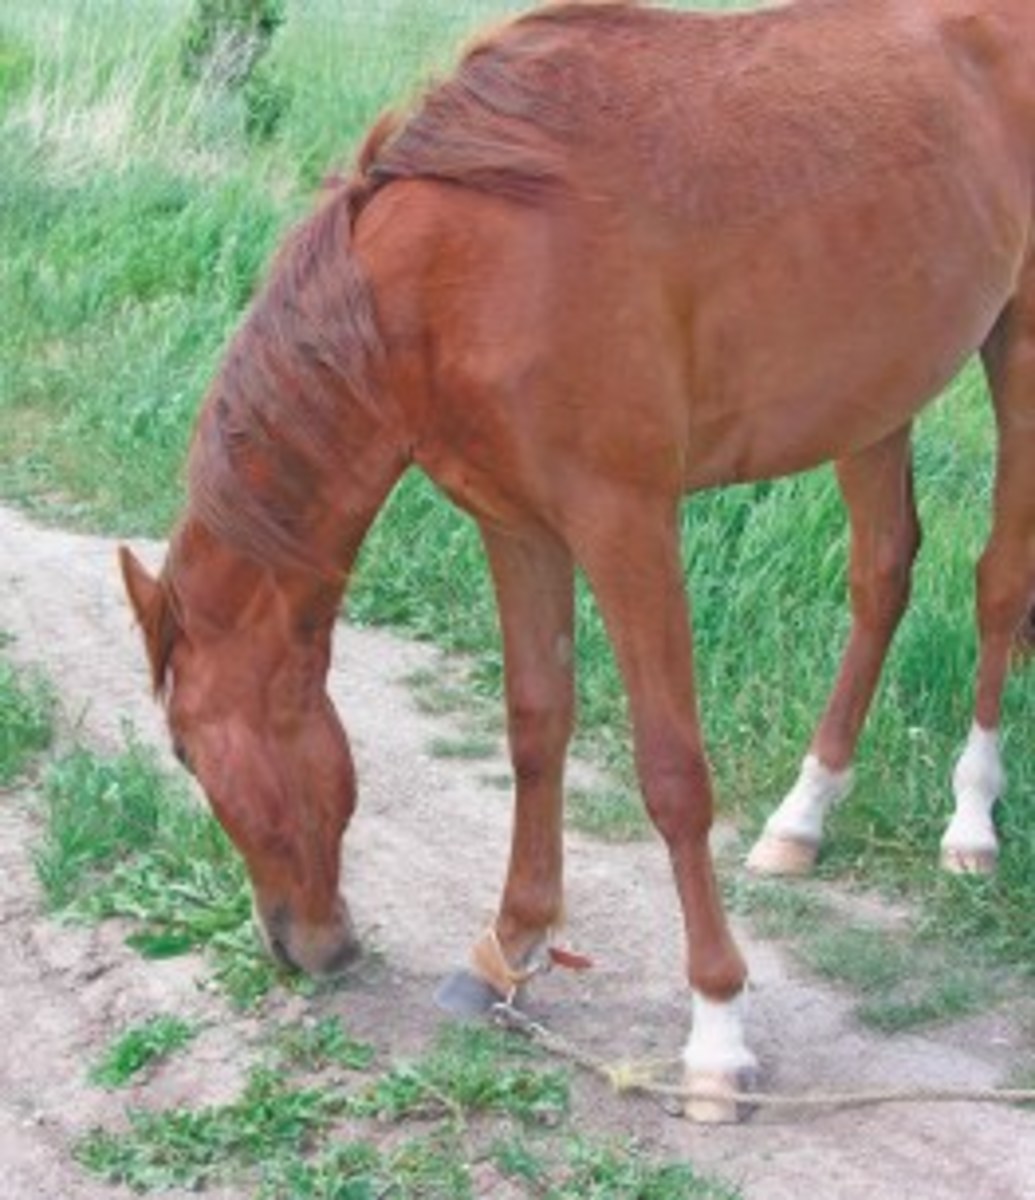
Skill #4: Picketing
Picketing has long been a favored method of restraining horses in the backcountry in a way that allows them to graze. The terminology involved has been quite universal: I know of a mountain named Picket Pin.
Again, use a soft cotton rope unlikely to chafe your horse in case of a tangle. Don’t picket from the halter. Yes, it’s often done by folks grazing their horses in barrow pits along roadways, but trust me, it’s dangerous. Every professional outfitter I know pickets from the pastern of one front foot. It’s important to have already trained your horse to be hobbled so that he gives readily to this restraint.
Use a hobble half, described earlier, but with a D-ring instead of a chain. Use a swivel in your picket line so your horse won’t turn the rope into a tangled mess. Secure the line to a picket pin, usually made from steel, and drive the pin into the ground. (In a pinch, I’ve tied picket lines to downed logs and angular rocks.) While in camp, move your picket line frequently lest your horse graze an unsightly circle.
Skill #5: Knots
We’ve mentioned the importance of several knots. Here’s a brief rundown. (For knot-tying how-to, visit www.tollesburysc.co.uk/knots/knots_gallery.htm and www.iwillknot.com.)
The bowline is essential whenever a loop must be made which cannot tighten.
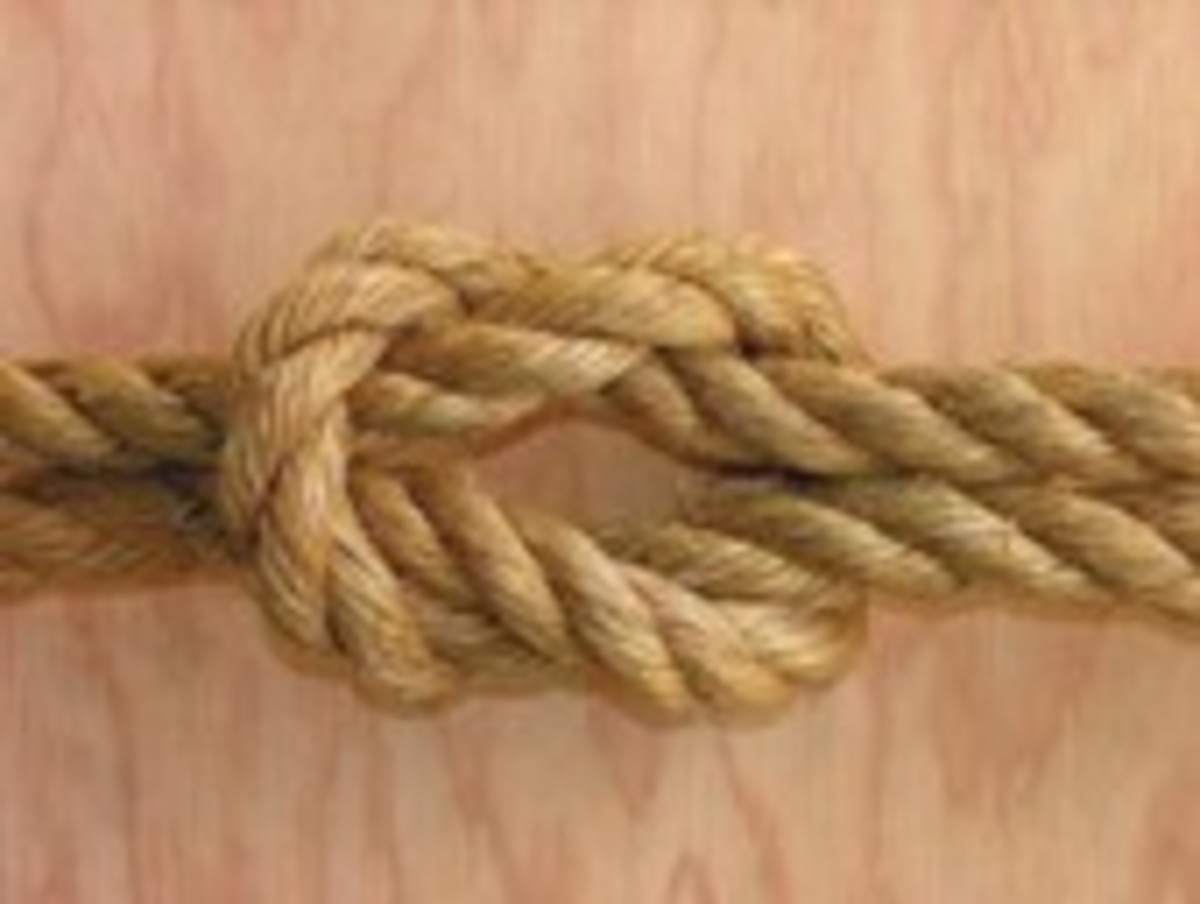
The square knot is best to join similarly sized lines.
The half hitch is the first half of a square knot, and it can be tied with a quick-release loop for a fairly secure knot that’s very quick to untie.
The eye splice is easy to tie in three-strand rope, and useful for many things, including lead ropes.
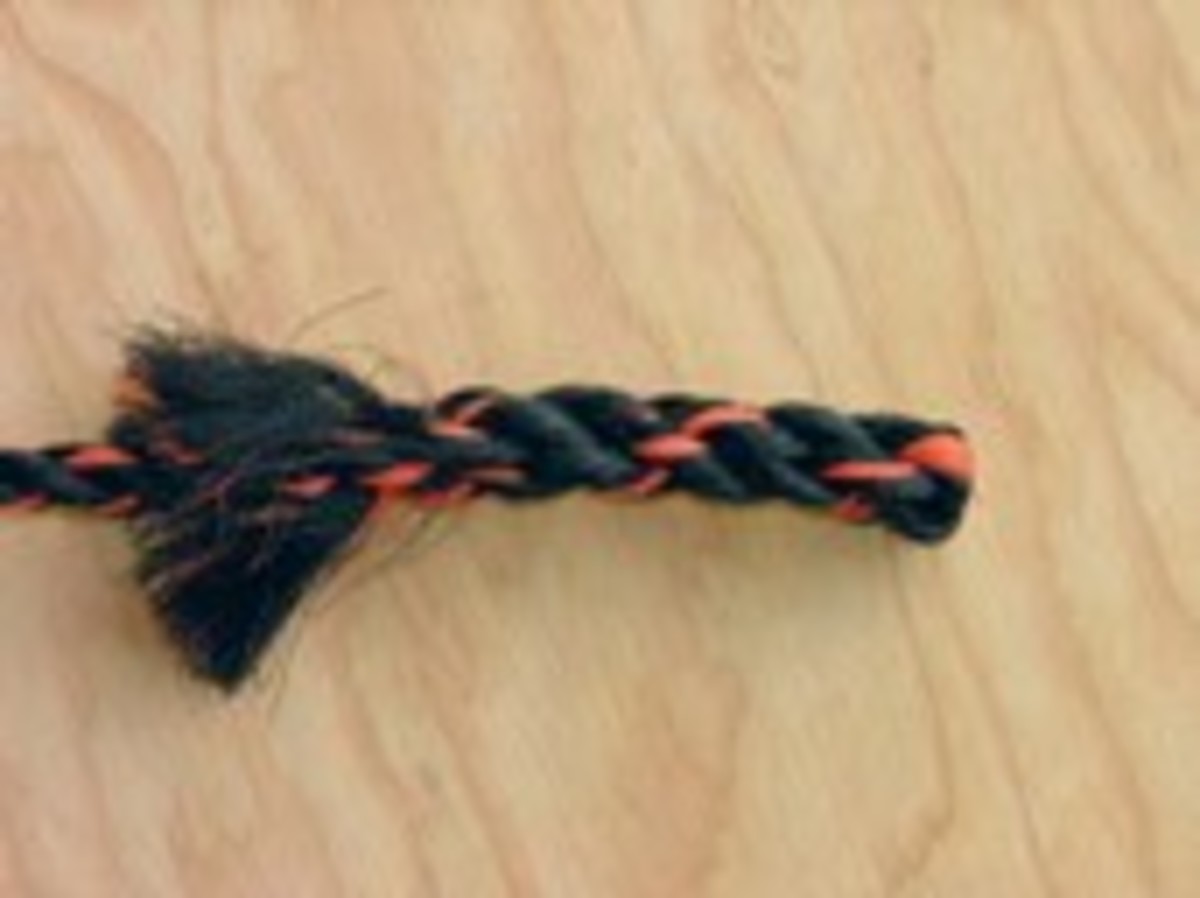
The back splice with crown knot is also easy to learn and neatly finishes off the end of a rope to prevent it from slipping through your hand.
Horsemanship is, among other things, a collection of skills and knowing when to properly use them. Learning is a lifetime affair, and it’s part of the fun. Happy trails!
Dan Aadland (http://my.montana.net/draa) raises mountain bred Tennessee Walking Horses and gaited mules on his ranch in Montana. His most recent books are The Best of All Seasons, The Complete Trail Horse, and 101 Trail Riding Tips. Sketches from the Ranch: A Montana Memoir is now available in a new Bison Books edition.


