
On the trail, your reins need to be safe and functional and help your horse quickly and easily understand the slightest cue.
And, your reins need to be comfortable. If your reins are too long, too much to hold, or are just uncomfortable, you’ll tend to shorten your trail rides. If they feel good to you, you’ll relax in the saddle and enjoy long rides.
Your horse is highly attuned to how you hold and cue with the reins. When you move along at a casual pace, he appreciates a long rein to give him room to move. Your reins also need to be long enough so that your horse can reach down to drink.
At the same time, when you speed up, you need to be able to easily shorten the reins to collect your horse and give a more direct cue when necessary.
Here, top trainer/clinician Julie Goodnight will first cover rein quality, types, and attachments. Then she’ll tell you the best ways to attach your reins to the bit and how to rein your horse. Next, she’ll give you ground-tying safety pointers.
Overall Quality
“It’s all about quality,” Goodnight says. “The heavier the rein is, the easier it’ll be for your horse to feel what you’re doing with your hands and the more subtle a signal you can give.
“Plus, when the reins are made from quality leather or rope, your horse will feel the rein release right away, so he’ll learn to be more responsive.”
Riding with well-weighted reins will remind you to give your horse enough slack, because you’ll feel the downward pull of gravity. He’ll feel the rein’s weight, and your cues will be amplified because of the weighted drape.
If you use reins made from inexpensive, lightweight material that flops around, your horse won’t feel the rein and may have a tough time feeling your rein aids. This means you may find yourself pulling on the reins more than should be necessary (and therefore applying undue pressure to your horse’s mouth) to get a response to your cues.
Rein Weight
To experience what your horse feels when the reins are weighted just right, stand up, and place your arms straight out in front of you with your palms up.
Imagine you hold a penny on your right index finger and a feather on your left index finger. Now think what it would take to balance the item on each finger.
You likely imagine that you’d be able to balance the penny easily, but need to shift your finger to keep it under the feather. The same law of physics applies to how your horse feels and balances himself within the weight of your reins.
If your reins are made from lightweight leather or nylon webbing, there isn’t much weight, and it becomes difficult for him to feel the reins and stay balanced.
With high-quality leather or a thick marine-type rope, your horse will be able to feel your hand movements and balance himself more easily. He’ll know what you’re asking because the weight of the reins echoes the slightest movement from your hand.
Rein Types
Here’s a rundown of common Western rein types and how to use them. Find reins that feel best in your hands and as you ride on the trail.
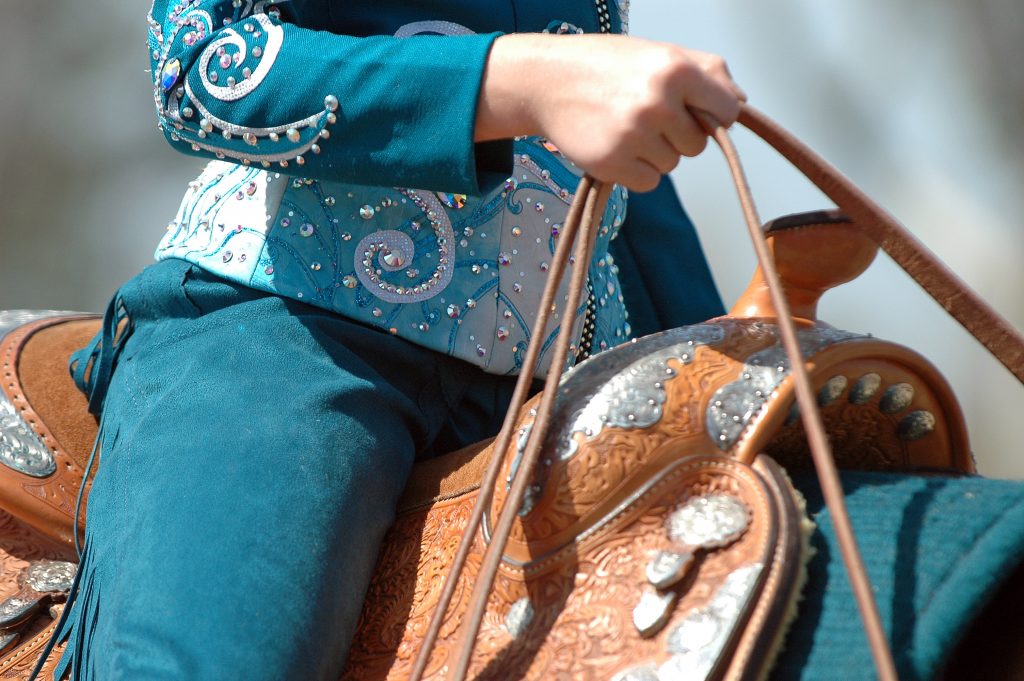
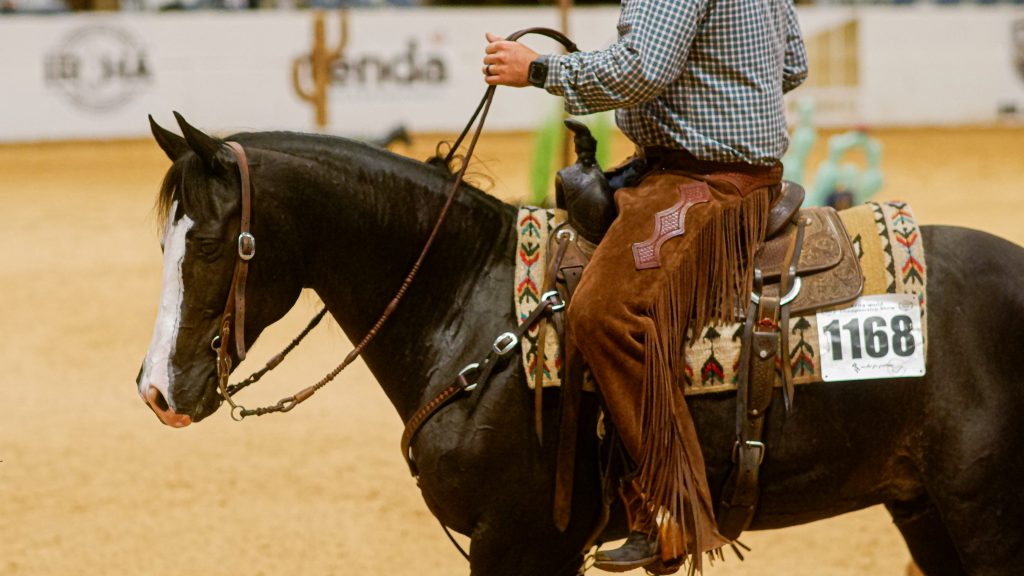
Split reins.
If you opt for split reins, choose quality leather. Split reins are long and versatile — you can make them long or short, and use them independently or ride one-handed. Split reins can be great for trail riding, because you can easily ground-tie by laying the reins down on the ground. But some find them hard to use, and they can be easily dropped.
You can hold split reins in a variety of ways. You can choose how you hold them and where you hold them to cue your horse.
The traditional pistol-grip hold is the rein hold used for competition. Hold both the reins in one hand with your index finger in-between the two reins.
The trainer’s hold or bridge is made by laying one rein on either side of your horse’s neck, crossing the reins over each other, and holding one rein in each hand or both in one hand. Hold your hands as though you’re holding bicycle handles while making a “bridge” with two pieces of leather as the reins cross over your horse’s neck. This allows you to ride with two hands and work each side of the bit independently. You can also use a bridge when riding one-handed.
When riding Western, the traditional rein hand is the left hand; it’s assumed you’ll need to use your dominant right hand to hold a rope, open a gate, rope, etc.
Learn More: Soften New Reins
If you’re riding with split reins, make sure the bight (the tail of your reins) lies on the same side of your horse’s neck as your rein hand so his neck doesn’t interfere with your cues.
Continuous-loop reins
If you choose to ride with continuous-loop reins, choose high-quality, heavyweight rope for trail riding. These reins fill your hand for comfort and control. They’re easy to use when you’re following a trail and don’t need to guide your horse’s every step. Rope reins are easy to hold onto, as well as to shorten and lengthen.
Hold rope reins right in the middle to ride on a loose rein. “The reins I’ve designed have a marker in the middle so you can easily check to see your reins are even,” Goodnight says.
Consider length. On the trail, your horse needs to be able to drop his head to drink and move in a relaxed frame. Most trail horses do well with a 9-foot rein.
However, if your horse has a very long neck, you may prefer a 10-foot rein. Find a length that also helps you ride on a loose rein with a relaxed hand.
Rein Attachments
Traditional Western reins can also include a mecate or romal. Here’s what you need to know.
• Mecate. The mecate is a long lead on a continuous-loop rein that comes off of the left side of the bit. The reins are usually attached with slobber straps. Some trail riders love the convenience of the mecate; off the horse, there’s a built-in lead line. But others find the extra rope bulky and a lot to handle.
“I prefer a halter and lead separate from the bridle,” Goodnight says. “I either tie my halter and lead onto the saddle or sometimes ride with the halter beneath the bridle. This means there’s less to hold. And when you tie your horse, you aren’t tempted to tie with a rope that’s connected to the bit.”
• Romal. A romal is attached to the set of closed reins; the entire assemblage is called romal reins. The romal was developed to help a rider move cattle. Romal reins are held without a finger between the reins, so you have less ability to articulate with the reins than you might with split reins. You ride with two hands — one hand cues your horse, while the other holds the romal.
These reins are best used on a well-trained horse that knows how to neck rein.
Bit Connections
Goodnight advises against using a metal snap to attach your reins to the bit. Although convenient, the metal-to-metal connection can annoy your horse. The metals rub and vibrate, which he feels constantly.
A rope or leather bit connection gives you a better feel and helps you know when your horse moves or makes a change. You don’t need to change the bit or reins frequently; take a few extra moments to tie on your reins or otherwise secure them without a clip.
“A leather or rope connection is fine,” says Goodnight. “Although I’m not a fan of decorative slobber straps — they’re too bulky and don’t allow me to finesse the reins. Plus, they’re cumbersome to put on and take off.”
The ideal connection for a continuous loop rein is a corded quick connect, says Goodnight. “A corded quick connect allows you to put the reins on easily, and also allows the reins to drape and easily communicate with your horse.”
A split rein will usually have a tied-on connection — a kind of slobber strap made from the same leather as the rein. The leather piece is a breakaway and may save your horse from getting hurt if you drop a rein and he steps on it. If that piece does break, it’s easy to repair while on the trail.
Holding the Reins
Whether you ride with one hand or two depends on the type of bit you use, and your horse’s training level and obedience.
Snaffle bits (bits without shanks) are designed to be ridden two-handed with a direct rein (applying pressure from the rider’s hand to the bit’s mouthpiece). Riding in a snaffle bit with one hand causes the bit to collapse around the horse’s tongue and pinch his jaw in a nutcracker effect.
Curb bits (bits with shanks) are designed to be ridden one-handed. However, if the bit is designed so that the shanks move independently from each other, you may also ride with two hands when your horse is in training.
Ground-Tying Safety
When you dismount and lay the reins on the ground, a horse trained to ground tie knows that means he should stand still. Laying the reins on the ground should only be done with a split rein, not a continuous loop rein.
Split reins have no dangerous hoof catching loop. In the worst-case scenario, your horse may break the split-reins’ leather, but he won’t get caught up or pull excessively on the bit with a material that won’t break.
Never drop loop or continuous-rope reins in front of your horse. Rather, hold loop reins in your hands or over your arm to keep the loop far from your horse’s feet.
If you want to ground-tie with a loop rein, keep the loop over your horse’s neck, or attach a lead rope to a halter beneath your bridle, and allow this lead to hang down. Or you can use the traditional neck rope for this purpose, known as a “getdown” rope.
For safety’s sake, make sure that some part of your reins, bit, and headstall is made of a breakaway material. For instance, if you have rope reins, connect them to a leather headstall. Something needs to give in case of an emergency.
Julie Goodnight lives in central Colorado, home to miles of scenic trails. She trains horses and coaches horse owners to be ready for any event, on the trail or in the performance arena. She shares her easy-to-understand lessons on her weekly RFD-TV show, Horse Master, and through appearances at clinics and horse expos held throughout the United States. She’s also the international spokesperson for the Certified Horsemanship Association.