
Trail is a dance that requires rhythm and connection. Every good dancer has a choreographer, and the same can be said for trail exhibitors. I may be best known as a trail-course designer, but I’m also the choreographer and dance instructor. It’s my job to teach you how to gain rhythm and use it to connect with one of my courses.
My goal is to get people to participate in trail classes. I want you to love trail and learn how to continuously improve. To do that, I construct engaging courses that challenge riders, make them think, and (sometimes) make them laugh. My approach to designing some of the world’s toughest courses carries over to the way I approach my clinics—I want to give you a new perspective on how to master this challenging event. Here I’ll discuss six keys to conquering my courses.
Feel the Music
Music has been an important part of horse shows for a long time. Long before wireless speakers and Bluetooth audio, an organist played music that synced up to the gait of the horses showing. I like to add music to see a connection between the horse, rider, and my trail patterns.
An upbeat song can become the tempo to the pattern—it inspires you to do something. We start with a pre-test where you’ll ride through a course to evaluate what you need to work on. You probably get nervous over certain obstacles. This is when I use music to help. Focus on the music, and feel yourself relax and your anxiety settle, which naturally helps your horse settle as well. Key trail tip: Find a song that puts you at ease, and hear it in your mind when executing an obstacle that might usually cause anxiety.
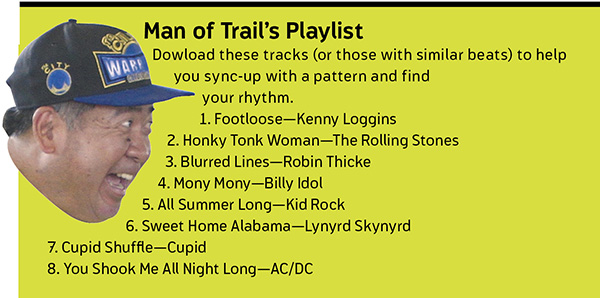
Use music to other advantages, too. For example, when you’re practicing at home, work on understanding rhythm and how to use it to your advantage throughout a course. Syncing up to the first pole in a course is important, and the music offers you something to sync up to. Pick a song that creates good energy and allows you to get into a tempo regardless of if you’re practicing a back-through or loping over a pinwheel. If you’re not sure what type of music to play when you’re practicing, check out my favorite songs for finding trail rhythm (see ‘Man of Trail’s Playlist,’ below).
Create a ‘Trail Trot’
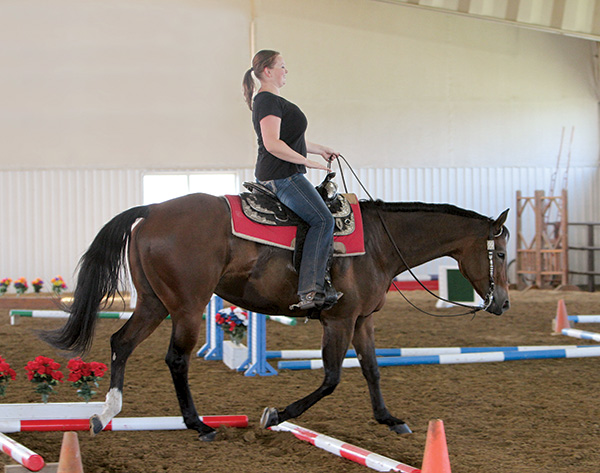
To get over the obstacles, you need a trot that gives you height and length. The typical Western pleasure jog is too slow and causes horses to hit their back legs on the pole. The English trot is too long and makes it hard to put a horse in the correct spot. So that means you need a completely new gait: a trail trot.
To achieve the trail trot, try this basketball-dribbling exercise. Working at a trot, hold your free arm, elbow bent, at a 90 degree angle from your body, with your palm flat, and move it up and down, like you would if you were dribbling a basketball. (See photo below.) This helps your core go up and down, which also helps your horse start to get more height—and a steady rhythm—in his trot. The down is the most important part of a trail trot because it causes your horse to land and compress in the gap between the poles and create a spring-like jump. Key trail tip: If you need more height to get over a pole, you’re going to need a higher up-and-down motion with your arm, so that your core goes up and down more.
The trail trot is one of the hardest trots to sit because of this up-and-down motion, but you’ll get used to it. Once you get comfortable sitting it, continue to “dribble the ball” while you go over one or two trot poles. You’ll notice your horse has more reach and lift. After you’re done “dribbling the ball,” maintain that up and down motion as you navigate trot obstacles.
Bring Your Target Down
When you’re competing in all-around events like horsemanship and Western riding, you look up to see where you want to go. With trail you need to bring your target down, because you can’t tell the horse where to go if you aren’t looking at that spot. Use your eyes to “rate” the pole (see below).
If you look up and forward, you’ll go where your eyes focus, and in the process you’ll speed up, causing your horse to land in the wrong spot. This is the opposite of “rating the pole.”
By looking down in front of the poles, you’re slowing your rhythm and telling your horse where you want him to place his feet. To learn how to rate, draw lines in the ground on both sides of the pole and go over it at different gaits. The first line in the dirt is your takeoff point. By looking for that takeoff line, you’re telling your horse that’s where he is supposed to land and takeoff from before he goes over the obstacle. To help you rate the pole before you even approach it, add a pre-takeoff line 3 feet from the pole at the trot and 6 feet at the lope. It’s important that you continue to look where you want to go until you clear the obstacle. I see so many people hit the last pole in a series because they stop looking.
Key trail tip: If you’re new to the trail class, it’s not necessary to have a whole trail course—or even a full set of poles—to execute. Practice going over one pole until you nail it in all directions. Then you can teach your horse to cover multiple poles in succession.
Sit Back Over Poles
It’s natural for your body to perch forward when you go over a pole, especially if you also compete in English all-around events. When you ride English, you get comfortable in the two-point position, and it becomes a balance point for you. However, when you lean forward during trail, your horse speeds up and loses collection in his gait. And when you perch forward, you’re telling your horse’s feet to go toward the obstacle, rather than over it.
Instead, get yourself behind your horse’s motion to help his front legs over the pole. I want you to think about sitting back as you approach the pole. Key trail tip: An easy way to remember this is to think about the phrase, “pole-rock-back” as you go over an obstacle.
To help put your body in the right position, take your free hand, put it on the horn, and push your body back with it. This will force your body to stay back while you go over an obstacle. Trot over a few poles in this position. While this exercise is done at a trot, it’s important to keep your body back for walk-, trot-, and lope-overs to help you and your horse stay balanced. The idea behind it is to keep your body from perching and help take pressure off your horse’s front legs. This will also help him stay balanced as he maneuvers over an elevated obstacle. If you get too far forward, your horse will try to catch up to you.
Count Out Loud
Don’t be embarrassed. Whether you’re a trail newbie or a seasoned veteran, you’re not too good to count out loud. Think of it as your metronome when you’re riding a trail course. You can use it to find cadence over the poles, or to help with a horse that doesn’t stand still during slow maneuvers. To keep your cadence over the whole course it’s important to keep a count until the last foot goes over the last pole. You have to keep power in the back end, and the only way to do that is to make sure you have forward motion, which is created by a steady count. If you have a horse that doesn’t like to stay still during slow obstacles like the back-through, try standing still and counting to ten. Most of the time, your horse dances and gets antsy because you’re thinking too far ahead, and he’s trying to keep up. Focus on the count, and stop thinking too far ahead—if you slow your mind down, his will slow down, too. Key trail tip: Make sure you count during practice and then use that same count in the show pen to get the same steady rhythm.
Use Your Rudder
Do you hold your free arm down, like you’re showing Western pleasure, or hold it against your belt buckle when you do trail? Not anymore.

Even though you’re not physically holding anything with your free hand, it still holds a purpose. Use your free arm to your advantage by keeping your arm in a horsemanship position, and use that arm like you would a rudder.
If you ride with your left hand, your right arm will help you guide. When you put your right hand forward, you go left. If you put your right arm back, you’ll go to the right. And when you place your arm back in horsemanship position, it stays neutral. Key trail tip: You can also think of your rudder as a joystick, it’s how you guide through the whole course.
Here’s an example of using your rudder on the course. The back-through can be one of the toughest parts of a trail course, so use your rudder to your advantage. Push your rudder back to make your horse’s hip go to the left, and place your rudder forward to make his hip go to the right.
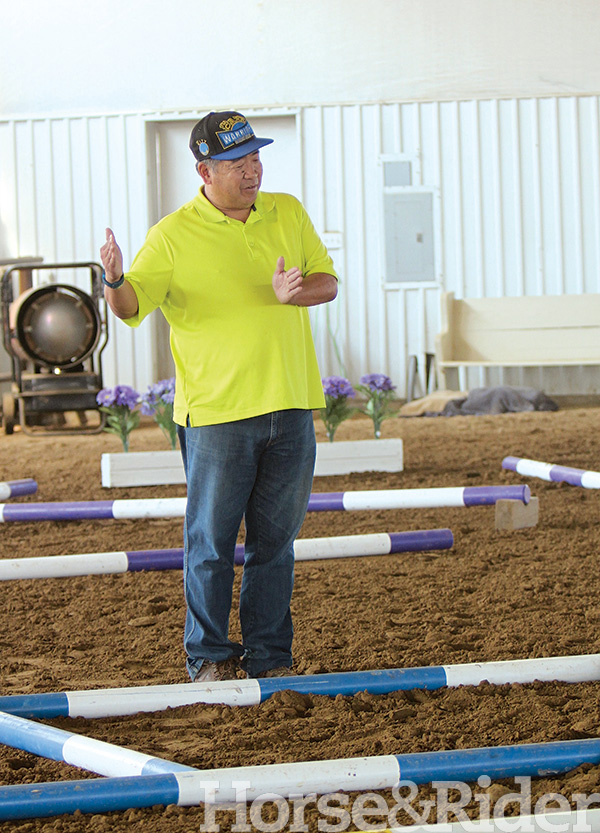
Tim Kimura, Oak Point, Texas, has designed top trail courses for some of the largest horse shows in the world. When he’s not at horse shows, he’s traveling to different countries to hold clinics that educate riders of all levels on how to successfully show trail. Visit his Facebook page, Tim Kimura: Man of Trail, to purchase his trail DVDs and learn more about him.