Riding in an arena for an hour or going on a short trail ride is a far different experience than an all-day ride. Without proper conditioning, outfitting, and handling, your horse can suffer painful consequences from extended riding time.
Ranchers, serious trail riders, and endurance competitors know what it takes to minimize saddle soreness.
Mary Davis is the horse manager for CS Cattle Company in Cimarron, New Mexico. With hours of saddle time working cattle on the ranch, she’s learned to spot the subtle signs of a sore-backed horse.
“If your horse’s attitude has changed, what have you changed?” Davis asks. “How are you riding him? Did you get a new saddle, saddle pad, or girth?”
Jeanette Mero, DVM, is a practicing veterinarian and endurance rider based in Mariposa, California. She says most equine body soreness comes from lack of fitness.
“Do your homework well ahead of time to have your horse fit, and spend time in the saddle prior to any kind of long ride,” Mero says. “An endurance horse, for example, won’t get terribly sore if he’s properly trained and conditioned. Muscle fatigued, yes, but not really sore.”
Lari Shea of Mendocino, California, is an endurance rider with nearly four decades of experience leading weeklong riding vacations. Before you set out on an extended ride, she says, know how long your ride will be, the approximate elevation gain, and the trail terrain (such as sand or rock). Then you’ll know whether your horse is fit enough for the ride and shod or booted appropriately. →
Here, these experts will share their guidelines for preventing equine soreness before, during, and after your ride. Plus, they’ll give you tips on preventing rider soreness.

Before Your Ride
Make sure your saddle fits. Signs of poor saddle fit include back soreness and white hairs on your horse’s back or withers. Davis says a back-sore horse may wince when you run your fingers down his spine, he might refuse to stand still while saddling or mounting, or he might try to bite during tacking up.
“Also look for dry spots in an otherwise-soaked area under the saddle pad,” Davis adds.
Pull the front of the pad into your saddle’s gullet to enhance airflow, and keep the pad and saddle from pressing straight down on your horse’s back.
Select the right rigging. In a Western saddle, pay attention to the rigging—the location of the saddle’s points of attachment. The front cinch rings can be located anywhere from full (just behind the swells) to centerfire (behind the stirrups). Positions between these two, front-to-back, are known as 15/16, 7/8, 3/4, and 5/8 rigging.
Shea recommends a saddle with 3/4 or 5/8 rigging to give your horse some elbow room. “If the cinch is too close to the horse’s armpit, it can cause sores,” she notes.
Use a right-size cinch. Girth galling—open sores just behind the horse’s elbow caused by cinch-ring rubbing—can occur when the cinch or girth isn’t long enough, particularly if your horse is trending toward obesity, says Davis.
“I use longer girths that fall halfway between the elbow and the saddle rigging,” Davis says. “Rarely will a horse have an issue of soreness in that area when you use a longer girth.”
Davis also prefers a girth with an O-ring rather than a D-ring—she feels it’s less likely to cut into the horse’s elbow.
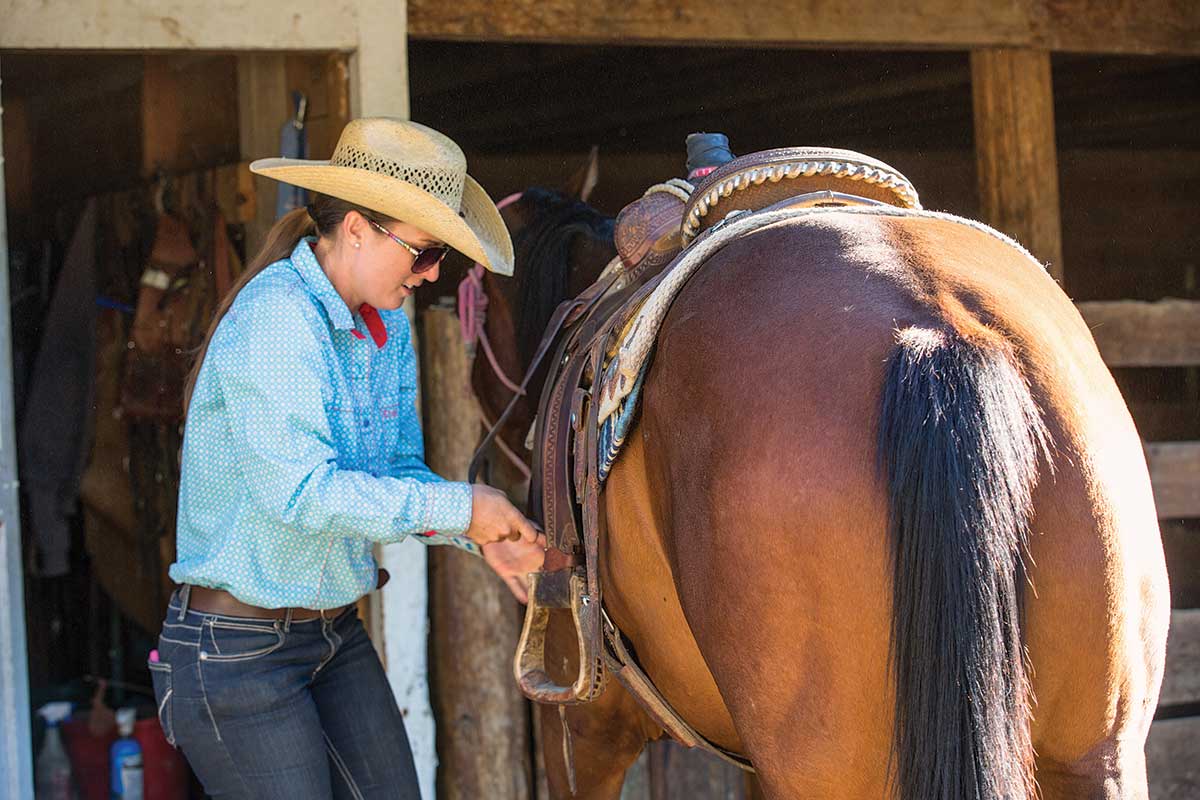
Ensure correct cinch fit. If the cinch fits correctly, you’ll be able to slip your hand between the cinch and the point near your horse’s elbow, but not under his barrel. (Note: Running your hand under the cinch to check fit will lay down your horse’s haircoat to help prevent girth galls.)
Avoid riding with a too-tight cinch, but also make sure it isn’t too loose. “Too loose of a girth does your horse no favors, as the saddle might slip back on steep hills,” Shea says.
Ensure correct breastcollar fit. Shea says an optimally fitted breastcollar tightens on your horse only when his leg comes forward. She also recommends attaching the breastcollar to the upper D-rings on the saddle, instead of the cinch.
“To test fit, pull one leg forward—the breastcollar should contact that shoulder,” Shea says. “As your horse strides forward, that slight amount of contact will prevent the saddle from sliding backward.”
Make sure your breastcollar is centered on your horse’s chest; if it’s off to one side, it could cut into his armpit.
Add a crupper. A crupper buckles to the back of the saddle and loops under your horse’s tail to help keep your saddle in place when going down steep hills, says Shea. Before you head out, longe your horse with the crupper in place to make sure he’s well-accustomed to it.
Center the saddle and cinch. One soreness cause, Davis says, is a cinch that’s much shorter on one side than the other, causing the between-leg D-rings to be off-center. An off-kilter saddle can also cause pain.
“Your horse can get sore if your saddle isn’t traveling centered—maybe one of your stirrup leathers is longer than the other, or you pulled your saddle over mounting up,” Davis says.
Clean the cinch and pad. Davis recommends cleaning a saddle pad and mohair cinch at least once per year to remove debris and other irritants. You can rinse a neoprene cinch more frequently.
Condition your horse. To condition your out-of-shape horse, says Mero, start riding three or four days per week, primarily walking, for at least an hour each time. Then add trotting if you desire. Within one or two months, your horse will probably be able to handle a longer ride.”
“That’s the purist approach,” Mero says. “If you can get even a month of prep time before an all-day ride, your horse will do far better than if you decide to pull him out of the pasture for a ride the following weekend.”
If you’ll be riding in unfamiliar terrain, Mero cautions against overdoing it.
“Different terrain will produce different types of soreness,” Mero says. “For example, ride conservatively if you’re taking your mountain horse out on sand and vice versa. A flatland horse doesn’t have the muscles for hill work. If you spend all day riding that horse in the mountains, you should expect that he’ll probably have a lot of back, hamstring, quadriceps, and gluteal soreness.”
Protect his hooves. Mero recommends applying protective boots to your barefoot horse’s hooves before a long ride. “Horses lacking hoof protection [on a long ride] can get total body soreness and won’t want to move because their feet hurt so much,” she notes.
Warm up sufficiently. Mero says a proper warm-up can help reduce muscle soreness, especially for a horse in unfamiliar terrain.
“If you’re planning to trot and lope on your ride, spend enough time walking to warm up,” Mero says. “Also, cool down your horse by walking him for a bit before you reach the end of a ride.”

During Your Ride
Mount with care. To save your horse’s back, use a mounting block at the barn, says Shea. She notes that 100 percent of your weight is on one side of his back as you mount, which stresses his muscles.
“When on the trail, use a rock or a tree root, or turn your horse so he’s on the downhill side of the trail to give yourself some height advantage,” Shea says.
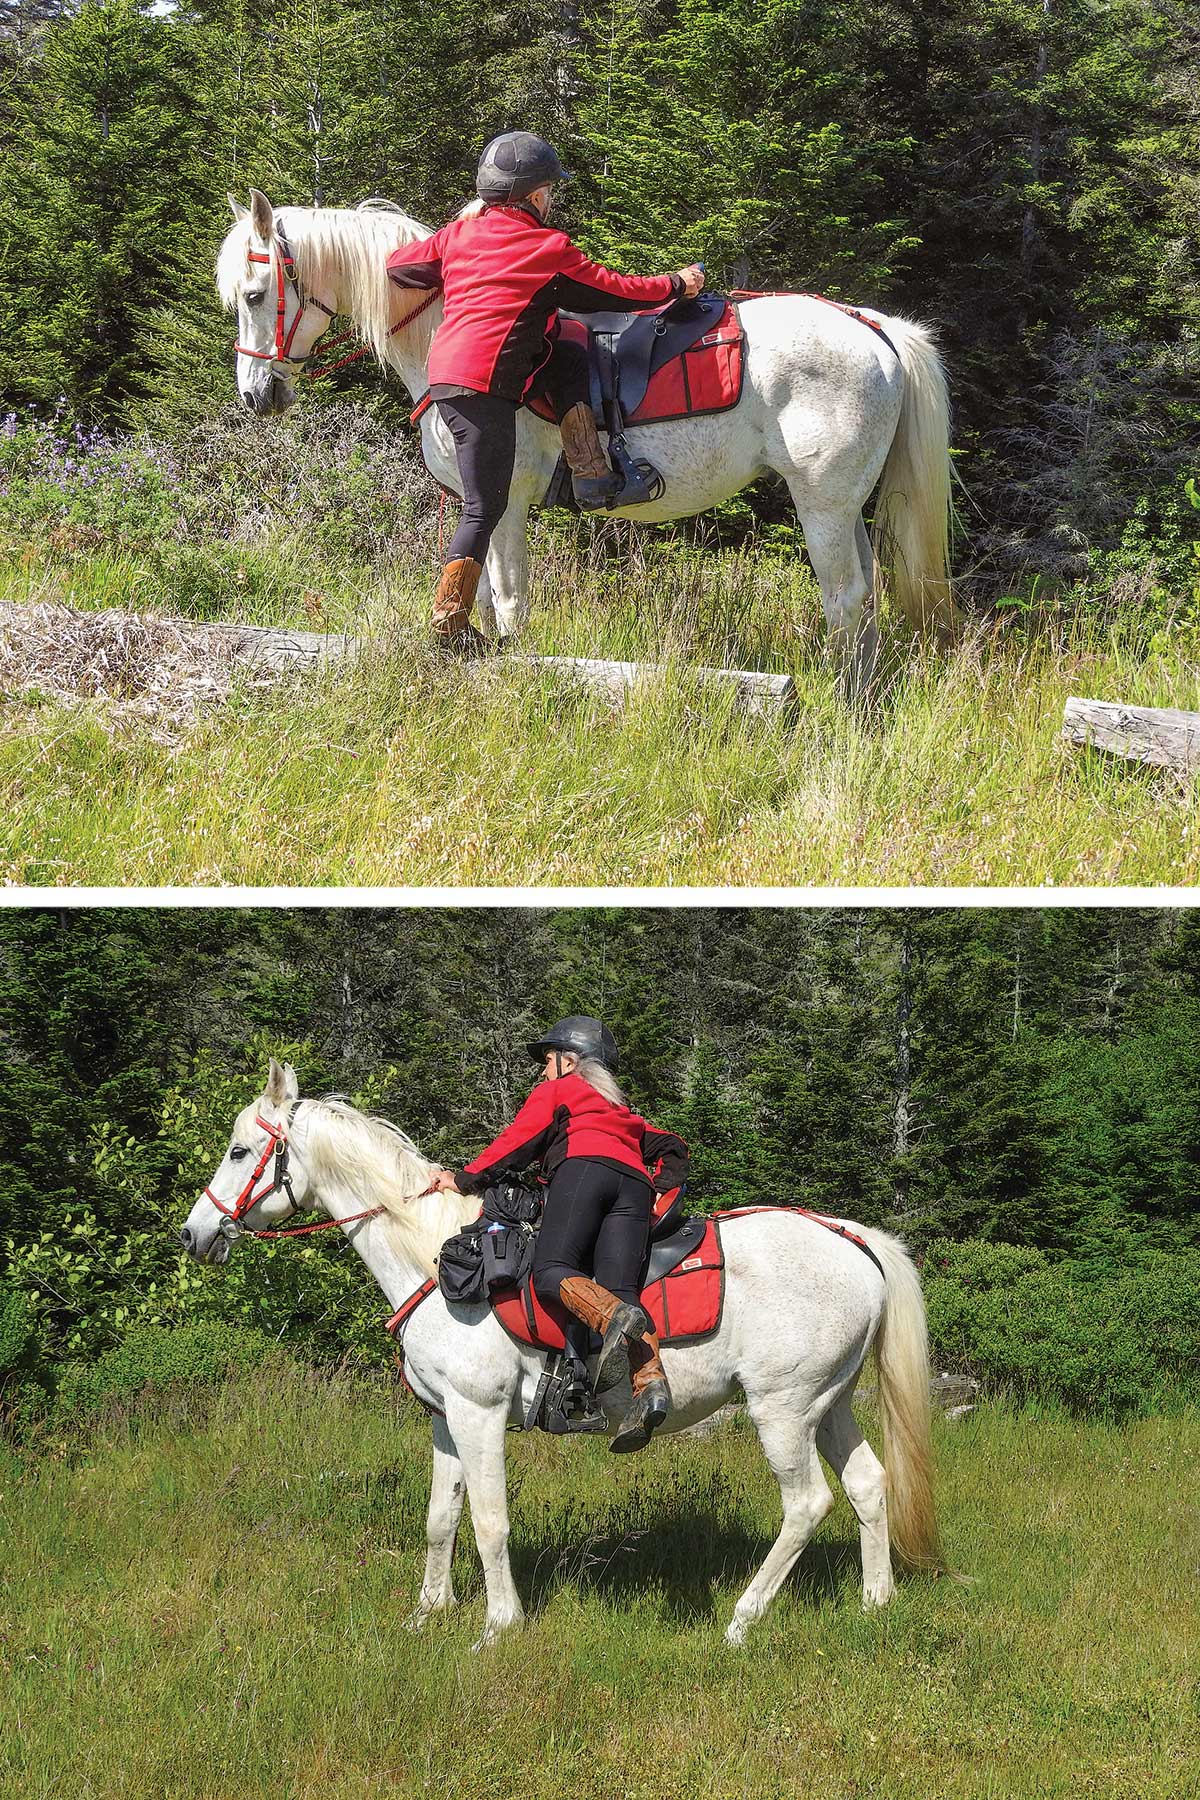
Dismount correctly. When you dismount, Shea stresses that you should kick your feet out of the stirrups and semi-vault off, instead of stepping off.
“Begin your dismount by rising up with equal weight in both stirrups—don’t shift your weight to the left,” Shea explains. “Kick your right foot out of the stirrup. As you swing your right leg over your horse’s back, lean your stomach on the seat of the saddle. Kick your left foot completely out of the stirrup, and, holding onto the saddle, slide off.
“Don’t begin to slide off until both feet are completely out of the stirrups,” Shea cautions. “Not only is this the safest way to dismount, it’s also kind to your horse’s back.”
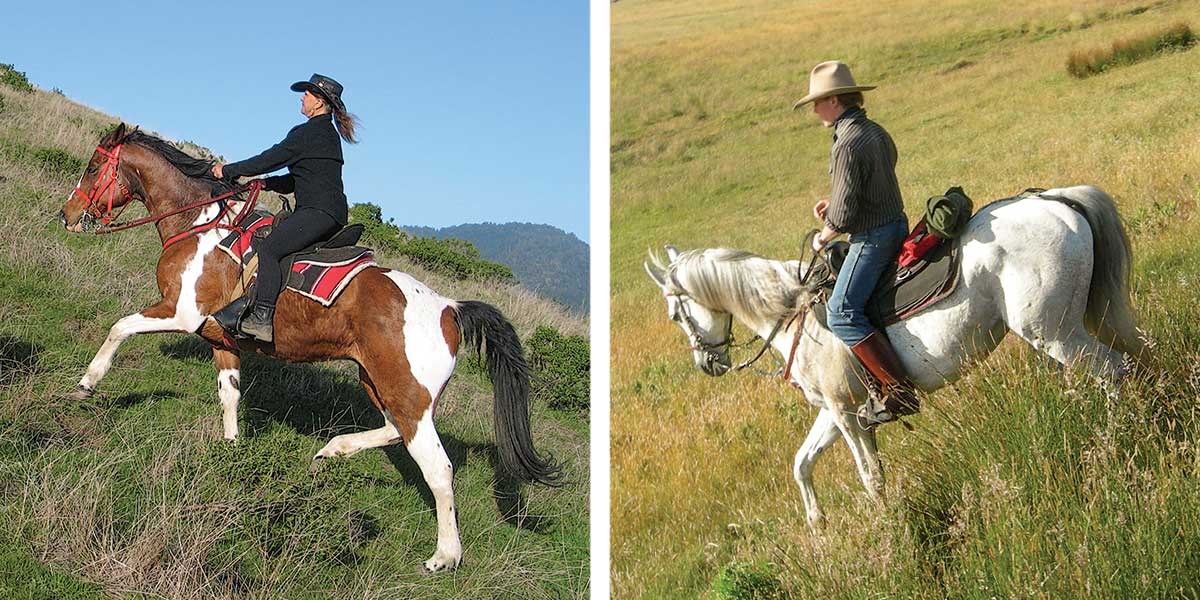
Ride uphill correctly. Going uphill, Shea says, lean forward to position your center of gravity over your horse’s, with your seat out of the saddle on steeper hills. For support, grab your horse’s mane halfway up his neck, and wrap your calves, knees, and thighs around the girth area.
“Don’t rotate at the knee and allow your lower leg to move backward because you might kick your horse in the stifle,” Shea advises. Follow your horse’s movement with your hips, not your shoulders. Shoulder movement, she notes, tends to push the saddle up and over your horse’s withers.
Ride downhill correctly. Going downhill, you might think you’re helping your horse by leaning back with your feet braced, but Shea says this actually contributes to soreness over your horse’s loins.
“If you lean backward, you’ll push down on the cantle, which will dig it into your horse’s loins, soring his back,” Shea says. “Sit up straight, lighten your weight in the saddle, and put your weight in your stirrups, gripping a bit with your legs, to free the weight from his hind end. He’ll then be able to step well underneath himself with his hind legs, supporting his weight and yours.”

Post the trot. If you’re covering long distances at a trot, Shea says your best bet is to post. It’s more comfortable for you, and it’s easier on your horse’s back. Standing in the saddle applies pressure at the point where your stirrup leathers meet the saddle, while posting disperses your weight. Posting also encourages your horse to breathe regularly as you rise and lower back into the saddle.
“Switch your posting diagonal every 10 minutes or so,” Shea says. (The diagonal is the simultaneous movement of your horse’s diagonal front and back legs.) “Your horse’s muscles are affected by you coming down on his back and riding up. You’ll find that your horse will switch his breathing diagonal when you switch the posting diagonal.”
Balance your gear. Shea recommends packing items of equal weight on both sides of your horse, and on both pommel and cantle. Attach items to the saddle’s frame off his withers and loins. Saddle pads with pockets also work well.
Use a following hand. With every walking or loping step, your horse’s head and neck snake forward and back for balance. Follow this movement with your hands on the reins, Shea says. Otherwise, your horse can get jabbed with the bit, which can prevent a long-strided walk and may even encourage him to jig.
Take breaks. Davis recommends unsaddling your horse during breaks on a long ride. Even a few minutes with the saddle off his back will make a difference.
“I’ve found that lifting that saddle off the back will protect the horse’s back from scalding, particularly on hot days,” Davis says.
On mountainous rides, says Davis, resaddling changes pad position, which relieves pressure points, and smoothes the haircoat for comfort.
For the Rider
These tips will help you avoid feeling each of the miles traveled aboard your horse.
Choose a comfortable mount. Davis says the best remedy for preventing human soreness is choosing a horse that doesn’t pound the ground as he travels.
Ride in fitted pants. Jeans with wrinkles around the knee can rub your skin raw on a long journey, Davis advises. She recommends choosing riding pants that are more fitted at the knee to reduce this problem.
Stretch. Davis often stretches her legs on a fence before she mounts up. Shea goes through a 10-minute yoga routine before, during, and after a ride.
Get off and walk. Shea walks her horse on some steep grades to work out kinks. This practice also gives her horse a break.
After Your Ride
Note lameness signs. Even with good hoof protection and fitness, Mero says your horse can come up lame after a long ride, especially if you traversed tough terrain.
“Slogging through sand and mud can create strain in your horse’s ligaments and muscles,” Mero adds.
An early indication of lameness can present as the horse feeling “off.” Look for these signs before you tack up the next day.
“Your horse may be lackadaisical or sluggish,” Mero says. “You might see these kinds of signs before he’s head-bobbing sore and lame. He just might not feel quite right.”
Rub him down. Liniment, oils, rubdowns, and massage thank your horse for a job well done. Mero encourages applying ice and hydrotherapy if a muscle or leg is hot and swollen. Toward ride’s end, stand your horse in a stream for 10 to 15 minutes, says Shea, for natural hydrotherapy.
Limit painkillers. As a veterinarian, Mero dispenses her fair share of nonsteroidal anti-inflammatory drugs (NSAIDS), but she recommends limiting their use because of the potential side effects.
“A little bit of muscle soreness will dissipate on its own in a day or two,” Mero asserts. “If your horse is terribly sore, pain relievers are OK. But NSAIDS aren’t innocuous. They can cause ulcers and gastrointestinal-tract problems, and they can hurt the kidneys. Judicious use of nonsteroidals on a sore horse will be fine as long as he’s hydrated and otherwise perky and eating.”
Give him room to roam. Allow your horse to walk around after a long ride instead of confining him to a stall to help him work out tight muscles.
“Unless the horse has an injury, such as a bowed tendon, he’d be better off where he can regulate his own exercise and stretch himself,” Mero shares.
Jeanette Mero, DVM, an endurance rider since 2003, is the chair of the American Endurance Ride Conference (AERC) veterinarian committee. She graduated from Cornell University College of Veterinary Medicine and has owned her solo practice for 13 years. She lives in Mariposa, California, training daily in the mountains of Yosemite National Park.
Mary Davis is the equine manager for CS Cattle Company, based in several locations in northern New Mexico. Owned by her husband’s family since 1873, CS Cattle Company won the American Quarter Horse Association’s Best Remuda award in 2000.
Lari Shea owned Ricochet Ridge Ranch in Mendocino, California, for 37 years, where she produced and led weeklong trail-riding vacations. She continues to conduct international riding vacations. A champion AERC endurance rider, Shea has completed more than 6,500 miles in 50- and 100-mile races.

