When you want to frame-up a horse, teach him to give at the poll, and help him drive from his hind end, draw reins can help. They can be used for all kinds of events, from reining to Western pleasure and even on trail horses that need some collection and control.
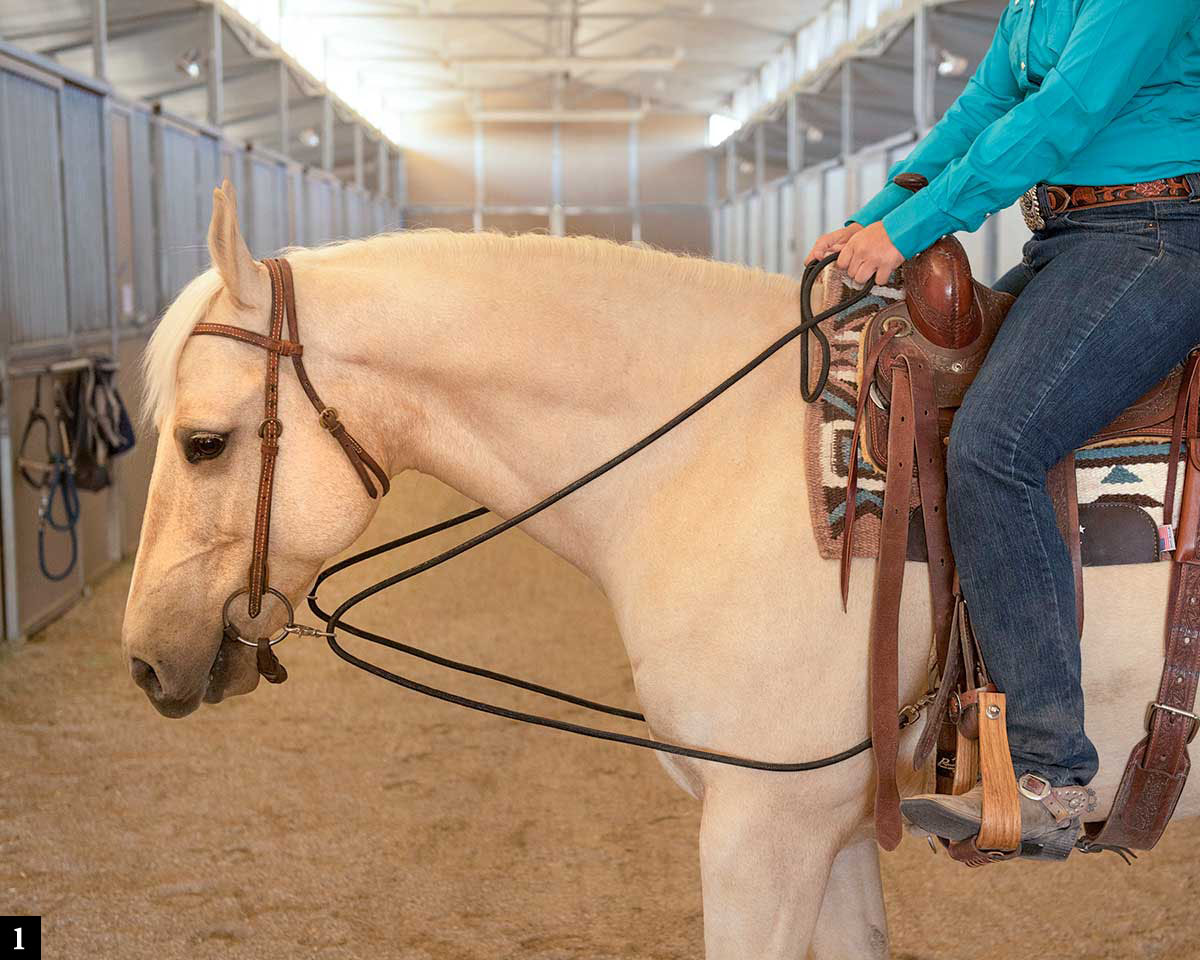
When you look at the rider with the traditional draw reins (this page), you can see there’s a straight line from her elbows to her wrists to the bit. A straight, steady pull back to her hip draws her horse’s head down and in. Combined with leg pressure, this drives his hind end forward. It’s similar to an accordion that’s being played. This is the response she’s looking for. The timing of the release is the key to establishing your horse’s response to your cue. The horse gives and collects, and you release the pressure and repeat as needed.
But, as with almost any piece of gear, there are downfalls with misuse of draw reins and reins like them. Your horse can learn to “run through” the reins, which happens when you pull straight back with both hands and your horse keeps motoring forward with a hollow back. Or if you jerk your reins or your hands aren’t light, your horse can respond by rearing—a seriously dangerous response that can lead to injury for both you and your horse.
Here I’ll discuss traditional draw reins and two other pieces of gear that work in a similar fashion. I’ll also offer some safety tips to keep you and your horse out of trouble when using draw reins.
Safety First!
Before you use draw reins, or any of the other similar setups shown here, check these points.
• Check your snaps. If the connections to the reins or anywhere else on the piece are rusty or don’t look reliable, replace them before using the piece of tack.
• Pay attention to your horse. If he’s never been confined in this manner, be careful with your hands and ready for his response. I always back my horses up a few steps from the ground to test their response before getting on to ride.
• Be prepared if he raises his head quickly, in an attempt to resist. Give him his head and take it back slowly.
• If you’re at all worried about using draw reins, seek help from a professional trainer.

Photo 1: Traditional Draw Reins
This is the setup you’ll most often see with traditional draw reins. They connect to the cinch’s D rings on either side of the saddle and connect to the bit—either a snaffle or a curb bit. You might see some people connect them to the middle ring on the cinch, between the horse’s front legs. I don’t like this because it sucks the horse down too far. He can keep giving to pressure until his nose is between his knees with no resulting collection or softness.

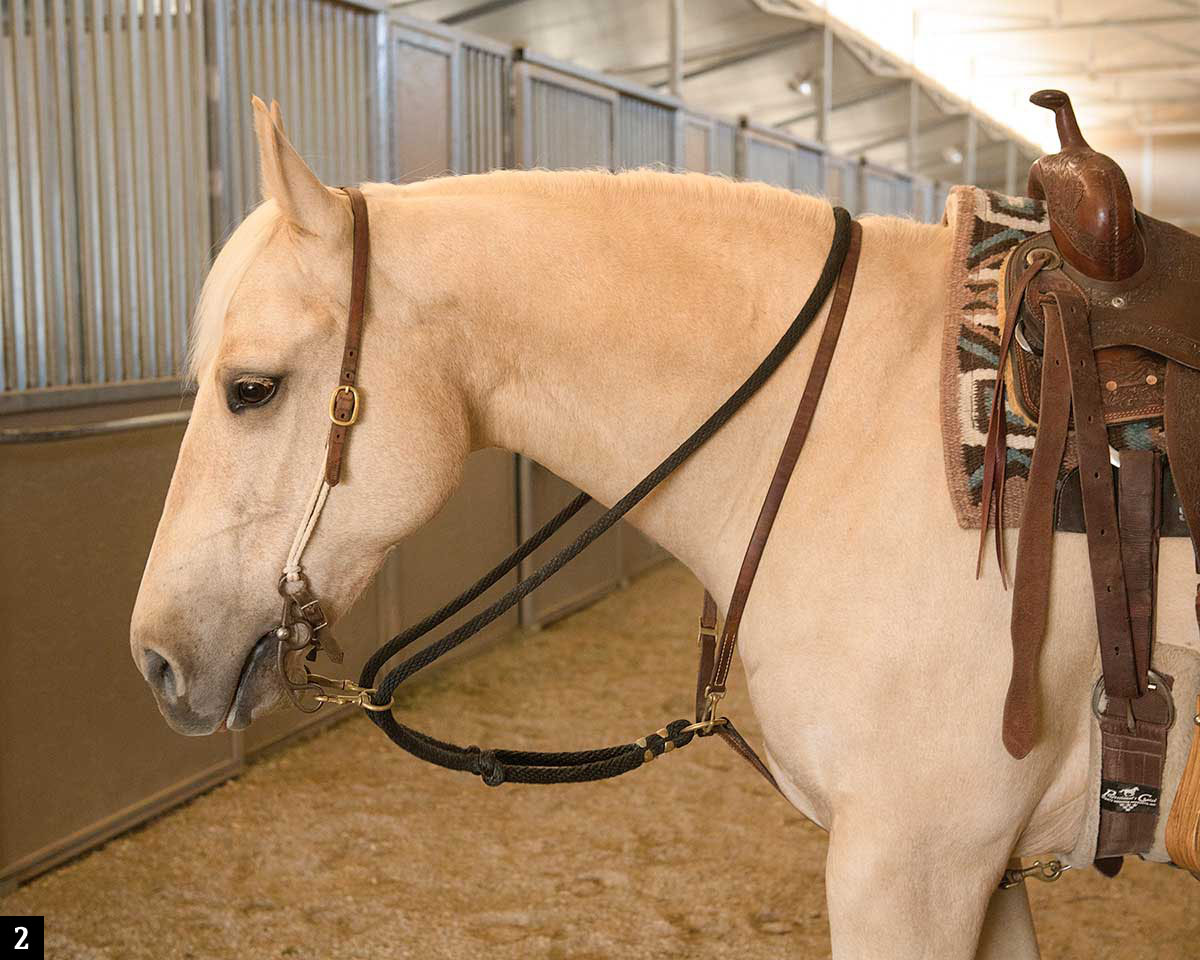
Photo 2: Black Rope Martingale
This is related to traditional draw reins, but a little different. It features a strap around the horse’s neck, similar to a running martingale. The rope rein clips to the neck strap and ties in a knot midway between that connection and the connection to each side of the bit. The neck strap keeps the reins from getting too low where the horse’s feet could interfere with them. The knot acts as a stopping point. Once your horse gives to that degree, the setup doesn’t request him to flex any farther than the knot. At this point, the connection to your horse’s mouth is directly in your hands.

Photo 3: German Martingale
You might see these made in all leather, but I prefer the lightness of the cord used in this example. It has the strap around the horse’s neck, similar to the black rope martingale, and has three adjustment points on the reins. If your horse goes past the desired point of flexion, the martingale disengages, and the horse is straight in your hands. This is a popular piece of equipment for multiple events.
Al Dunning, Scottsdale, Arizona, has produced world champion horses and riders in multiple disciplines. He’s been a professional trainer for more than 40 years, and has produced books, DVDs, and an online mentoring program, Team AD International (aldunning.com).


