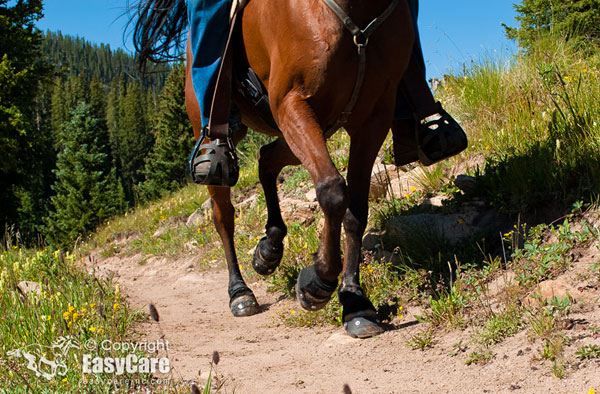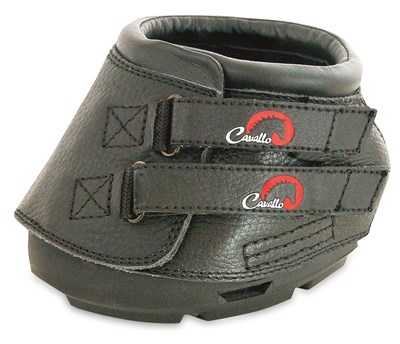
If you’re considering pulling your horse’s shoes and switching to hoof boots, know that there are several critical steps to take as you make the transition. Before you invest in expensive hoof boots that may or may not be right for your horse, talk to your farrier and veterinarian. Then decide which boot, if any, is best for your horse. Here, we’ll give you checklists on barefoot transition, hoof-boot selection and fit, and getting started once you’ve purchased hoof boots.
Barefoot Transition
First, here’s a checklist to see whether your shod horse might be a good candidate for living the barefoot life.
■ Consult professionals. Enlist the aid and involvement of a professional farrier and veterinarian who agree that your horse is likely to succeed without shoes — either one who usually shoes or is an experienced trimmer.
■ Schedule a veterinary exam. Your horse needs to be healthy, fit, and young to middle-aged. He should be of good weight and not handicapped by limb or hoof capsule deformities. (Note: Older horses may require more time to adapt.)
■ Provide daily exercise. You’re a healthy, fit, observant rider with time to exercise your horse daily and provide hands-on care.
■ Provide turnout. You give your horse ample turnout, preferably with good drainage and firm ground similar to the terrain on which you typically ride. (Don’t turn out your horse while he’s wearing boots.)
■ Time it right. You plan to pull your horse’s shoes when you and your horse are heading into a time when your horse may have a lighter workload.
Selection & Fit
If you decide that making the transition to hoof boots is right for your horse, use this checklist as you shop.
■ Find the right shape. Find a boot shaped like your horse’s foot. Note that Thoroughbred-type feet tend to be more round, while those of gaited breeds may be more oval. Avoid trying to jam an oval hoof into a round boot.
■ Consider custom. Custom-made boots are sometimes required for hard-to-fit sizes. For instance, if you have a half-draft trail horse, you may be limited in your choices to find a boot big enough for him.

■ Get a tracing. Most hoof-boot makers will advise you to make tracings of your horse’s feet soon after trimming. Custom-made boots will require this step.
■ Determine size. Determine the correct hoof-boot size for your horse in consultation with the manufacturer (or his/her representative), or a knowledgeable and patient tack-shop salesperson.
■ Size each hoof. A boot may fit your horse’s front feet, but not his hind ones. Hind feet are generally more oval and may be a different size. Likewise, if your horse has mismatched front hoof angles — a common condition — he may need two different boot sizes. This can be problematic if the boots are only sold in pairs, but correct fit is imperative.
■ Take your time. Spend time researching models. Have your hoof tracings on hand as you examine each one.
■ Find out the return policy. Find out in advance under what conditions the boots may be returned for a refund if they don’t fit your horse. Custom boots are usually not returnable. Ask about warranties for materials.
■ Continue to evaluate fit. Every few months, stand back and evaluate how your horse’s hoof boots fit. Ask your farrier to check the boots and point out any developing problems.
Boot Up
You’ve bought the boots, now what? Here are some startup tips.
■ Save the packaging. Save all the packaging and product literature that comes with your boots, especially the receipt. Read any and all advice from the manufacturer. Make a note of the manufacturer’s website and telephone numbers.
■ Check photos. Check photos of the boots on horses as shown by the manufacturers. Note how the boots fit in the heels and around the pastern.
■ Stay up-to-date on trimming. Overgrown hooves may affect the fit.
■ Take extra time. Schedule a quiet hour with your horse to fit the boots for the first

time. Tie him safely, or have a helper hold your horse while you apply the boots.
■ Take a photo. Photograph the boots on your horse’s feet, then remove the boots. Decide whether you’re satisfied with the size and fit. If you’re not, call the tack shop or manufacturer immediately to arrange an exchange.
■ Walk, trot, and turn your horse. Apply the boots, and walk your horse. Ask him to turn, and note whether the boots twist on his feet. Judge how comfortable he appears. Make a mental note of any changes in stance, or whether the boots brush, particularly in the hind feet. Trot your horse on the lead line, and listen for an even footfall. Does he hesitate to transition into and out of the trot? Adjust the boots and try again.
■ Saddle up. Head out on a short trail ride over level ground. Again, listen for any changes in the normal sounds of your horse’s gaits. Ask a knowledgeable horseperson to observe your horse under saddle to see whether anything appears awkward or out of sync.
■ Mark right and left. When you’re happy with the boots, note which one is marked right and which one is marked left (if applicable). Small markings are easy to read on a new pair of boots, but will be obscured with wear. Place a dot of paint or nail polish in two different colors on the inside collar of each boot to help you put them on the correct feet.
■ ID each boot. Write your name, the size of the boot, and your horse’s name on the inside of each boot with a waterproof marker for identification purposes.
■ Practice. Practice applying and removing the boots several times, until your horse is accustomed to the procedure and you can judge what normal adjustment will entail. You need to be able to remove the boots quickly in case of injury at home or on the trail. TTR
Fran Jurga of Gloucester, Massachusetts, is the editor and publisher of Hoofcare & Lameness: Journal of Equine Foot Science. She also owns and writes The Hoof Blog (www.hoofblog.com). For more of her helpful articles for horse owners, go to www.hoofcare.com.


