Poles (like those seen in traditional trail classes) and logs (more like natural downed trees) are present in almost all ranch riding and ranch trail patterns. Judges can place them at a variety of heights and distances, which means your horse must be versatile and well-practiced to execute the obstacles correctly.
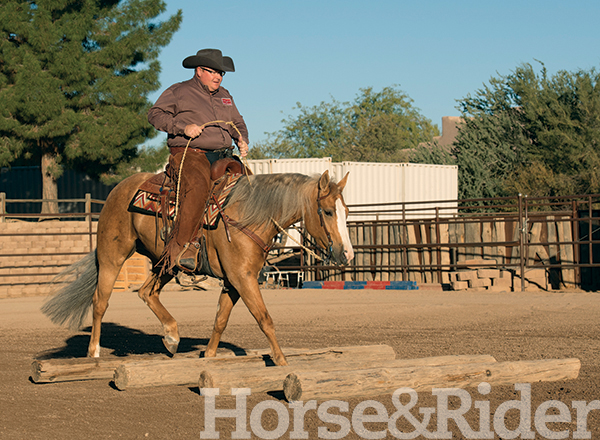
Here, I’ll offer 10 tips for practicing these obstacles at home. Traditional trail poles are fine for these exercises, but I suggest working over larger logs, too, so you’re prepared to execute them. I’ll refer to the obstacles as logs for the purpose of this article, since it focuses on the ranch patterns. Practice going over logs on a weekly, if not daily, basis. The more time you spend practicing the obstacle, the more comfortable and capable you’ll feel when you see them drawn into your pattern. When performing these obstacles, think back to the purpose of the class: Would this horse be suitable for the ranch if he encountered this obstacle?
Tip #1: Start Slow
Begin working at a walk, adding more logs as your horse becomes accustomed to stepping over them.
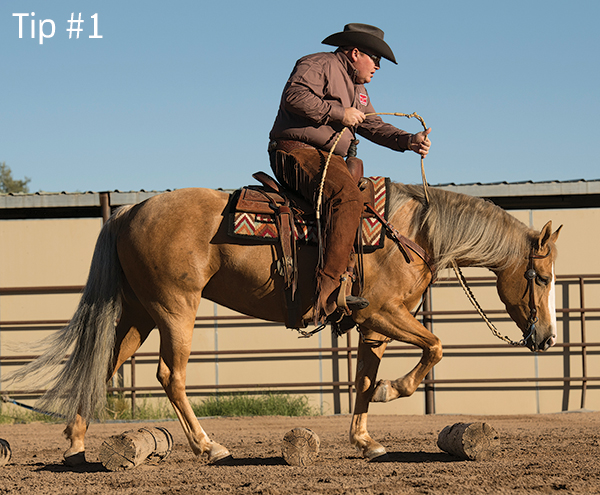
Your horse might be afraid of the logs, so be sure to give yourself enough time to get him accustomed to the obstacle. Walk and then jog in circles near the logs, letting your horse realize they’re not as scary as he might believe.
Once your horse feels comfortable with the logs, begin walking over just one log in a straight line. Build to two logs once your horse confidently covers one, and then add more at the walk as appropriate.
Tip #2: Work at Multiple Distances
Distance between the logs is very important in the first stages of training. Walk-over logs are set at an average of two feet apart; however, show managers can set various spaces between the walk-over logs, so you’ll need to practice at home for various distances and so you can adjust your horse’s stride at the show. Practice riding to place your horse’s feet in the middle of the space between the logs to prevent him from ticking or hitting a log. Hitting logs incurs a minus maneuver score, with the amount depending on the severity of the “hit” on the log (i.e., ticking a log versus kicking it forward to collide with the other logs).
Tip #3: Keep Him Round
Use your legs and hands to round your horse’s back as you approach the logs. This shape gives him the necessary impulsion to get over the logs without hitting any.
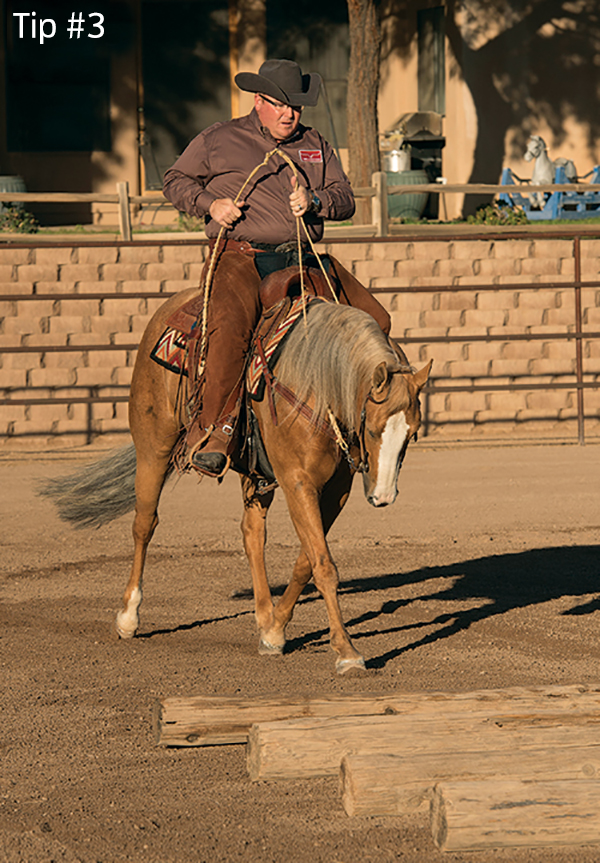
You can improve your control of your horse’s stride by using your legs and hands to pick up his back as he approaches the logs. Wrap your legs around your horse to lift his back, and lift your hand to steady his face until you feel him raise his back into your seat and soften in your hand. By rounding his back up, your horse will have a more up-and-down motion, which helps his legs go over the logs instead of plowing straight through them. Work on having your horse lengthen his stride to accommodate a larger walk space, and practice a tighter stride for a smaller space.
Tip #4: Ride All the Way Through
Begin preparing for the obstacle a few strides before you reach it, and continue riding over the obstacle a few strides after. Sitting down or relaxing before you’ve completed the obstacle will increase your horse’s chances of hitting the log. Always be sure your horse’s final foot has exited the obstacle before you move onto the next maneuver in the pattern.
Tip #5: Nix Rushing
If you find your horse rushes through the logs instead of thinking about them, stop in the middle of the obstacle and wait until you feel him relax. Take as much time in the middle of the logs as your horse needs. If your horse rushes up to the logs in his approach, stop and back him up before going over the obstacle. Make sure your back-up isn’t too aggressive; you don’t want him to become nervous when you approach logs. Lift your rein hand slightly before the logs to let him know that you’re about to go over them. Your horse should give to your hand and look at the logs.
Tip #6: Enhance Expression
Expression over the logs is important. Your horse shouldn’t appear numb to them as he just clods over the obstacle. Let him slightly lower his neck while going over the logs to show that he’s a willing mount and is interested in where he’s putting his feet. If you were on a ranch, you’d want your horse to look before he stepped over a fallen tree and into a gofer hole, for example. You can sit forward as you guide your horse over the logs or maintain your regular working position. Use the position that you feel most comfortable in and gets your horse over the logs cleanly.
Tip #7: Get a Great Trot
Practice a forward, lofty, two-beat trot—at a standard stride and extended—so you’re prepared for whatever the pattern requires.
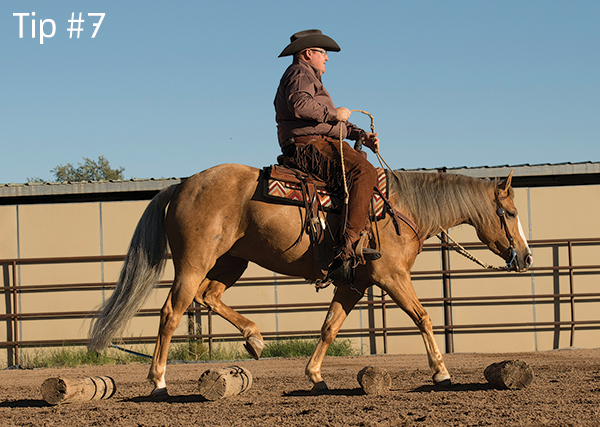
Strive for a solid, two-beat trot that drives from behind before you attempt the trot-over logs. Trot logs are usually set three feet apart, but they can be spaced differently at each show, so you must have control of your horse’s trot. Pick up your horse’s back (see Tip #3) while trotting in a circle to achieve a lofty gait to get over the logs smoothly. Practice this at different trotting speeds so you can adjust your horse’s strides to get correct leg timing and maintain his correct body position.
Some patterns may call for an extended trot over a log. Be careful to never allow your horse to break gait into a lope due to the increased forward motion. This takes practice at home to know how far you can push the trot before your horse breaks into a lope. You may sit, post, or stand in your saddle when going over a log at the extended trot.
Tip #8: Stay Centered
Approach the obstacle as close to center as possible, and take a straight path to cross all of the logs.
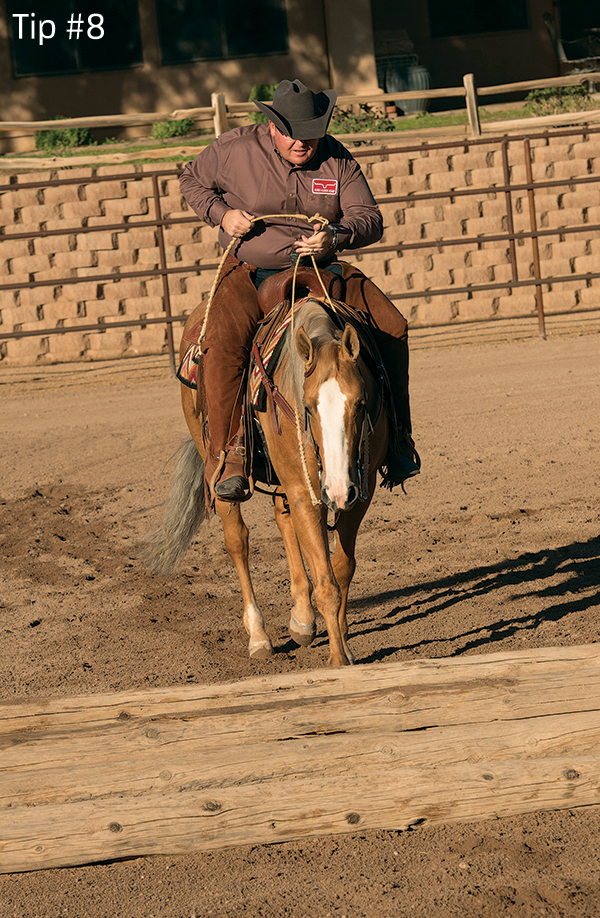
Trot logs both straight on and as part of the arc of a circle, always approaching the obstacle at the middle of the first log. Staying centered through the obstacle should mean that each log is equidistant, which will make it easier for your horse to stay balanced and place his feet carefully and confidently.
Tip #9: Practice the Lope-Over
Guiding your horse over a log at the lope is one of the most difficult maneuvers with this obstacle; however, once mastered and performed correctly, it can be one of the most beautiful and credit-earning maneuvers. Lope logs are typically set six feet apart, but can vary depending on the show.
A lope-over requires a three-beat lope with impulsion from behind and your horse’s back lifted and round. Establish this gait and body position away from the logs, and then work over the obstacle. Begin with one log, and then add more as you and your horse gain confidence.
The place your horse’s first footfall land before the first log is important at this gait. If your horse’s foot lands too close to the log or too far from it, your horse runs the risk of splitting the log (having the log go in between the horse’s front or back strides), switching leads, or breaking gait over the log. Try to gauge the correct foot placement when you’re six to 12 feet away from the log. If you feel that your horse won’t land in the correct spot to make it over the log cleanly, then shorten or lengthen your lope stride to accommodate a proper distance. You can also stop and back your horse before he reaches the log, to help teach him how to rate his stride at the lope (see Tip #5). With practice and your manual “rating” (lengthening and shortening of his stride), he’ll begin to see the distance himself and help you find it when approaching the log.
Tip #10: Increase the Difficulty
The lope is probably the most challenging gait to travel over logs, but with practice you’ll master it for a credit-earning maneuver.

Once your horse gets comfortable, challenge him by adding more lope-over logs. Space the logs approximately six feet apart, and only add one additional log at a time so that you know your horse is capable of performing the obstacle. Keep an even stride over all of the logs to perform the maneuver cleanly and to look as effortless as possible.
Ryan Kail, Scottsdale, Arizona, is a lifelong horseman. He started Kail Quarter Horses in 2008, where he and wife Andrea train horses for the ranch and all-around classes. He holds judges’ cards with AQHA and NRHA.


