As an avid trail rider, you’re bound to encounter a log or fallen tree at some point. Crossing obstacles is expected of any good trail horse and is actually part of the fun of a trail-riding adventure.
The safest method for crossing a low trail obstacle is to walk over it. If the obstacle is more than a foot high, your horse will probably want to jump it, but for safety’s sake, don’t allow him to do so from a standstill.
“The greatest danger of injury to your horse is for him to jump at the last minute,” says top trainer Lynn Palm. “It can also shake your confidence, because you can easily get left behind, thrown off balance, and end up snatching your horse’s mouth. You want to have confidence that you can control your horse and his approach to an obstacle.”
Gain the upper hand by setting up obstacles to practice at home so that when you encounter them on the trail, you and your horse both know what to expect. You can use poles or small logs for these lessons, but don’t use PVC pipes; they’ll roll if touched and can be dangerous if your horse steps on them.
Practice in an enclosed, safe area with good footing. A pasture is fine, as long as there are no loose horses. Before you begin, warm up your horse by riding him or working him on a longe line. Walk him at least 15 minutes before asking him to trot.
“Any time you want to teach your horse something or introduce something new, he’ll be better able to concentrate if you exercise him prior to the lesson,” explains Palm. “He’ll also be less likely to challenge you just because he’s feeling ‘fresh.’ “
To begin, cross obstacles in both directions at the walk. Eventually, you can work up to crossing at a trot and even at a lope/canter, if you like.

Step #1: Longe Over Poles
Introduce your horse to obstacles from the ground; when you know how he’ll react, you can mount up and ride across.
Tack up your horse as usual, but put a conventional (not rope) halter over his bridle, or just use the halter. Attach a longe line by running it through the side ring on the halter’s left side, then under his chin, and snapping it to the opposite side ring. Or, for more control, run the line over his nose and snap it to the opposite side ring. If your horse is quiet and obedient to commands, you can just snap the line directly to the left side ring.
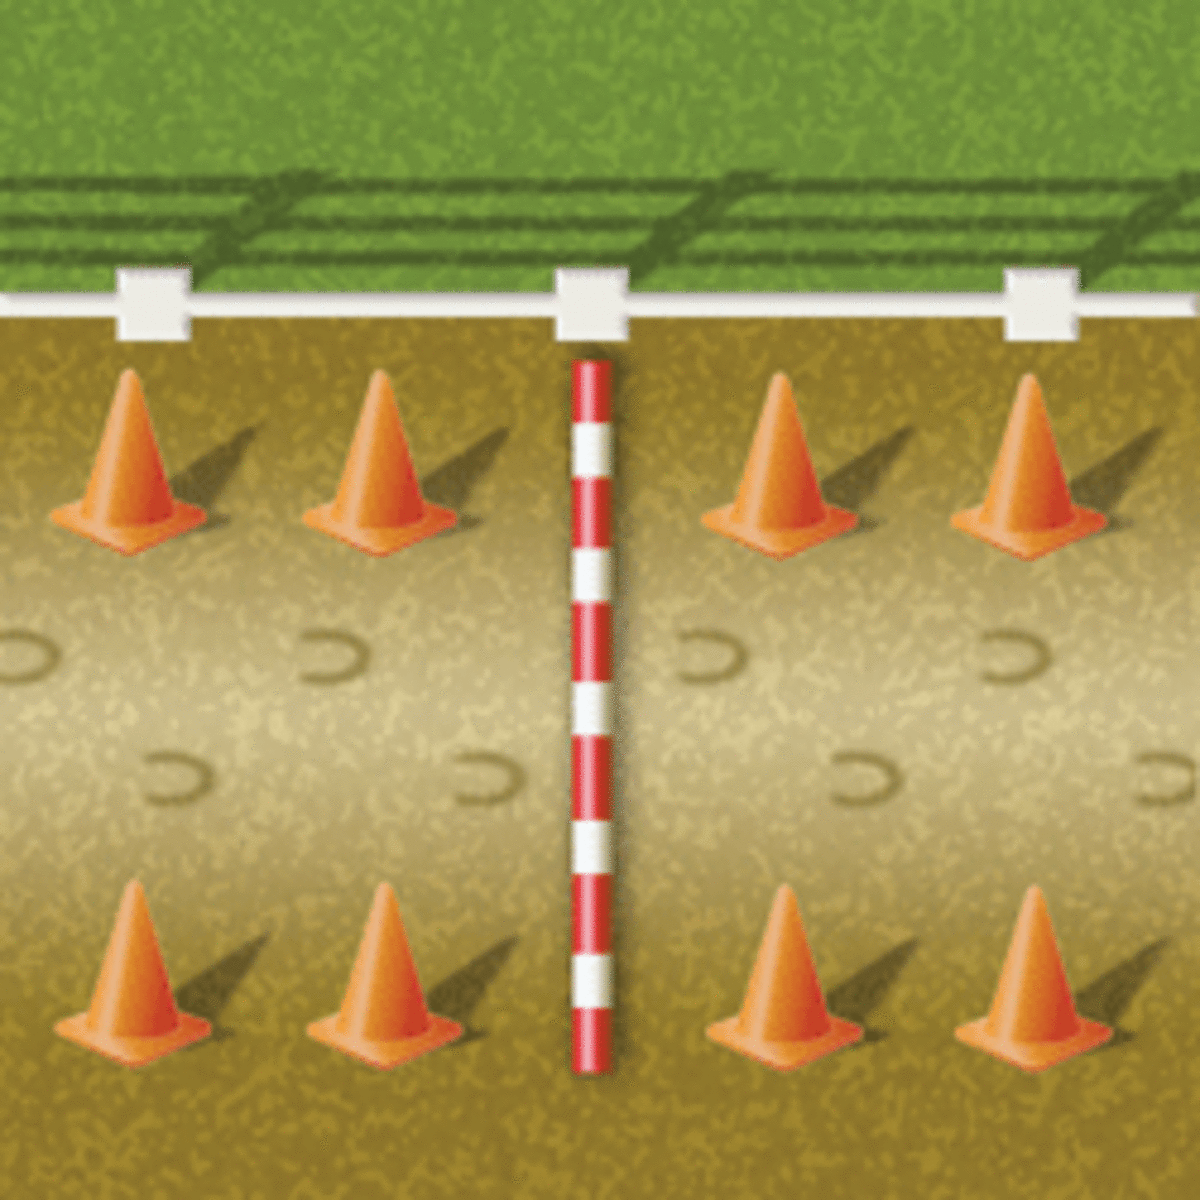
Lay a pole or log flat on the ground perpendicular to a fence. The fence line will help direct your horse over the pole if he tries to avoid it. If you like, add cones on both sides to help him stay on a straight path on his approach to the pole.
Longe your horse in a large circle to the left a few times in front of the pole, then move forward so that his circle will take him over the pole. At first, allow him a fairly long approach so you can regulate his speed and direction of approach. If his speed isn’t consistent, he may stumble over the pole; ask for a steady, even gait. If you cut his approach too close, he won’t be balanced and may stop instead of walking on over the pole.
“This is a great test for your eye and reactions,” says Palm. “If you can control your horse on the ground with this exercise, it’ll give you the tools you’ll need under saddle.”
If your horse wants to stop and drop his head to check out the pole, let him do so. Give him a moment to look at it and sniff it. Most horses will swing their heads both left and right to look at the obstacle with each eye.
When your horse looks away from the pole (indicating he’s finished examining it), encourage him to walk forward and over it. If you give him this opportunity when you first introduce an obstacle, he’ll usually be more willing to go over it. This rule of thumb applies whether on the ground or in the saddle.
Once your horse accepts crossing the pole from both directions, add a second pole 12 feet farther down the fence. Have him approach the poles at a walk straight on, and encourage him to walk over both. Later, move the poles six feet apart and then three feet apart. Don’t put them any closer than 2½-feet apart (one step between each pole) or he won’t be able to negotiate them well.
On the trail, you can’t control the distance between obstacles you encounter. Introducing obstacles at home gives your horse confidence; it also helps him concentrate and learn to step carefully between the obstacles so he can learn to gauge the distance himself.
After your horse masters crossing over two or more poles walking straight down the center, change your position so he must approach on a diagonal or angled track, an approach he’ll likely encounter on the trail. Ask him to do so going both directions.
Step #2: Ride Over Poles
When your horse is comfortable negotiating the poles on the ground, mount up, and ride over the same obstacles. If you can keep your balance centered, keep your horse’s body straight, and control his speed, he’ll have the best advantage of cleanly negotiating the obstacle.
Start at the walk with one pole as you did on the ground. If you find your horse tends to hit the poles with his feet, assess the track you’re following and your speed. Some riders think their horse is just clumsy, but horses don’t deliberately strike the pole.
If your horse hits a pole, you’re not keeping him in a straight path, or he’s either going too fast or too slowly. If he hits the pole with the front of his foot, he’s going too fast; if he steps on top of the pole or hits it with his heel, he’s going too slowly. Regulate his speed, and keep him straight to maintain a consistent distance between poles.
Walking over obstacles is actually more challenging, because the walk has the least forward motion of any gait. Also, at this slower pace, you might be tempted to let your horse choose the speed and direction of approach. Be sure to dictate both so that you’re in control, and to help him over the poles.
When your horse walks over one pole well under saddle in both directions, add a second pole 12 feet away, as you did in Step #1. As his skill increases, move the poles closer together, also as you did in the first step.
When your horse is confident as you ride over poles at the walk in both directions, practice going over the poles at the trot. At first, space poles 24 feet apart. Then reduce the space to 12 feet between poles. Eventually, you can shorten the distance to six feet, then three feet (one step between).
If you’re an experienced rider and would like to practice jumping low obstacles at the lope/canter, first don an American Society for Testing Materials-approved, Safety Equipment Institute-certified riding helmet. Then start with one pole on the ground. Then add two to three poles a minimum of 10 feet apart. Next, set one pole a foot off the ground and master control of jumping this one obstacle.
For more of a challenge, set up two low jumps one-foot high each, and space them 20 to 24 feet apart. Stabilize the poles so they won’t roll if your horse taps one with a hoof; don’t just set the poles on top of a bucket.

Step #3: Cross Obstacles on the Trail
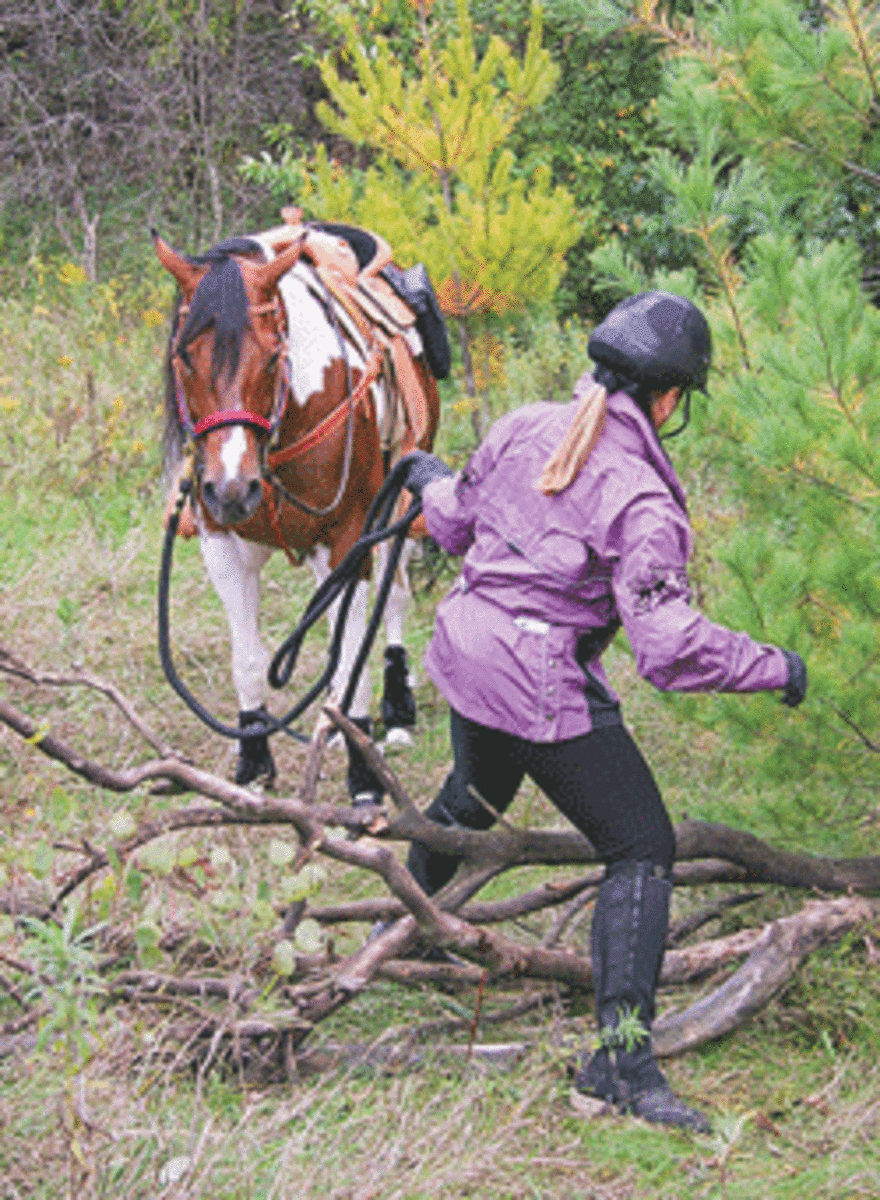
Tackling obstacles on the trail from the ground first can help you and your horse maintain confidence. You might feel safer negotiating an obstacle on the ground instead of riding over. Simply put the halter on over the bridle, and attach a longe line or a long lead rope to the saddle.
On the trail, stop your horse before he spooks or resists the obstacle, and let him look at it with both eyes. Allow him to address the obstacle and ground. Cross the obstacle while keeping a careful eye on your horse. Send him over the obstacle, letting him cross it on his own. Stop him on the other side and have him face you.
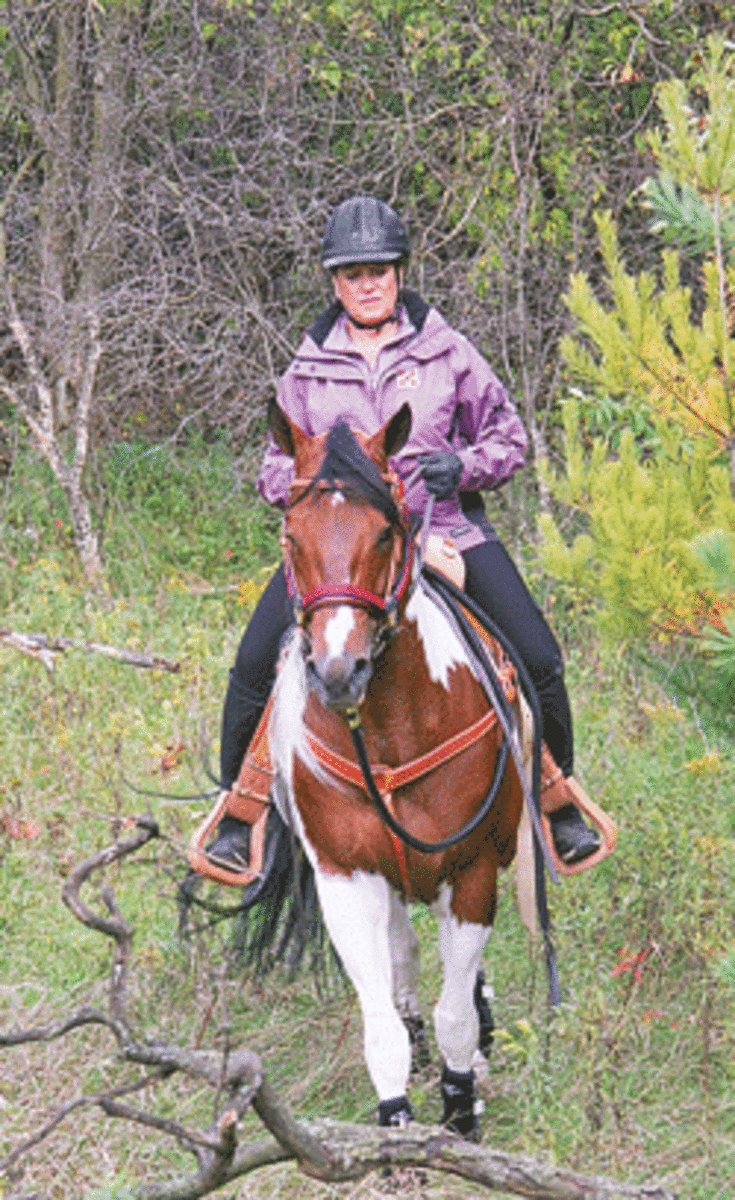
When you’re ready to cross a trail obstacle under saddle, such as a log, try the straight-on approach, if possible, especially if your horse isn’t experienced at negotiating actual trail obstacles.
If your horse wants to check out the log first, let him lower his head to sniff it and get a closer look. Give him all the time he needs to stop and address the log and his surroundings, to build his confidence. But don’t let him cross the log from a standstill. Turn him to one side, so crossing the log will be your decision, not his.
Then make a large circle, and approach again, encouraging your horse to cross without stopping. If he stops, be more assertive to maintain forward motion. You need to dictate when it’s time to stop and go, not your horse.
When your horse crosses the log, turn around, and cross back over from the other side. Don’t make the mistake of thinking your horse will cross it again, because he just went over. To him, the obstacle looks totally different from the other side.
Next, approach the log at a trot, posting to keep your balance. Keep your horse to a steady medium trot, not a fast trot; the latter will encourage jumping. The goal is to trot over the obstacle in stride, not jump over it.
If you think your horse might jump the obstacle, hold the reins in one hand, grab a handful of mane or hold the horn (if you’re riding Western) with the other, and tilt your upper body forward. This will keep you from being left behind and snatching his mouth when he jumps.
“I’ve found that when you have forward motion and straightness, the horse tends to stay in gait,” Palm notes. “It’s when you’re going slowly that the horse wants to jump. You must keep balanced to encourage your horse to maintain his gait. When you lose balance, the horse gets defensive, especially if you bang his mouth or back. He’ll also get worried, because he’ll have to make adjustments with his feet to compensate for your poor balance.”
When you come upon a log a foot high or higher, your horse may feel he needs to jump it, instead of trying to walk over. Don’t approach taller obstacles until you’re confident about jumping. You can always dismount and direct him over the obstacle using the halter and longe line.
In the Arena
Your position in the saddle as your horse crosses over an obstacle is important for keeping both you and your horse balanced.
At the walk, you might tend to lean forward when crossing an obstacle, but this puts too much weight on your horse’s front end and puts you off balance. Practice riding over poles on the ground at a walk while staying upright in the center of your saddle. Look ahead, not down at the pole or ground.
At the trot, your horse’s stride will become bouncier as he trots over an obstacle.
Set up poles on the ground, and practice riding over them at the trot while focusing on keeping your shoulders back and your seat centered in the saddle. When you negotiate poles at a trot, lean back with your upper body and you won’t bounce in the saddle.
Pick a point in the distance ahead to focus on. Don’t look down, or your upper body will start to tilt forward, putting you off balance. Don’t push down in your stirrups for balance; this will actually push your body up, which will lead you to bounce in the saddle. If you start to bounce, your horse will stiffen up in anticipation.
Step #4: Jump Low Obstacles
One of the more exhilarating things you can do on the trail is to jump low logs and obstacles. First, don an ASTM-approved, SEI-certified riding helmet. Then check for holes or rocks on both sides of the obstacle to avoid potential injury.
If the obstacle is more than one foot high, get into a forward position, and stand up slightly in your stirrups. Hold onto the mane or horn with one hand if you like, so when your horse jumps, you stay balanced; hold both reins in the other hand with even tension and light contact to steer your horse. You can certainly post to the trot, but well before the log, you need to be balanced and in this forward position.
As you approach, close your legs on your horse’s sides two to three strides before the log. Avoid clamping onto his sides. Rather, gradually close your legs, and add some pressure. This helps him gather his hind legs underneath himself for a soft takeoff to jump over the obstacle. And don’t look down at the obstacle; doing so will put you off balance. Keep your chin up, and focus on a point on the other side of the obstacle. Then jump, keeping a balanced position.
If you’re an experienced rider, and your horse jumps confidently at the trot, you might want to negotiate obstacles at the lope/canter. To do so, get into a forward position, and stand up slightly in your stirrups, as you did in the trot. This will help you stay in balance so you don’t get left behind when your horse jumps. Again, close your legs on his sides in the last two to three strides before the obstacle, and don’t look down as you approach or are going over.
Control your horse’s speed and direction to give him the best chance for a smooth, safe jump.


