
This article is brought to you by Cosequin® Joint Health Supplement.
Hitting the trails is a great way to decompress, enjoy nature, and build a better bond with your horse. However, ensuring a smooth and enjoyable experience hinges on thoughtful consideration of your equipment. As an avid trail rider, I’ve learned the importance of checking your gear and being prepared before embarking on your next trail ride. I’m going to give you a quick checklist to prep your gear in order to have a fun and comfortable ride before your next foray into the wilderness.
Proper Fit
Don’t make the mistake of thinking that your attire isn’t part of your gear. What you wear can make or break your comfort on the trail. If you’re riding in jeans, be aware of the impact a bulky inside seam can have on your skin. Check out some jeans designed specifically for riding to avoid rubbing and hot spots in the saddle.
Double check the weather and dress appropriately! However, be prepared for anything and have warmer options in your saddle bags just in case the weather turns quickly. Your clothing choices are more than just staying fashion-forward. Choosing the right riding wear can protect your skin, keep your joints from becoming sore, and help you avoid hot spots.
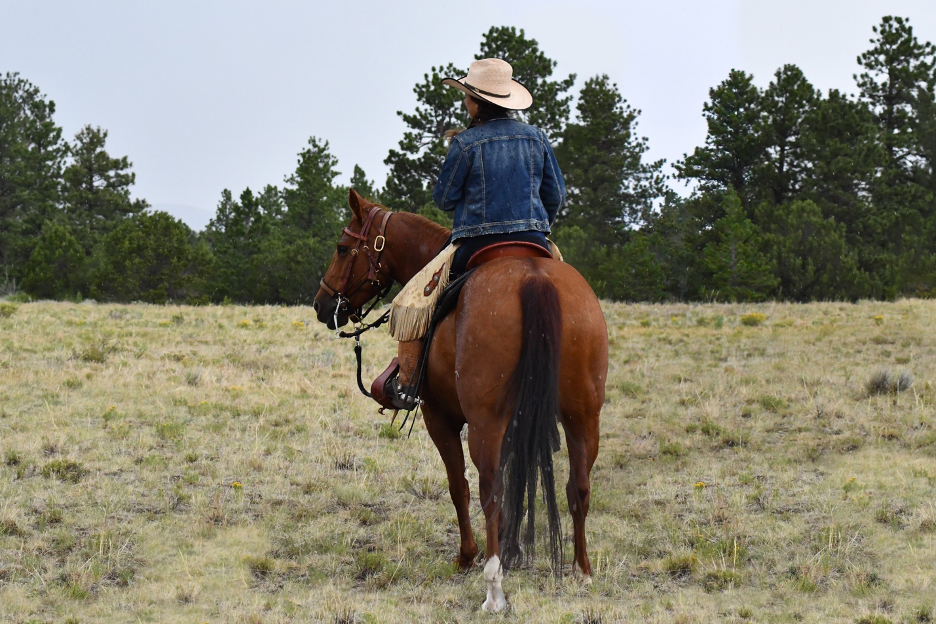
Caption: The weather can turn quickly, especially in the high country. Be prepared for weather changes. Photo by Megan Fischer.
Appropriate Clothing
On the topic of clothing, make sure that your clothing choices are appropriate for in the saddle. Avoid flapping, overly baggy, and loose-fitting clothes that can catch on branches or your saddle. Be cognizant that jackets or hoodies with zippers can get caught when mounting or dismounting and can cause a hang-up.
As a rider that opts to wear a helmet, I am a big proponent of this choice. Things can go wrong in the blink of an eye, and protecting your head will never go out of style. With many new, modern options for helmets, any rider can find one that is comfortable and breathable for any weather.
Analyze Your Tack
Before you tack up or step on, take time to check out your gear for weak spots or signs of wear. Imagine this: You’re loping across an open field and your reins go slack. You’ve lost a Chicago screw and your bridle has come apart. Now that’s a recipe for disaster.
To avoid a scenario like this, do a thorough inspection of all your tack, off the horse, at least once a year. Then get in the habit of conducting routine tack checks before you mount. Analyze the screws and leather connectors, opt for a bridle with a throatlatch for another layer of safety, and look closely at the leather for signs of wear.
This tip applies to your other tack as well. Look your cinch over closely, analyze your latigo for cracked or worn spots in the leather, and double check that all your gear is in working order before you leave the trailer. Take time to maintain your equipment at home to avoid unwanted and dangerous situations.
Double Check Your Halter
Many trail riders prefer to leave a halter and lead rope on underneath a bridle, to make break time a breeze, and let their horse graze. I am not opposed to trail riding with a halter under the bridle, however, I have a few preferences. I recommend using a flat, nylon halter instead of a rope halter. A heavy rope halter can rub your horse’s face and be bulky under the bridle.
Instead of leaving the lead rope on, and trying to tie it up, I recommend just using a detachable one and taking it off for the ride. Store it in your saddle bags until it’s time to use it again. A lead rope tied up around your horse’s neck can pose a serious safety hazard by creating a loop that your horse can step through, when he drops his head.
The last thing I urge riders to be aware of, is that riding with a halter under your bridle can impact the fit of your bit. Be aware that adding a halter underneath can require you to loosen your bridle. You can determine if you need to do so by studying the wrinkles at the corner of your horse’s mouth. If there are more wrinkles than before, you might need to loosen that bridle.
Ride in Comfort
Getting a few miles down the trail and realizing that your feet are numb or aching, or your knees are in pain, can sure put a damper on the ride. The rotation of the joint can cause pain or discomfort, especially if you’re not used it, or are sitting out of line. Here are a couple of tips to avoid knee and foot pain in the saddle.
First, stop riding with your toes pointed straight ahead. Turn your toes out slightly – about 45 degrees – and feel the immediate relief. Another quick way to find relief is to flex your foot so that your weight rolls toward your big toe.
If you have forward hung stirrups, this can cause your legs to become stiff and sore. Preferably, you’ll want stirrups that hang straight down underneath you.
If your stirrups are hanging too far forward, they may put you out of position. Your stirrups should hang down straight underneath the seat, but they can slide forward over time. Often you can shimmy the stirrups leathers back, from the ground, to get them back in alignment.
[Read more from Julie about gear safety on the trail]
Trainer and clinician Julie Goodnight, Poncha Springs, Colorado,hosts RFD-TV’s, Horse Master. Her book Goodnight’s Guide to Great Trail Riding is available at EquineNetworkStore.com. Learn more about Julie’s program and training methods at juliegoodnight.com.