
While it’s usually safer to ride with someone than it is to ride alone, you should take several things into consideration when planning your group ride. All it takes is one bad experience to realize that not everyone with a horse makes a good trail-riding buddy.
“Safety is always the most important thing when riding in a group,” says top trainer/clinician Lynn Palm. For an enjoyable ride that is safe for all participants, she recommends coming up with a game plan well before you hit the trail.
Discuss how long you’d like to ride and at what gaits. An amble down the trail with an occasional jog, or plenty of trotting and loping? Smooth terrain or rough? What about water crossings and steep hills?
Find out how experienced the other riders and their horses are on the trail, and whether their horses tend to be spooky or nervous. You don’t all have to be at the same skill level, but you should be able to agree on pace and difficulty of terrain.
If you’re introducing a young, inexperienced horse to the trail for the first time, plan to go with riders who have solid, reliable horses. And, for the safety of the group, the trail leader should always be experienced and aboard a quiet, reliable horse.
In the Arena
You can get your green horse used to riding in company, as well as passing and being passed by other horses, at home before his first group ride.
First, partner up with another rider on a dependable horse. Practice riding in an arena side-by-side. Then change positions from front to back, always keeping that 8- to 10-foot separation between horses for safety’s sake. Pass on the long, open side of the arena instead of between the other horse and the rail.
You can also pony your green horse off a steady, solid horse to get him used to being in close company with others.
If some riders have gaited horses and others are on nongaited ones, consider dividing into at least two groups, then meeting up at a designated spot. This way, riders on gaited horses don’t have to constantly slow their horses, and riders on other breeds don’t have to continually hurry up.
“The more you don’t ask, the more you don’t know,” says Palm. “If you’re riding with people you haven’t ridden with before, talk about your horses, and ask plenty of questions. When you start adding numbers to the group, this increases the degree of difficulty, because not everybody has good control of their horse. This can become very obvious when one horse spooks and it ‘trickles down’ through the other horses.”
And be alert. “Just like riding a bike or car, always listen, and look in front and behind you when you’re riding,” says Palm. “Be on guard and alert to the horses around you. You can’t blame other riders for negative incidents; you have to be proactive.”
Here, Palm describes four rules to follow for safe group riding: (1) Follow trail etiquette; (2) change up the lead horse; (3) curb jigging; and (4) stop with care.
Rule #1: Follow Trail Etiquette
Trail etiquette is especially important on group rides to stay safe and have fun. Here are six important etiquette rules to live by.
• Season a green horse. If you have a green or inexperienced trail horse of any age, start riding with just one other quiet horse. You’re likely to overwhelm your horse if you take him out with a large group in the beginning. Gradually build up to riding with four or five other horses, until your horse is comfortable in a group.
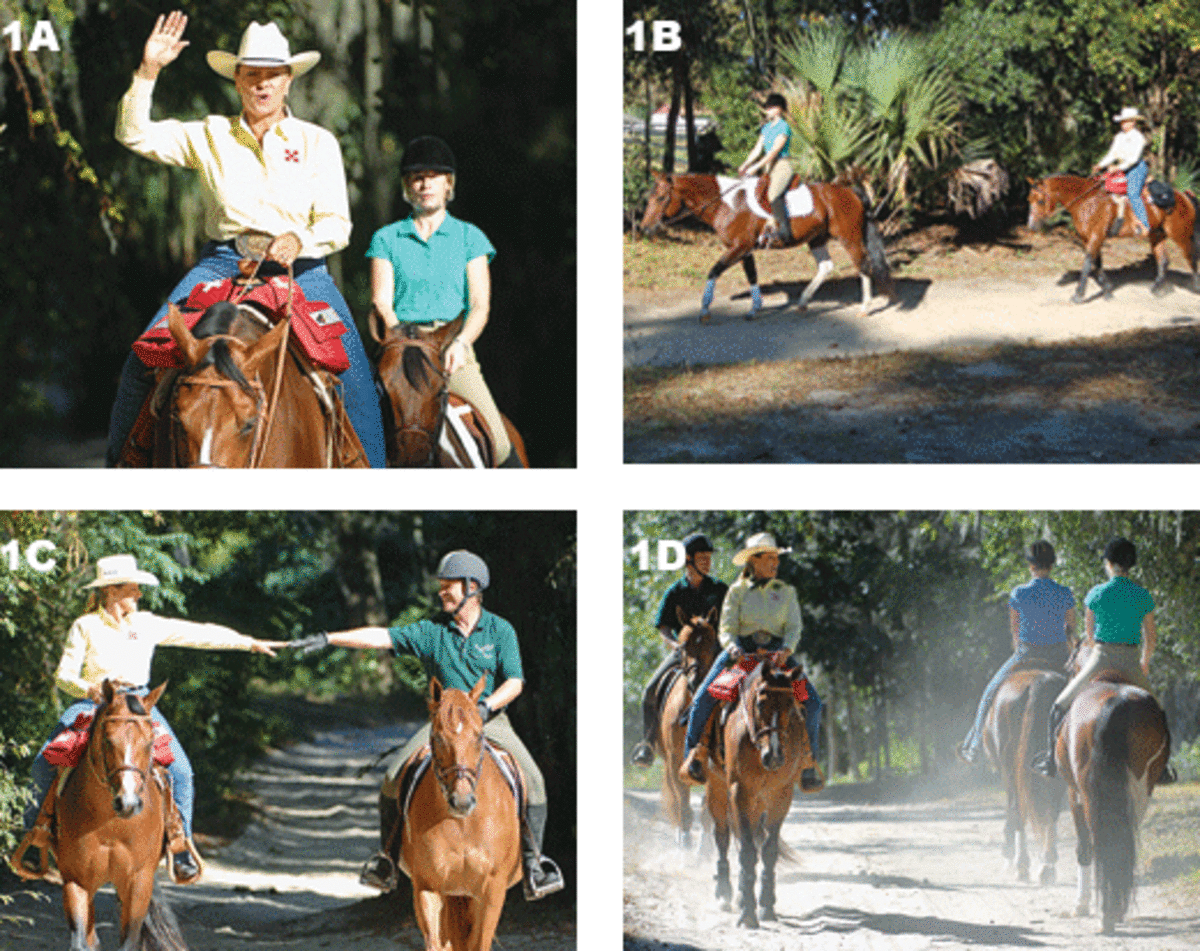
• Agree on hand signals. Before your ride, meet with the group and agree on hand signals for changes of gait and a group stop. You’ll then be able to communicate when you’re out of shouting distance. For instance, the leader can hold up one, two, and three fingers for the walk, trot, and lope/canter/gait respectively, and an open palm for a stop (Photo 1A). A shaken finger signal can mean to speed up within the same gait; a shaken fist can mean a hard stop, or danger.
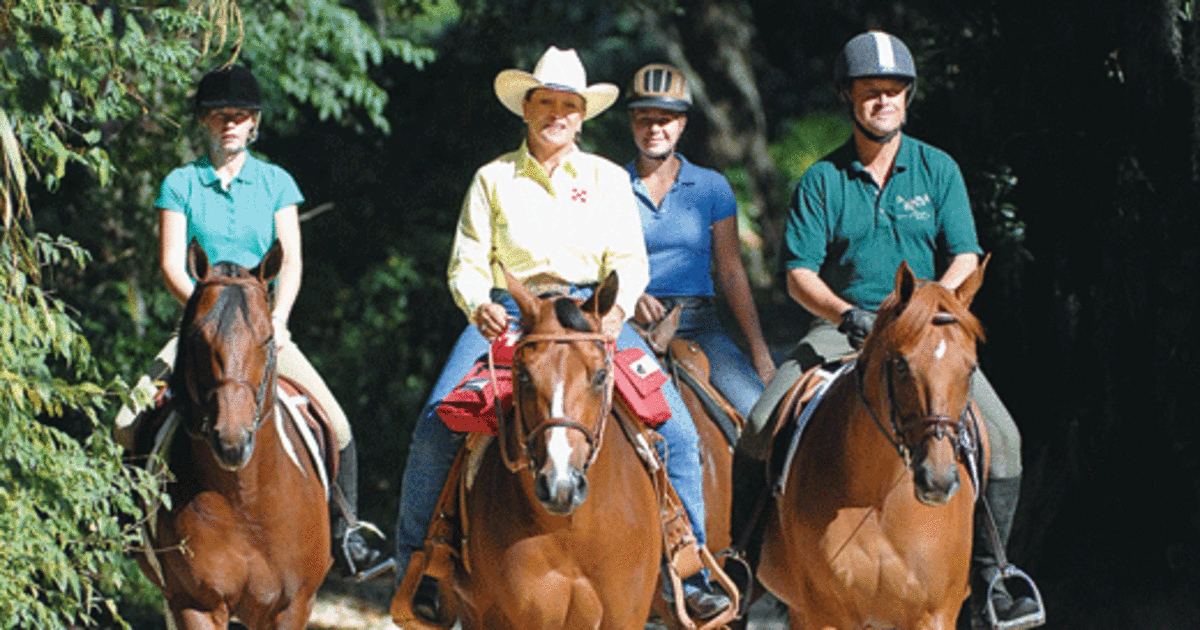
• Maintain a safe distance. Maintain a safe distance between horses at all times, both single file (Photo 1B) and abreast (Photo 1C). Keep at least one horse length (about eight to 10 feet) between each horse.
• Pass safely. Maintain the one-horse-length distance even when passing another horse (Photo 1D). (Note: If the trail is narrow, you may have to step off the trail to pass.) Always tell the other rider or riders when you intend to pass, and warn them before you get close. Also, be aware of riders coming up behind you to pass.
• Keep your horse going. Horses are sociable animals; they’ll often try to stop and sniff a new horse. While this is fine after the ride, it can cause trouble on the trail. What may start out as a little sniff can quickly escalate into snorting, striking, and other undesirable behavior. To prevent this, keep your horse’s head straight, and don’t let him stop when passing or changing positions.
• Keep him from grazing. Don’t allow your horse to graze on the trail, which can hinder the group’s pace. (Note: From a training perspective, allowing your horse to snatch up a bite of grass or other foliage on the trail cedes him control, which sets a dangerous precedent; that quick bite can escalate into balking and even bolting. From a health perspective, you don’t want to put him at risk for ingesting toxic plants.)
Rule #2: Change up the Lead Horse
If you’ve been on even a handful of trail rides, you’ve no doubt encountered riders who insist their horse always has to be in the lead. Often, these riders just haven’t put the time and effort into working with their horse so he doesn’t always want to be in front.
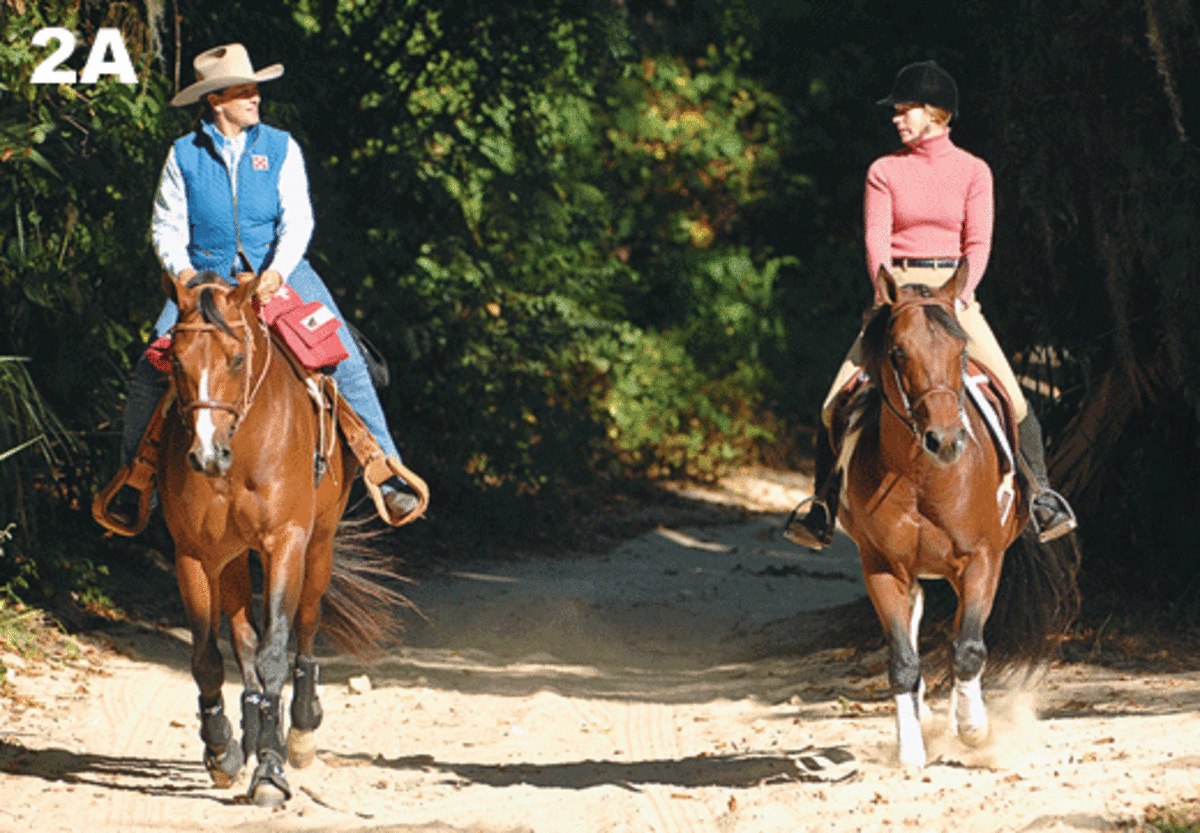
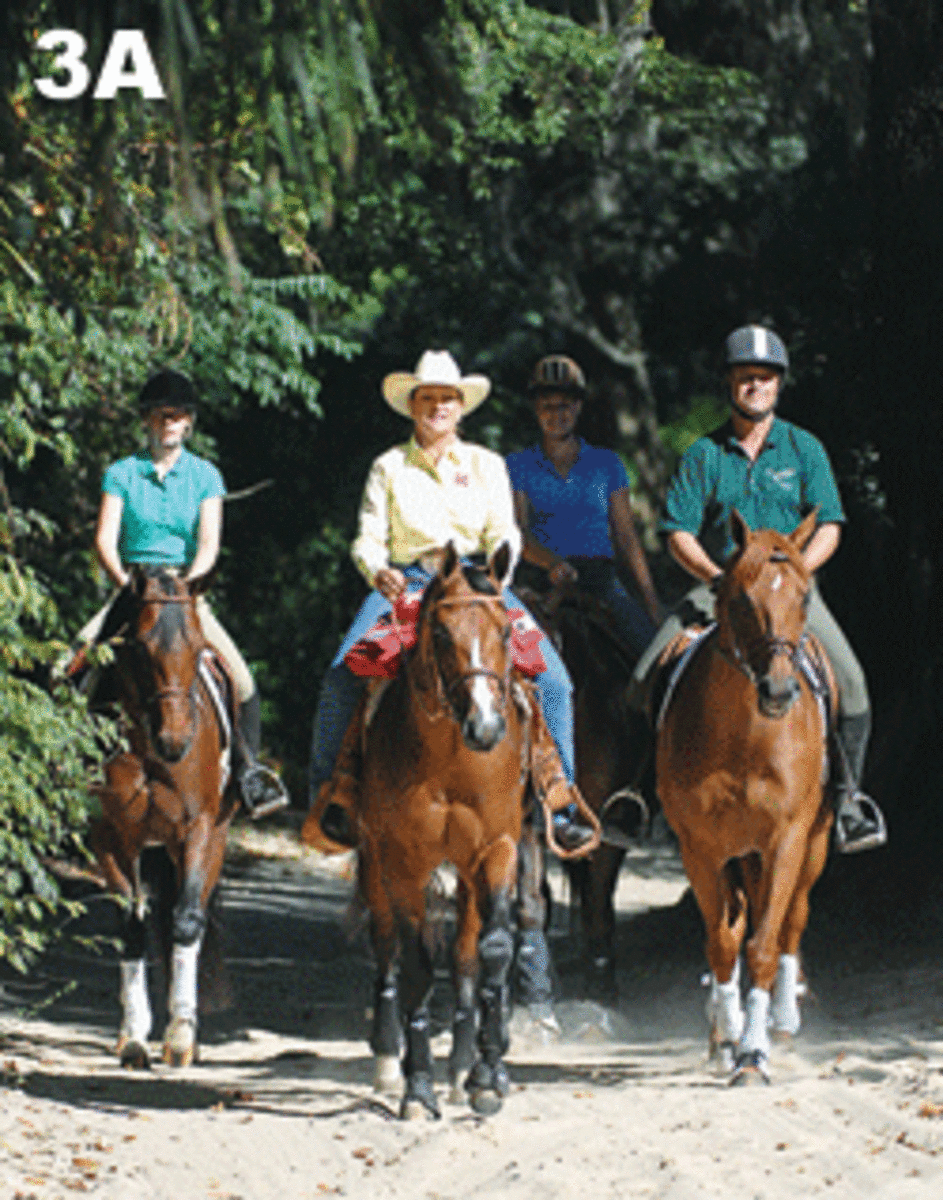
If you ride with a group, whether it’s just a couple other people or a dozen, it’s a smart plan to regularly change positions throughout the ride (Photo 2A; also see Photo 3A). This will give the lead horse an opportunity to be in the middle and at the back, as well. Not only does this give you, the rider, a change of scenery, but it’s an excellent way to keep bringing your horse’s attention back to you.
“I use transitions and constantly change positions on a trail ride so no horse is always in the same spot,” says Palm. “The more you do this, the more your horse has to concentrate on you, and the less he’ll fret. Keep trading places and mixing things up. It makes both horses and riders think, and improves the situation of the horse that always wants to be in front.
You don’t have to make an ordeal out of changing positions. You can actually make a game out of it by calling out position or transition changes frequently. The shorter the time between changes, the more the horse has to listen to his rider. This takes his mind off focusing on the other horses and his environment, because you’re constantly asking him to move and do something else.
When the trail allows, take turns riding beside other horses, instead of single file. Just remember trail etiquette, and maintain that safe distance of a horse length between each horse abreast.
When you stop for lunch or a break, make a point of letting a different horse and rider lead. Then you can start changing positions again.
Rule #3: Curb Jigging
Some horses are sensitive and more on the hot side. If you try to force such a horse to walk, you’ll only upset him more. In addition to frustrating both you and your horse, it can potentially affect other horses around you.
Palm finds that changing positions with other horses on the trail (Photo 3A) can help a jigger, but not always. “Instead, use the horse’s energy, and do something with him,” she suggests. “Rather than try to limit him to a walk, work on gait transitions, and use up some of that energy. Sometimes, this will make your horse want to relax and walk.” As your horse begins to relax, he’ll become more responsive to your cues.
(Note: If you plan on transitioning to different gaits, keep trail etiquette in mind, and let other riders know what you’re doing.)
Hard as it may be, don’t keep a tight hold of your jigging horse’s mouth. The tighter you hold him, the more he’ll fight you and the less control you’ll have. Go easy on bit pressure, and ride with your hands as light as possible on the reins.
If you find yourself on a section of trail that’s rough or challenging, and your horse still wants to jig, dismount. It’ll be safer for both of you – not to mention the other riders – to step off and lead your horse through. This will also give his mind a chance to settle and “come back down.”
If your group plans on going any faster than a walk, go at the faster gaits only on the way out or when you’re still a good way from your barn or trailer. If you allow your horse to speed up on the way home, he’ll learn to get anxious and jiggy on the way back, and can even become barn sour.
Rule #4: Stop with Care
When you stop for lunch or a short break, stop and leave as a group; otherwise, one or more horses in the group may get anxious or act up, which can lead to a problem or accident.
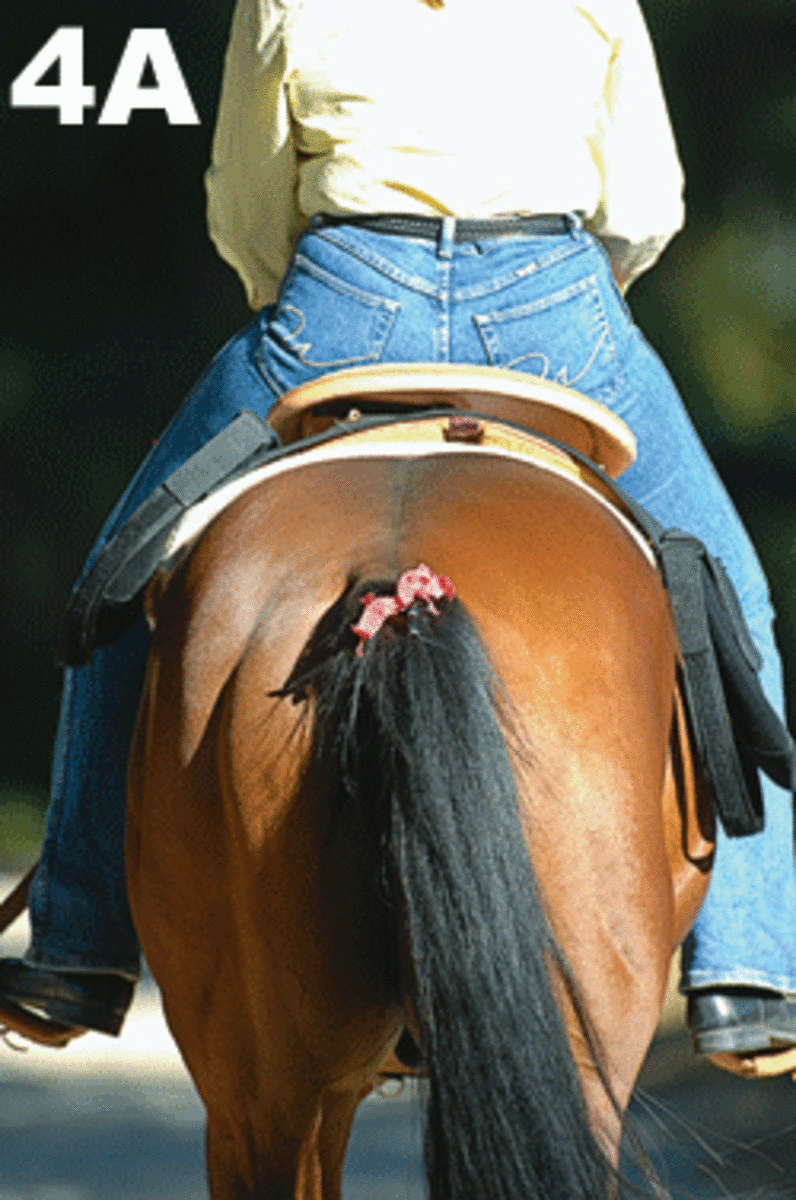
If your horse kicks, tie a red ribbon in his tail to alert other riders (Photo 4A). If another horse in your group sports a red ribbon, avoid crowding him, and stop your horse a safe distance away to avoid risk of injury.
Tie the horses safely. Bring along a halter and lead, or ride with the halter under or over your bridle. (Stash the lead rope in your saddlebags so it doesn’t get snagged on anything while you’re on the trail.)
Don’t tie with reins; not only can they break (resulting in a loose horse), but also a horse’s mouth can be seriously injured if he pulls back with the bit in his mouth. Tie all horses with quick-release knots that can be untied in a hurry, even if one sits back and puts pressure on the rope.
Also, leave the right amount of slack. “On large trail rides, I frequently see riders tying their horses long so the horses can eat,” says Palm. “For safety reasons, always tie so your horse can’t drop his nose below his knees. If you tie long, there’s too much danger of him getting a leg over the rope, which can lead to an injury.”
On trail breaks, allow plenty of room between horses when tying. Keep all out of kicking range from each other; they may be able to edge closer than you think if they’re at the end of their lead ropes.
On the other hand, don’t upset the horses by tying them where they can’t see the others; as herd animals, they’ll be calmer when they know their buddies are nearby.
If you’re stopping for more than 10 minutes, loosen the cinches/girths to give the horses a chance to relax – and urinate, if they need to. If grass is nearby, you can let your horse graze as you hand-walk him with a halter and lead rope.
Before you mount up, tighten all cinches/girths, then check them again a few minutes later before leaving the rest stop, so you don’t risk a loose saddle and a possible fall.