Knowing you can control your horse in any situation is a great confidence builder. One exercise to foster this kind of control is the “stop and drop.” It enables you to stop your horse at any speed and drop his poll toward the ground, all in one fluid motion. While it sounds simple in theory, it does take some practice. Let’s break the training down to its component steps so it’s easy to understand.
[RELATED: More Confidence Tips]

A Resistol RideSafe is one way to keep yourself safe in the saddle. (As an Amazon Associate, we earn from qualifying purchases made through affiliate links.)
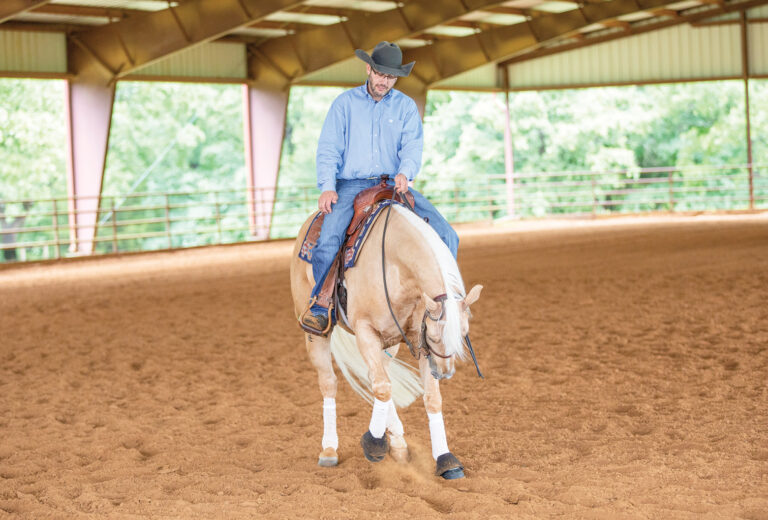
Step 1: Lower the poll. The first step is to teach your horse to lower his head. Start mounted, at a standstill. Take hold of the reins with both hands and start drawing back, applying a little more pressure in one rein than the other to ask for a slight tip to one side as well as a lowering of his head. (Asking for a slight lateral bend will make it easier for your horse to understand, as opposed to applying an equal pull on both reins.)
Use only enough pressure to get the reaction you desire—a slight head drop. At first your horse may offer something different, such as raising his head, backing up, or even bracing and pulling back. Just be patient and maintain the gentle pressure until he does finally drop his head—even if just a smidge—then instantly release the pressure so he knows this is what you wanted. Next time, ask him to drop his head a bit more. Repeat until he becomes fluent in this, and will lower his head at least down to the level of his knees.
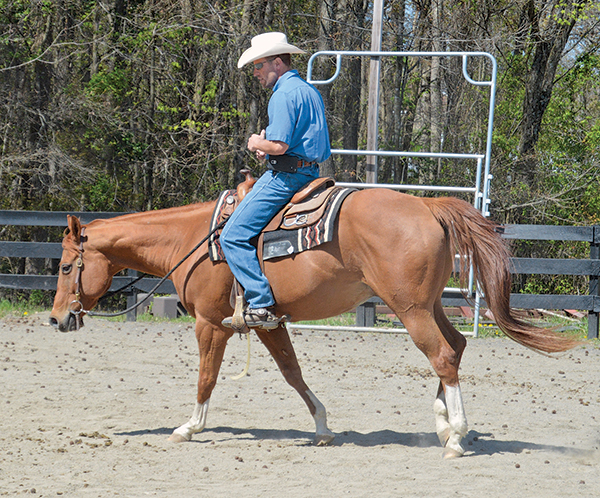
Step 2: Walk to a stop. Once you can reliably “ask” your horse’s head down at a standstill, move him forward a short distance at a walk, then ask for a stop and drop. Do this by relaxing your seat, saying whoa, and drawing back on the reins in the exact same way that you did at a standstill.
If your horse stops but doesn’t immediately drop his head, maintain the gentle pressure on the reins (with a bit more pressure in one than the other, as before), until he does, then instantly release. If he backs up a little while dropping his head, that’s OK—go ahead and release the pressure. Eventually he’ll stop backing and simply drop his head once he realizes what you’re after.
[SHOP: Good Gear]
5 Star 7/8-inch Thick Western Contoured Natural Pad
Cactus Saddlery Relentless Floral Tooled Slip-Ear Headstall
NRS 1/4 Breed Basket Stamped Heavy Oil Ranch Cutter
Bob Avila Collection O-Ring Signature Snaffle
Step 3: Move faster, longer. Once your horse stops and drops reliably from a short walk, start asking for “more.” Walk farther before stopping, then eventually try it after a few steps at a trot. Gradually build the distance you go at a trot before asking for the stop and drop. Only after you feel completely confident riding this exercise at a trot (and this may take many practice sessions over time) should you try it at a lope. Once you’re ready to try the lope, be sure you’ve spent a good bit of time continuously trotting, as this will put both you and your horse in the right mental frame to try it at the faster gait.
Keep at it. No matter your confidence level when you start this exercise, if you follow these steps, in this order, as incrementally as necessary to achieve results, you’ll be on your way to having a whole new outlook on riding. And your confidence will be boosted to the next level!
Scott Purdum is a trainer, coach, and clinician based in Fredericksburg, Virginia. Clinics at his ranch and at other venues in the east focus on horsemanship, working obstacles, colt-starting, and more. Learn about his Advantage Horsemanship Program at advantagehorsemanship.com.


