
Being out of control on an animal that outweighs you by a thousand pounds isn’t a good feeling, especially if it happens to be a horse that’s spooking, bolting, trying to run off, or hurrying to catch up with other horses. If you find yourself in this situation, you need to be able to regain control quickly and safely.
“The emergency stop is an ideal maneuver to control speed and to regain control of your horse if he’s going too fast or starts bucking,” notes top trainer/clinician, Lynn Palm. “This is also a technique I use if a horse is being arrogant or ornery, wants to resist and put up a fight, and isn’t respecting what I’m asking him to do.”
With Palm’s emergency-stop technique, you’ll flex your horse’s head and bend his neck to one side, turning him in a circle as tightly as possible while still maintaining forward movement. Unlike simply pulling back on the reins, which encourages him to resist and push against your hands, this maneuver prevents him from getting away from you and reinforces respect.
The key is to keep your horse moving forward in the circle until he shows submission, starts to relax, slows his gait, and lowers his head and neck, becoming less stiff and resistant.
When your horse begins to slow down and relax, his reward is to be able to straighten his neck. This is a reward because horses naturally want to move straight – not in a tightly bent circle.
A few important notes:
• If your horse is rearing, don’t use the emergency stop – pulling him to the side when he’s in this position could cause him to lose his balance and fall, possibly on you. If he rears, immediately encourage him to go forward. This will safely bring down his front end.
• Don’t use the emergency stop on uneven ground or on a hillside where your horse could stumble or fall.
• Make sure there’s enough area for your horse to turn safely.
• If you’re going straight ahead and can safely do so, turn to your horse’s “easy” side; that is, the one he most readily bends and on which he tends to pick up his lead.
• If you’re already curving to the right or left, turn in that same direction to apply the emergency stop. This will keep your horse as balanced as possible and will facilitate the tight turn.
• When you’re turning, the rein on the inside of the turn is known as the inside rein, and the rein on the outside of the turn is known as the outside rein.
Step #1: Shorten One Rein
If you’re like most riders, if your horse speeds up on his own, your natural instinct is to pull back on the reins with both hands (Photo 1A). But when you pull straight back toward your body, your horse can throw up his head, resist or run through the bit, or create a tug-of-war. On the trail, these resistant maneuvers can lead to dangerous situations, such as going off-trail down a hill, slamming into other riders, and even falling.
With the emergency stop, you’ll shorten one rein smoothly and quickly so your horse is forced to turn in a tight circle.
Note that if you don’t make the rein short enough, or turn your horse tightly enough, the maneuver loses its effectiveness. “You need to have a very tight inside rein and a very loose outside rein,” Palm cautions. “Otherwise, if your horse resists turning, he could rear up.”
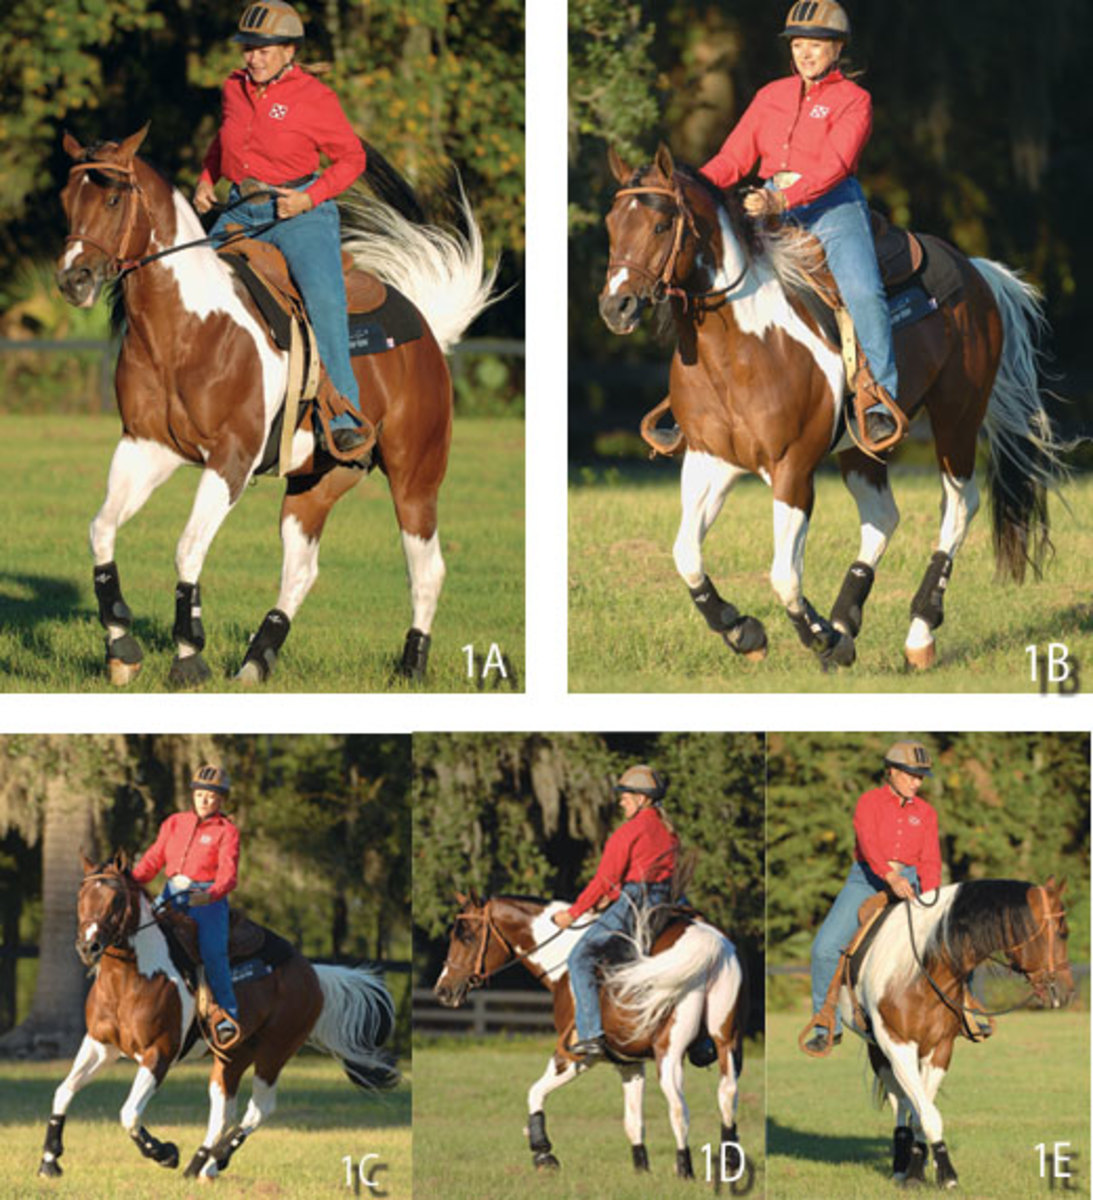
As an example, we’ll use a turn to the left. If you’re using an open rein (a rein in each hand and applying direct pressure on the bit) you’ll be in a ready position to apply the emergency stop (Photo 1B). However, if you’re using an indirect rein (or neck rein, with both reins in one hand), first switch to a direct rein: Take the right rein in your right hand and the left rein in your left hand.
Then, with your left hand, pull the left (inside) rein to the left (Photo 1C) until your horse’s head flexes and his neck bends in that direction (Photo 1D). Hold your hand low and sideways so you pull his head back toward your knee and upper thigh. Keep slack in the right rein so that you have no contact on that side (Photo 1E).
This should be a quick movement, but smooth. Remain centered in the saddle and balanced; don’t lean forward or into the turn. To perform this maneuver smoothly on the trail in an emergency situation, practice at home. (See “In the Arena,” below.)
Step #2: Keep Moving Forward
If your horse is running when you use the emergency stop, your cues will bring him down to a trot and then to a walk. But you don’t want him to stop altogether. If he stops and balks, or stops with his head turned sideways, he may try to rear to avoid rein pressure.
As long as you keep your horse moving forward in the maneuver, you won’t make him resistant or allow him to lean on the bit.
When your horse’s head and neck are turned to the side and he’s still moving forward, it’s not a position he’ll want to hold for long. That’s why the emergency stop maneuver is so effective.
“It’s like asking someone to do a back walk-over,” explains Palm. “It’s one thing if you’re double-jointed or a gymnast, but the average person wouldn’t want to hold that position. It’s the same thing for your horse. He can do it, and it’s not painful for him, but it’s not a comfortable position to stay in for long.”
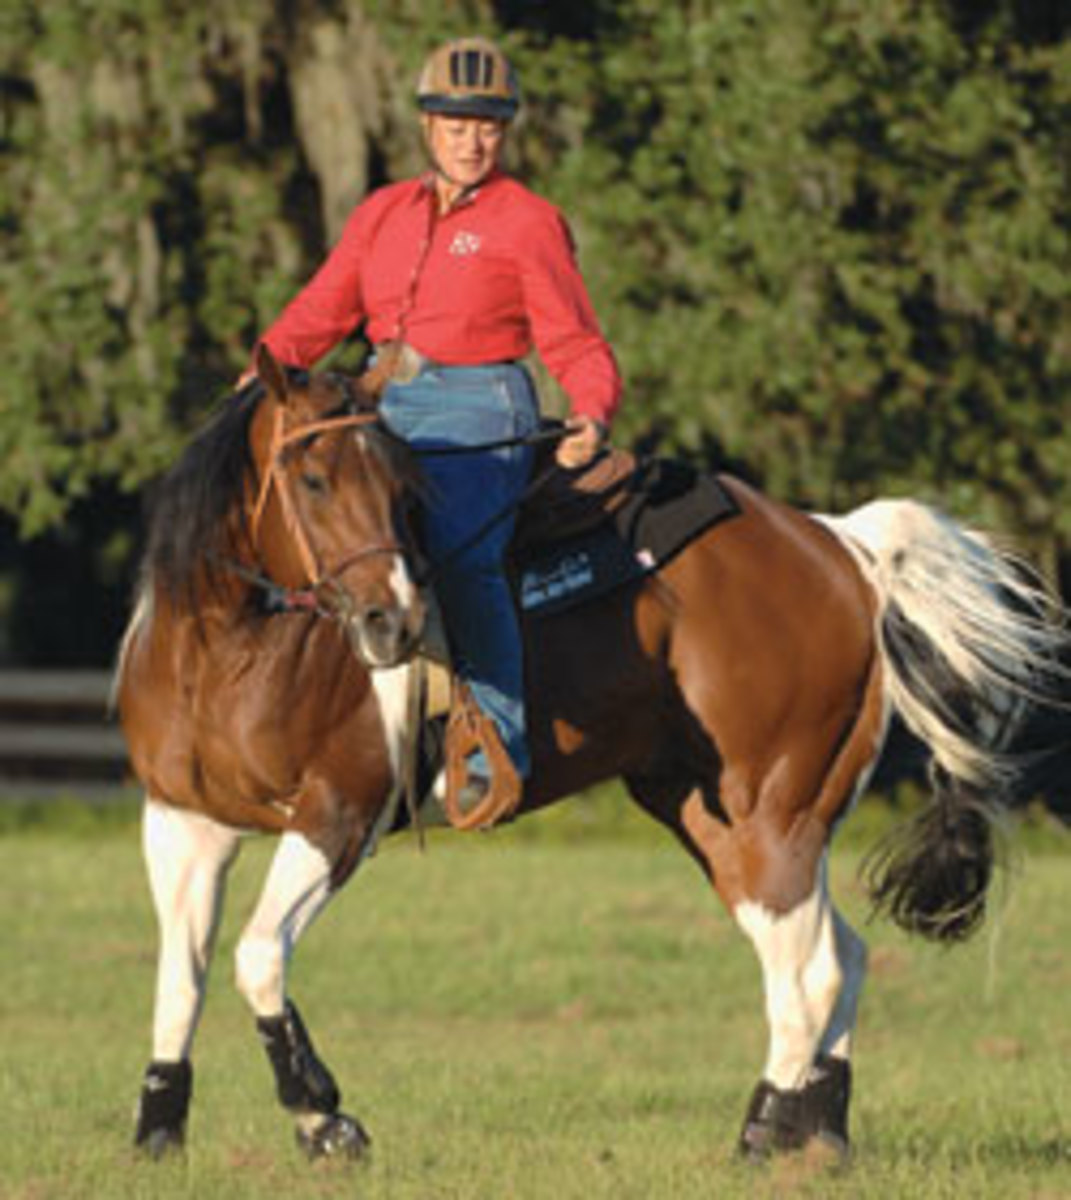
To keep your horse moving forward, sit deep in the saddle, keep the outside rein loose, and use your legs as actively as necessary (Photo 2). Don’t give in to a natural tendency to lean forward for balance; this will actually throw both you and your horse off balance, and you’ll lose control.

Step #3: Release
Your horse won’t relax his head and neck if he’s moving at high speed. But once you’ve put him in the emergency stop, he’ll start to slow down and relax.
When your horse ceases resisting, release the rein pressure until his head and neck are once again straight in front of him (Photo 3).
Important: Don’t release the rein pressure if your horse is still stiff and resistant, or is trying to snatch his head away from you. If you release at this time, he’ll just learn that he gets rewarded for resisting.
Step #4: Stop & Walk Forward
Once your horse softens and you release the rein pressure, bring him to a full stop so he can stand quietly and absorb what has just happened. Let him stand for a minute or two, and give him a pat. Then ask him to quietly walk forward.
“If you’re riding with a group and you’ve had to do an emergency stop because your horse was acting up or bolting, his actions may’ve taken you away from the other riders,” notes Palm. “If that’s the case, you may need to get off and walk him for a few minutes to rejoin the group. Do whatever you need to do to continue on in a safe manner.”
If you employed the emergency stop because your horse spooked at something and took off, go back and address the cause of the spook to complete the lesson.