
If you look at the diagram of this exercise and think, “Well, that looks easy!” I want you to stop what you’re doing, saddle your horse, and go try it. You’ll soon realize just how difficult it is to achieve straightness for lead changes.
I use this drill in all of my clinics, as well as at home with my riders. But this drill really comes in handy when you’re riding alone at home, without anyone to point out what you’re doing wrong as you approach the middle of the arena, make your way across, change leads, and head in the other direction. The cones you knock over or go on the wrong side of and the poles you hit are all you need to tell you, “Whoops—I messed that up!”
Here, I’ll take you through the drill, pointing out potential trouble spots and other tips to negotiate the exercise correctly. It’ll take some practice, but you’ll see results!
The Goal
This drill has many benefits. It keeps you from letting your horse drop his shoulders and diving into the middle of the arena, cutting off your circle. It also keeps you straight through the middle of the arena. This straightness is key for a correct lead change, with your horse changing simultaneously in front and behind. Finally, it promotes straightness as you leave the middle of the area and depart on your next circle, which again prevents cutting the corner and dropping a shoulder.
Note that while this exercise is geared more toward reiners, it’s an excellent challenge for all riders to gain better control of their horses.
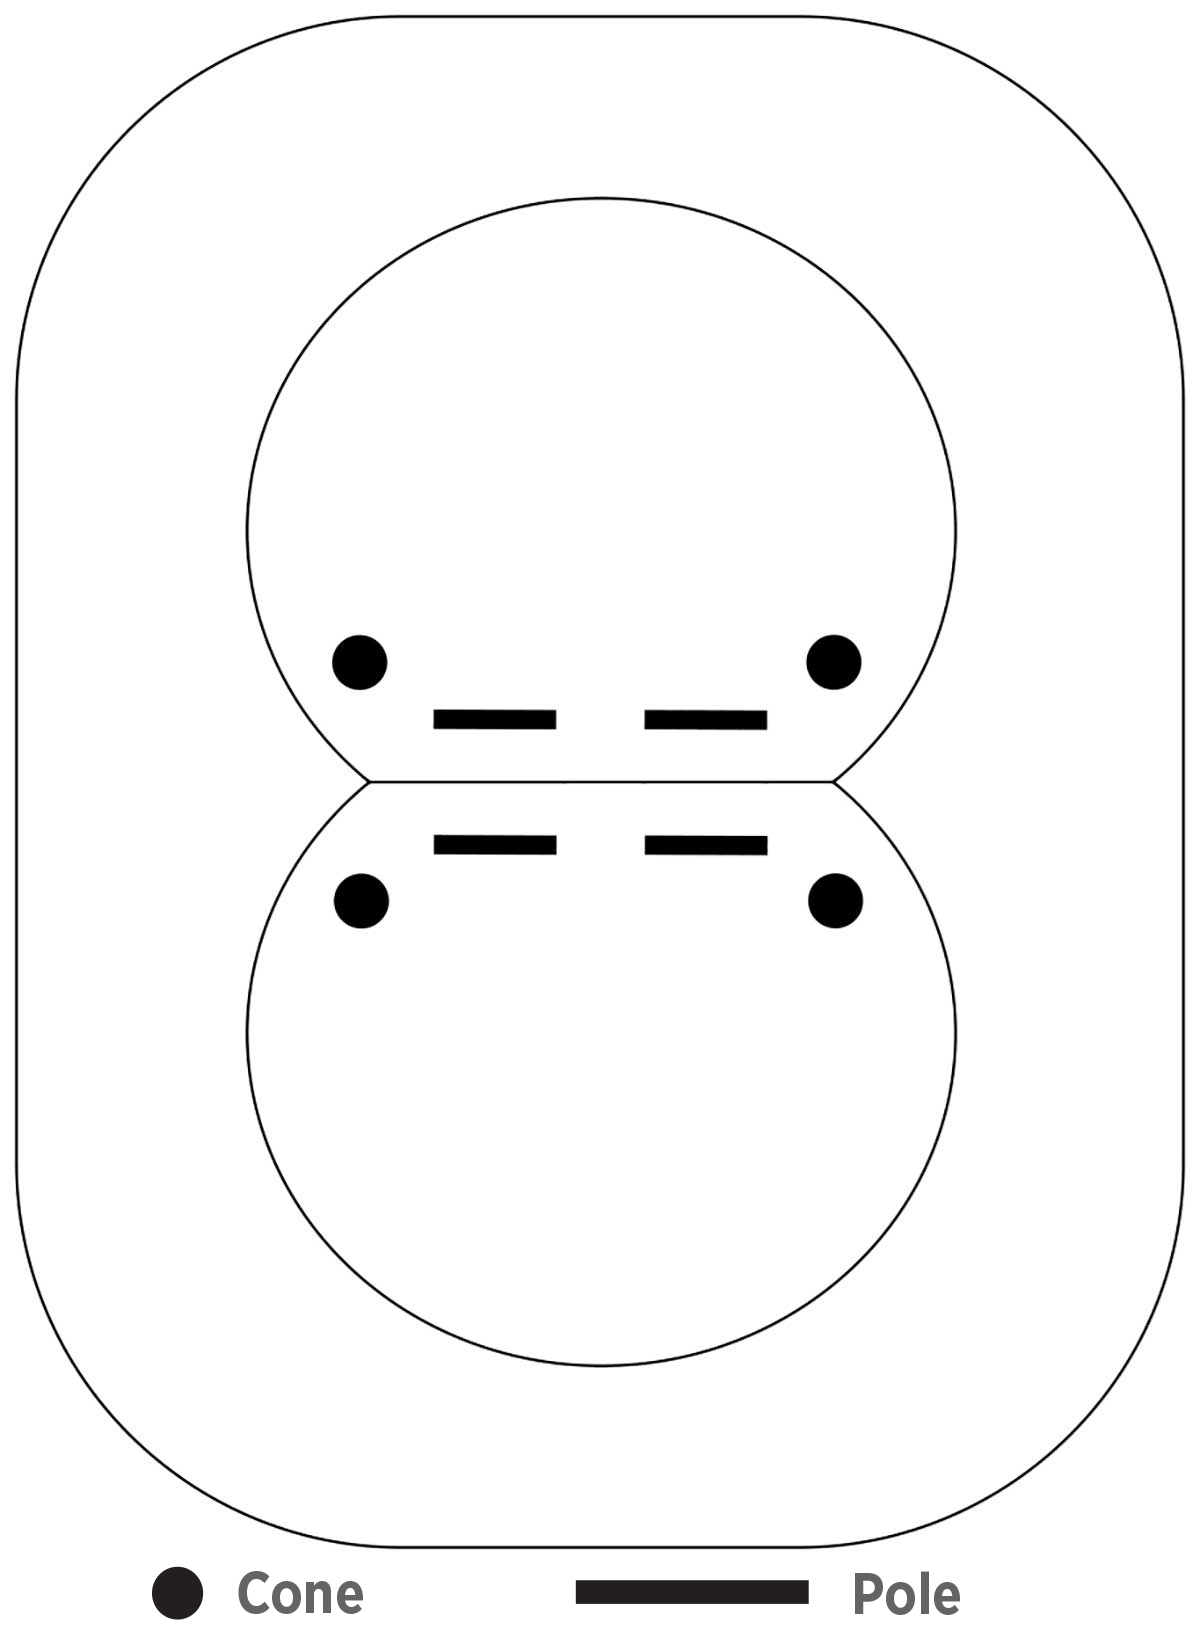
The Setup
For this drill, you’ll need four cones and four poles. Set each cone near the corners of your figure 8, where you’ll approach the middle of the arena. They should be about 10 feet off the fence. Create a chute with the poles in the middle of the arena, with a 10-foot gap between the two poles that make each side of the chute. Be sure the gap is centered in your arena because this is where you’ll cue your horse for a lead change.
The Drill
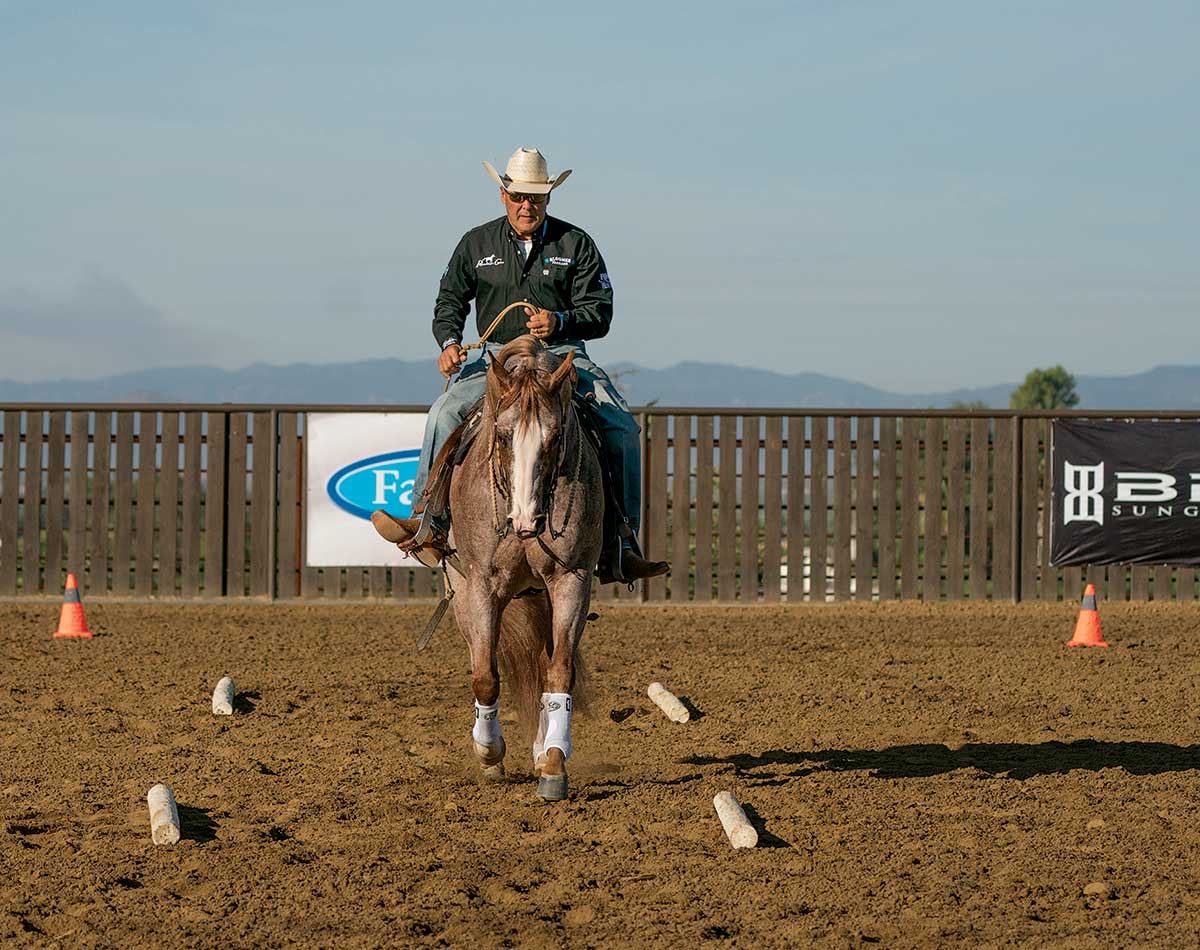
In these photos, my horse is loping on his left lead in a large circle to the left, and he changes to the right lead and a right circle. Swap these instructions when working in the opposite direction.
Step 1: As you come to close the circle in the middle of the arena, keep the cone to the inside of your path. This means you’re completing a full circle. When riding a figure 8, it’s more like two Ds, with their flat sides facing. Completing the circle without cutting it off means you’re coming into the middle set up for a straight, successful lead change and departure in the other direction.
Trouble spot: If you cut off that corner and/or your horse drops his inside shoulder, you’ll run over the cone or lope past it on the wrong side. This means you need to focus on your path—your horse will go where you’re looking. If your eyes say “shortcut!” your horse will cut off the corner. You might also need to elevate your horse’s inside shoulder to keep him from ducking to the inside. Do this by lifting your inside rein and driving with your outside leg.
Step 2: As you come off the corner, straighten your horse’s body, staying on the left lead. These few strides of straightness are important as you approach your lead change. With his body square, straight, and upright, your horse is best prepared to change leads in front and back at the same time.
Trouble spot: If you’re not on-the-money straight and centered, your path of travel will go on the right side of the chute if you haven’t steered enough or on the left side of the chute if you over-steer. This tells you loud and clear that you’re not looking nor steering where you need to be.
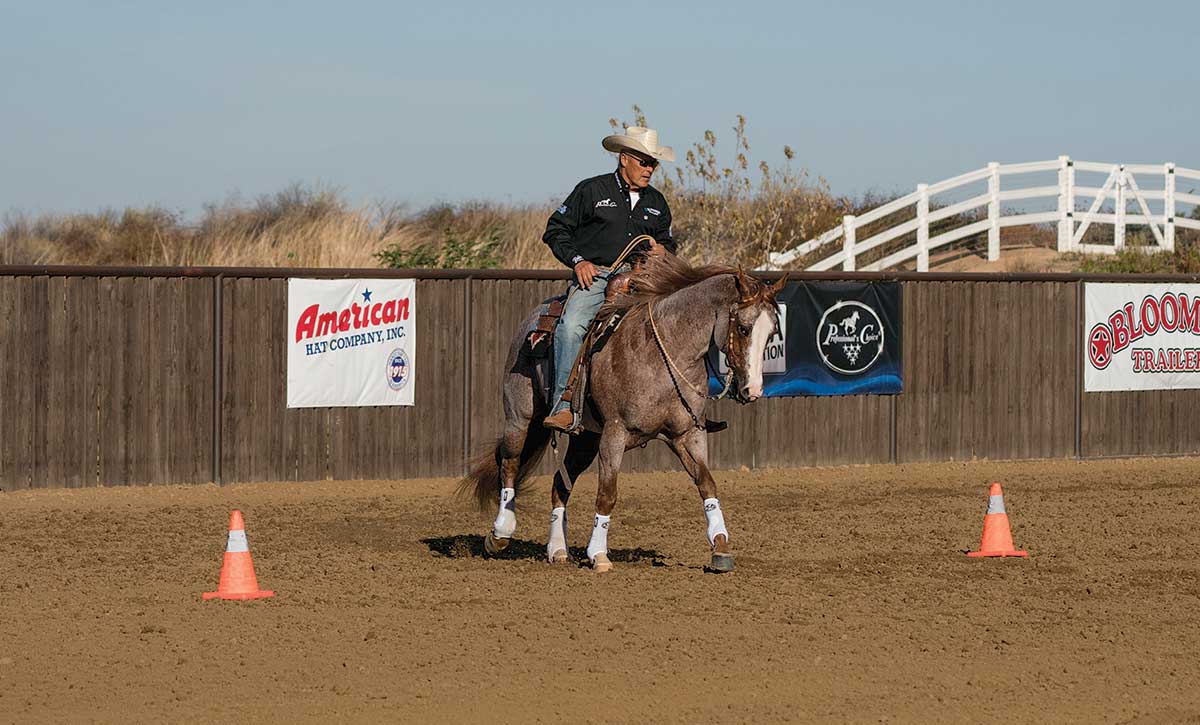
Step 3: The lead change will come quickly and should be executed in the gap between the poles. This space represents the center of the arena. With your horse already square and straight from his approach, he should be able to change leads correctly.
Trouble Spot: If your horse is leaning into the direction of travel—the left in this case—then he can’t change leads in front and in back simultaneously. He’ll drag his hind lead, which is a penalty.
Step 4: After changing leads, apply those same guides to straightness that you used approaching the change. The second two poles in the chute will help keep you straight as you exit the middle of the arena and depart on your circle to the right.
Trouble spot: If your horse isn’t straight after the lead change, he could dive into his right circle, which means he’ll hit or cross the second pole on the right or go on the wrong side of the cone that lies ahead. This tells you that you must work on post-lead change straightness to finish the maneuver correctly.
One More Benefit
As you read the instructions for this, you’re probably going at a slower pace to take it all in. But when you’re in the arena, each step will come quickly. This helps you prepare your timing and prepares you for the rapid-fire pace of the approach, lead change, and exit.
Bob Avila, Temecula, California, is an AQHA world champion, three-time NRCHA Snaffle Bit Futurity winner, NRHA Futurity champ, and two-time World’s Greatest Horseman. He’s been named the AQHA Professional Horseman of the Year. Learn more at bobavila.net.