
A step-by-step progression when teaching neck-reining can lead to success.
When you first start a horse or ride one that hasn’t been well-trained to neck-rein, his natural tendency when the rein lies against his neck is to turn his head in the opposite direction of the way you want to turn. That rein has shortened just enough to make him think, “They want me to tip my nose that way.” Meanwhile, you’re in the saddle thinking, “How the heck am I going to get him to connect the dots and look to the left when I lay the right rein on his neck?”
There’s a natural progression for training your horse to neck-rein, and the foundational elements are essential for success. Otherwise, you’ll end up with a confused horse and a frustrated rider. Here’s the process I use.
It Starts With a Pull
For this article, let’s focus on steering your horse to the left. When he’s a solid neck-reiner, that means you lay the right rein on your horse’s neck, and he steers to the left following his head. But that doesn’t come without putting in a good foundation.
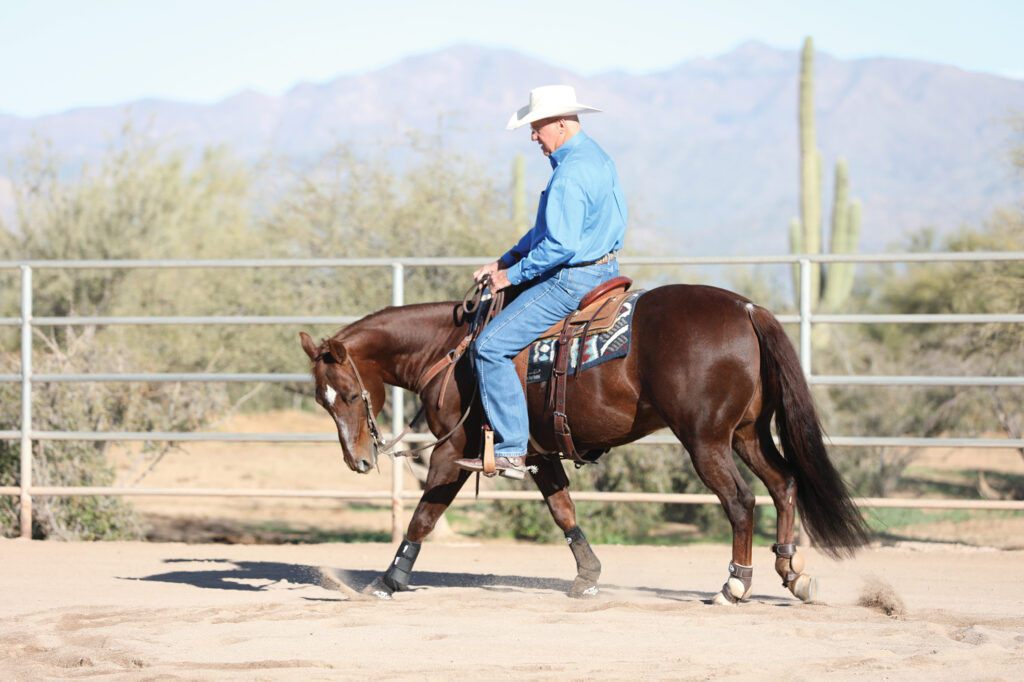
Working with two hands on split reins with even contact on the horse’s mouth, lay your right rein on your horse’s neck. Wait a split second to let him respond, and then give a slight tug on the left rein to lead him in the correct direction. Repeat that action patiently and quietly to help it sink in without causing frustration or a sharp reaction.
Keep It on an Arc
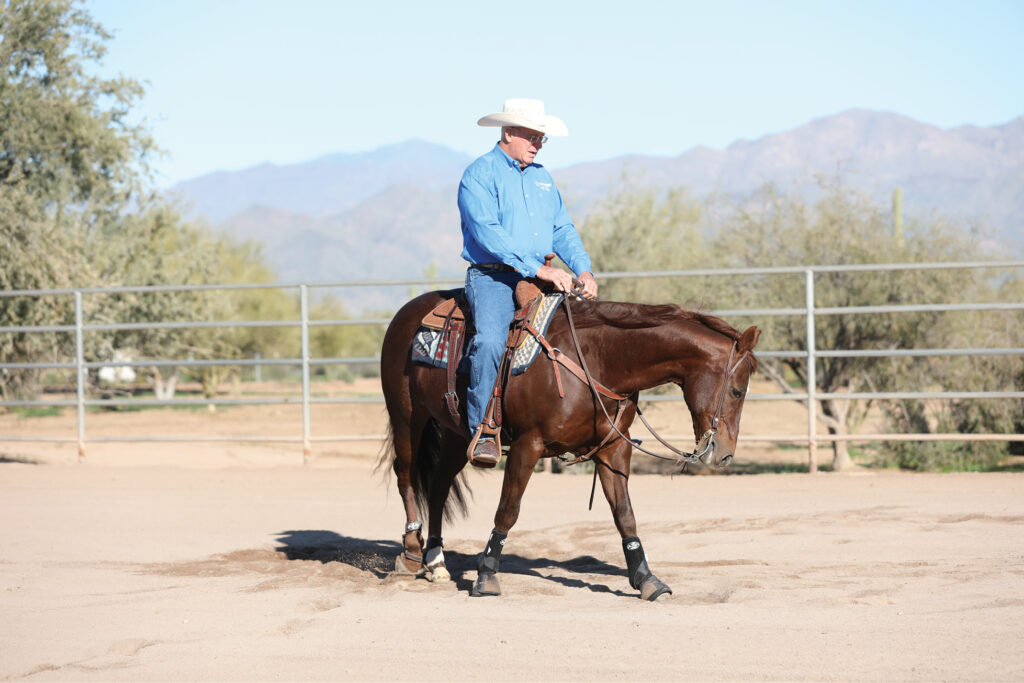
While you work on neck-reining, don’t forget the rest of his body position. Work to keep his body on an arc in the direction you’re reining. In this case, to the left, his body should be in a backward-C shape.
Drive your horse forward at a steady walk, with your right leg lightly pushing his left hip to the inside of the arc. Don’t use too much leg or place your leg at his belly, because that will put him in a reverse arc. Lay your right rein on his neck, and then reiterate that cue by giving a slight tug on the left rein, until he starts to go to the left. Keep it positive by rewarding the slightest try.
Grab Your Romals
When a horse needs a neck-reining tune-up, I like to use romal reins, but I cross them under his chin, with the left rein connected right ring of the bit and the right rein on the left ring of the bit. I first saw this in the 1960s and was curious if the trainer had done it on purpose or by mistake, so I asked.
When you lay your right rein on your horse’s neck, it connects to the left side of the bit, which tips his nose and leads him in the correct direction. Additionally, the knots on the reins amplify the signal when you lay the rein on the neck.
If your horse still doesn’t go in the correct direction, raise your hand higher on his neck. Use an in-and-out motion, laying the rein on his neck and taking it off as soon as he responds.
When Is Neck-Reining a Problem?
Horses are trained in all different ways and at all different levels. The person who started your horse might’ve taken shortcuts and not kept him on an arc during his neck-reining training, or maybe the trainer didn’t follow through enough times for the training to sink in. Or perhaps your horse was only taught direct-reining. Another common problem is using too much outside leg directly in the horse’s belly, which puts him on a reverse arc and doesn’t set him up for neck-reining success.
Remember to think about where you’re laying the rein on your horse’s neck. Too many times I see people basically try to shoulder-rein the horse. They hold their hand so low that the rein lays on the shoulder. We want it farther up the neck. This also helps keep the horse on a correct arc instead of possible pushing his shoulder in on the arc.
The most common issue I see riders run into with this is lack of patience. It takes the horse a little bit to figure it out. You have to be patient and keep trying with consistent technique. Don’t get stronger or harsher in your cues. Don’t start using more leg because you’re frustrated. Move your legs softly, and keep rubbing the rein on the neck and either tug on the inside rein or use crossed romal reins to help.
I always say, your horse performs as you repetitiously do. We have to practice this repetitively and correctly to achieve results.