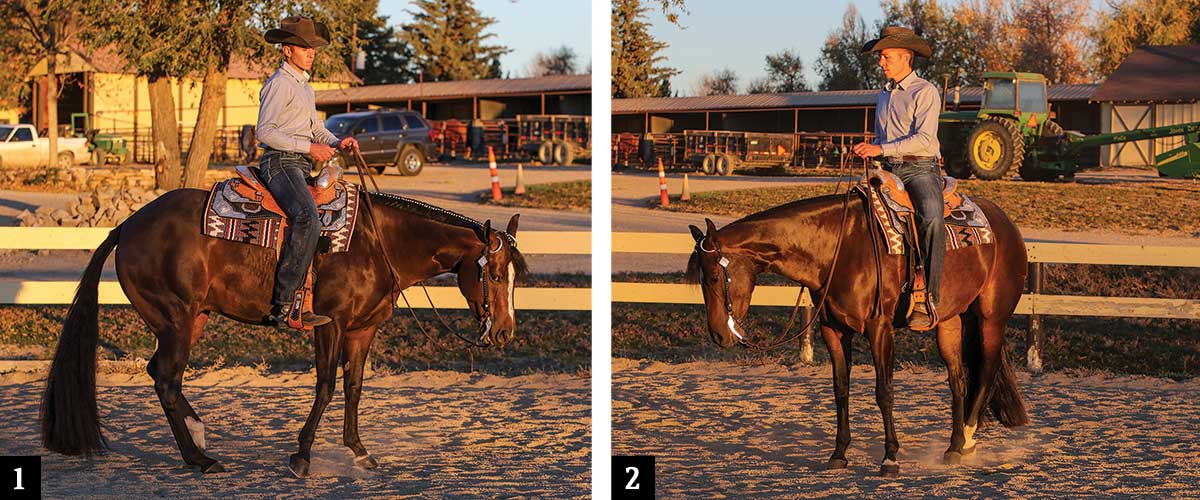
A metal trail gate in a trail pattern increases the degree of difficulty for horse and rider. In today’s tough trail classes, these challenging obstacles set competitors apart. You might be intimidated by working a metal gate; don’t be. The steps are basically the same as with a rope gate, but require more precise pivots and turns on the forehand to get it just right. When practicing at home, work gates of all heights, widths, and weights so you’re prepared for anything. This gate is lower than a traditional gate might be, but it’s a good one to test my horse’s response and my balance in the saddle.

One
Before working the gate, test your horse’s response to your cues to move only his front and hind feet. Beginning with moving his front end (a pivot) I ask my horse to execute 90-degree turns to the left and right. I use a neck-rein cue to move his front feet a couple steps at a time, and then pause, making him wait on me for the next cue to move again.
Two
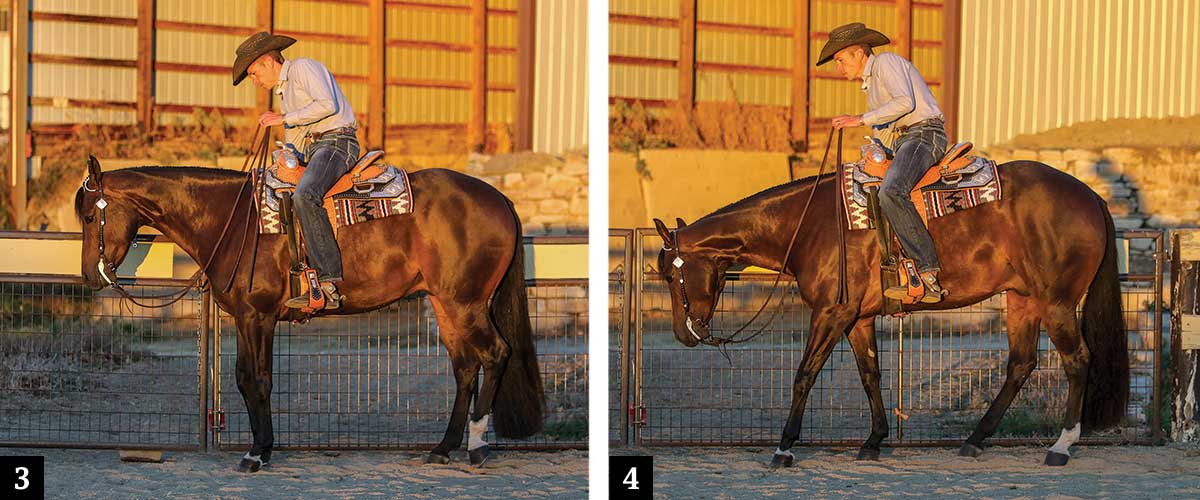
Next I work on moving his hind feet. I slightly block his forward motion with my hand, and use my legs to push his hind feet left or right. I work incrementally to ensure that he’s listening to my cues. His attention means I can ask him to make the small movements necessary to precisely work the metal-gate obstacle.

Three
Now to work the gate. I ride my horse forward alongside the gate to the latch, keeping his body parallel with the gate. Because of this gate’s height, I must be careful with my weight when I reach for the latch. My weight will override my leg and hand cues, so practicing at home ensures that my cues are being processed correctly by my horse.
Four
After unlatching the gate, I back my horse a few steps, remaining parallel with the gate. Backing this distance allows me to open the gate and pass through it without my horse’s head getting too close to the fixed side of the gate. This is a good place to pause and let my horse relax. Frequent pauses ensure that he doesn’t rush through the gate once we open it.

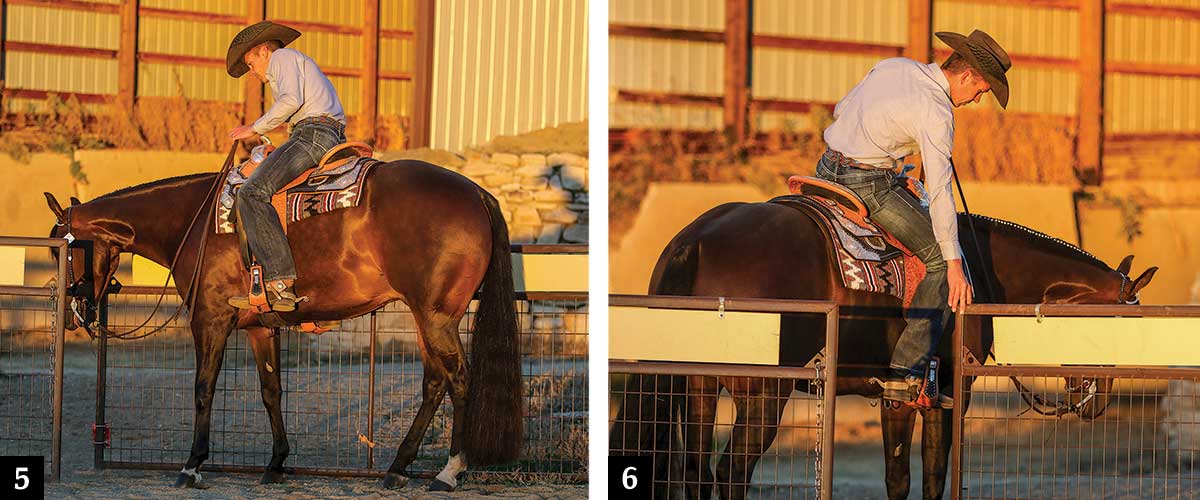
Five
As I open the gate, I cue my horse to make a small pivot on his hind end. I isolate his front feet by lifting my hand and moving it to the right while blocking his hind end with my right leg. Moving his front feet with the gate while keeping his hind feet stationary will keep him aligned with the gate. As he moves, I push the gate to open it away from us. I keep my right hand on the gate at all times to prevent it from swinging back on my horse or flying open, out of my control.
Six
After I push the gate open and ride forward to get my horse’s body halfway through the obstacle, I execute a small turn on the forehand to move my horse’s hind end out of the gate’s opening. Keeping my horse’s front feet in place means I can keep my hand on the end of the gate while he brings his body completely through the obstacle.

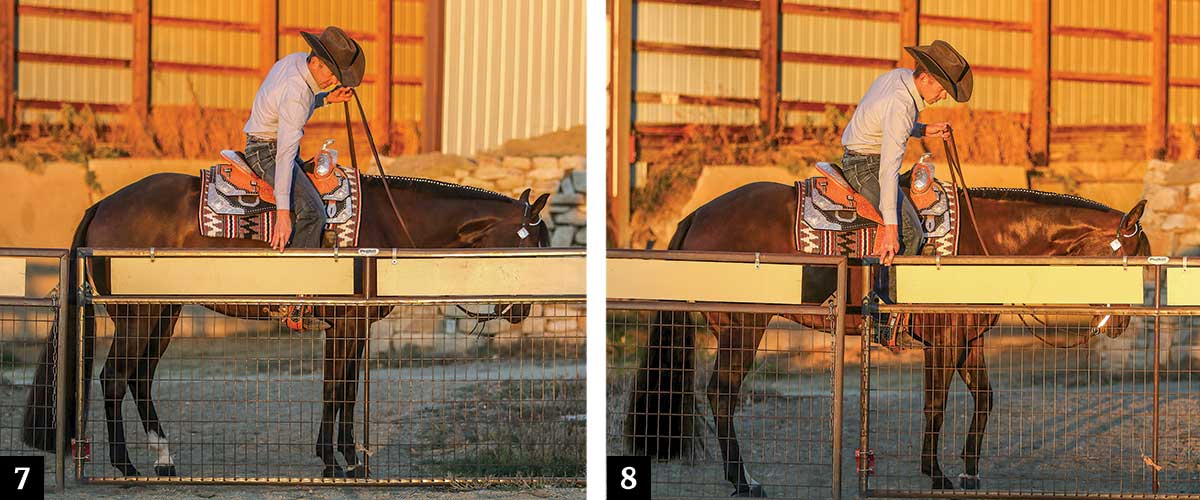
Seven
Once we’re through the gate, I ride my horse forward, parallel with the gate, and use a small forehand turn to move his hindquarters over to stand beside the gate. I can cue him to sidepass a few steps to completely close the gate.
Eight
Finally, I back my horse a few steps in a straight line until my leg is aligned with the end of the gate. Staying close to the gate, with my hand on it, keeps me in control the entire time we work the obstacle. I can latch the gate, pause for a moment, and move onto the next obstacle if I’m competing or re-work the obstacle to fine-tune all the parts if I’m at home.
Seth Fender, Loveland, Colorado, specializes in preparing all-around horses for youth, amateur, and open competition of all levels. He’s a lifelong horseman who understands the need to tailor training and coaching programs to individual horses and riders. He’s trained and exhibited world champions and top-10 finishers in both AQHA and APHA competition. Learn more at sethfender.com.

