
Every once in a while, you’ll encounter a trail pattern that requires you to change hands to work the gate. No matter if you ride left- or right-handed, it’s important that you know how to approach the gate from the opposite side, swap your reins from one hand to another (without incurring penalties), work the obstacle, and return the reins to your regular rein-holding hand.
Here, I’ll go through each of those steps, pointing out common trouble spots and how you can avoid them. Even if you don’t show, these pointers could help you work a gate out on a trail ride.
1. The rider has approached the gate and aligns her horse’s left shoulder with the gate standard, in line with the gate’s “latch.” She can take a minute to collect herself before switching her reins to her left hand, but she shouldn’t delay too long, or her pattern will lose a fluid feel.
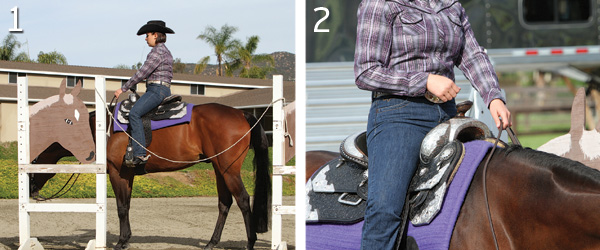
2. Before she switches her reins to her right hand, the rider starts with them in her left hand, with her index finger between the two reins. This is a standard position for most riders. (Unless you ride with your reins in your right hand. If so, swap the left/right directions in these steps.)
3. She removes her left index finger from between the reins, holding the two reins together in her left hand, and places her right index finger between the reins instead, grasping the pair of reins with the rest of her right hand and releasing them from her left hand.
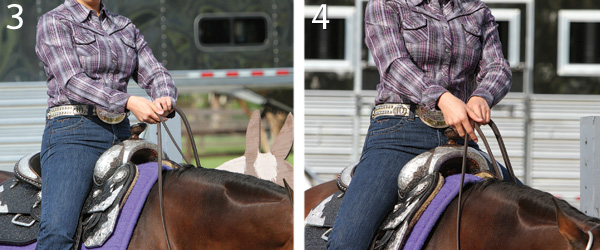
4. Here’s a “don’t”: She has both index fingers between the reins, which results in a disqualification. She’d also be disqualified if she took up one rein in each hand. The change of hands should be quick without any hesitation or rein adjustment.
5. Her hands and reins are now in position to work the gate with her left hand. Notice that she’s left the tail of the reins on the left side of her horse’s neck. Doing so reduces the movements required to efficiently work a gate and return to a regular hand position afterward.
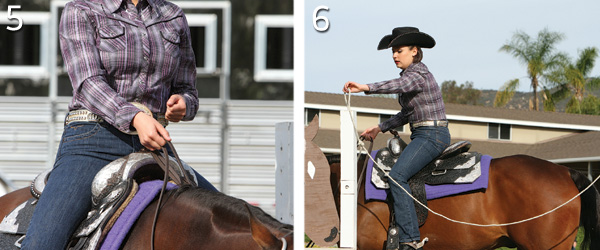
6. The rider reaches to unlatch the rope from the standard. Notice that she’s placed her horse close enough to the gate that she doesn’t have to lean too far out of the saddle. She’s able to safely reach the rope while keeping her seat in place.
7. She rides her horse centered between the standards, keeping the rope out to her left side and out of her horse’s way. You can see the path she’ll follow through the gate in the dirt in front of her: forward and to her left.
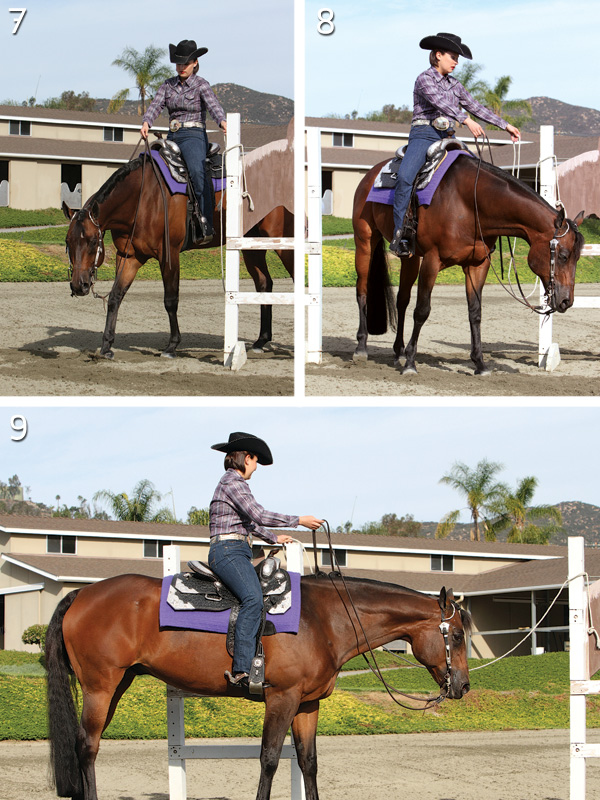
8. When her horse’s midsection passes the standards, the rider turns her horse to the left and aligns him parallel with the gate standards. She’ll ensure that she’s close enough to the gate setup to replace the rope, but not so close that she’s in danger of hitting one of the standards.
9. The rider backs her horse a few steps to align his shoulder with the gate’s latch, leans over, and places the rope’s loop over the gate standard. She’ll settle for a moment, and then return her reins to her left hand, reversing the steps outlined in photos two through five.
Jill Newcomb, San Marcos, California, is a lifelong horsewoman and an AQHA judge. She specializes in all-around events and has successfully coached and shown world champions and All American Quarter Horse Congress winners. Learn more about Newcomb’s program at jillnewcomb.com.