
Bridling is a basic part of everyday riding, which might mean you don’t pay much attention to it. However, when you lose focus on even the most routine task, it can lead to bad habits that grow into big problems. Here I’ll share a few common bad habits I see and then detail proper bridling technique that keeps your horse in a positive frame of mind for the ride ahead.
Minor Mistakes = Big Problems
At its base, bridling is simple. Grab the bridle, take off the halter, put on the bridle. The problem can come in your approach and subtle technique adjustments that annoy or even cause your horse discomfort and irritation.
❌ Don’t rush the process. Just because you failed to plan and are in a hurry doesn’t mean it’s OK to ramrod your way through the bridling steps.
❌ Don’t hit your horse’s teeth with the bit. At the least, this can annoy him and sour his attitude. At the worst, it can cause him discomfort.
❌ Don’t get aggressive when pulling the crownpiece over the ears. Your horse’s ears are sensitive and need to be handled carefully.
❌ Don’t ignore adjustment, especially if you use one bridle on multiple horses. Chances are, they all need their own adjustments to the cheekpieces and curb strap for proper fit.
❌ Don’t ever use anything but a browband headstall when using a snaffle. A one-ear headstall is easy to rub off since it doesn’t have a throatlatch.
❌ Don’t use metal snaps on reins if you can avoid it. If you must, cover them with electrical tape.
You might think one or two instances of the above situations can’t cause issues. But they build on each other and exponentially influence your horse’s reactions to you. What starts as a minor annoyance to him can build his frustration and resentment toward bridling, making him difficult to bridle. Avoid these problematic behaviors by following my bridling steps.
READ MORE: Pre-Ride Tack Check
Bridling 1-2-3
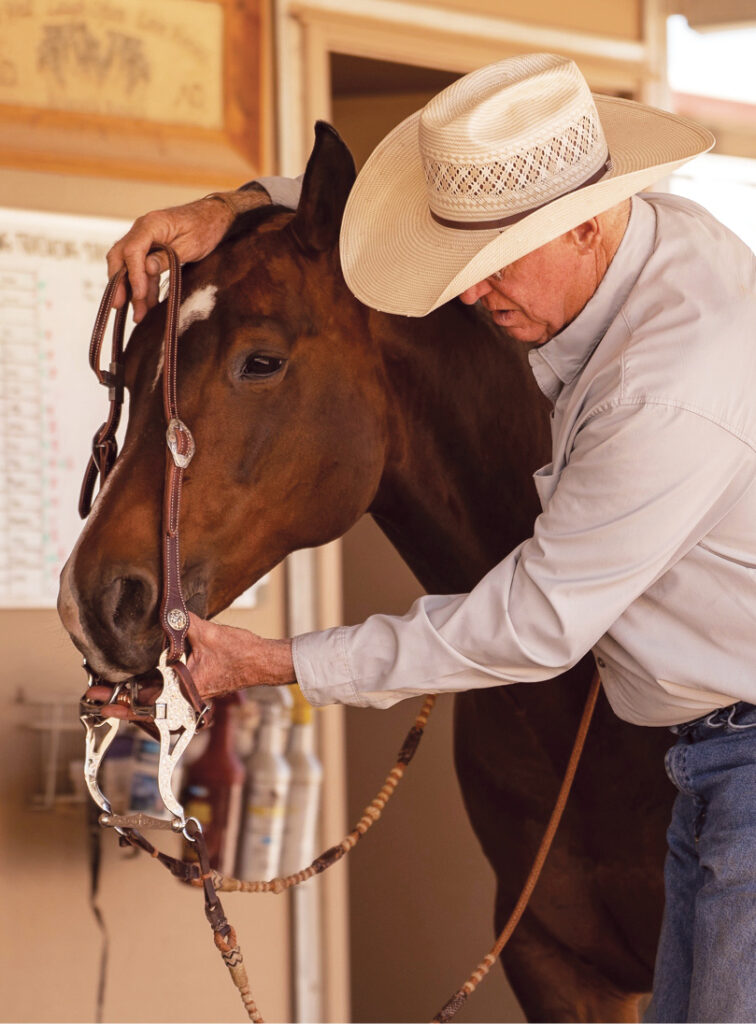
You’ve chosen the correct bridle for your horse, and you’re ready to put it on for a ride. With the halter around the horse’s neck (crossties disconnected or trailer-tie undone to avoid a pulling-back wreck), get the bridle ready in your hands first.
Place your left hand between the curb strap and the bars of the bit with your fingers forward. Lift the headstall with your right hand to raise the bit to your horse’s mouth. Place your left thumb in the corner of your horse’s mouth at the bars and insert it to slightly open your horse’s mouth. Lift the bit to your horse’s mouth with your right hand. Slide your left hand back to help pull the chin strap into the chin groove and use your right hand to pull the bridle over your horse’s ears. I prefer to do the left ear first, pushing the ear forward to get the crownpiece over. Then I do the opposite ear.
Once the bridle is in place, step in front of your horse to check all points of adjustment from that vantage point. Check that the bit isn’t higher on one side than the other. Then check the bit. A curb bit should have one wrinkle at the corners of the mouth. A snaffle shouldn’t have any wrinkles but sit nicely in the mouth.
Pull back your bit’s shank about 2 inches to check that the bars of the bit rotate freely in the mouth and the curb engages correctly. If you’re using a snaffle, the curb strap sits in front of your reins.
READ MORE: Two-Rein Dos and Don’ts
—H&R—