
When you teach your horse to sidepass, you learn to control his every foot placement and guide his every step. If you teach your horse this skill correctly, he’ll respond to your every cue and to your natural aids (seat, hand, and leg).
Here, top clinician/trainer Julie Goodnight will teach you how to position your body so that your horse will quickly understand that you’re asking for sideways movement. She’ll help you reinforce this new skill by asking you to practice it using a fence line as a guide.
Exercise Prep
Natural-horsemanship lesson: You’ll learn how to use your primary natural aids – your seat, legs and hands – to cue the horse to move sideways. You’ll apply these aids to control his every step.
Why you need it on the trail: On the trail, sidepassing is an important skill. Without it, you may find yourself in a jam when you need to dodge through timber and tight openings or sidle next to another rider to offer aid. Sidepassing also comes in handy when it’s time to open a gate, drag a log, pony another horse, push aside brush, and avoid a rock or even a snake.
What you’ll do: You’ll begin by learning how to position your body so that your horse will understand the go-sideways cue. Next, you’ll reinforce your sidepass cues as you ride next to a fence or barrier to help him understand which direction to go. Once you’ve mastered your work on the fence line, you’ll progress to sidepassing over a ground pole and logs.
What you’ll need: If your horse hasn’t been trained to sidepass at all, it’s best to start out with a snaffle or curb bit with articulation between the shanks (rather than a solid mouthpiece). A bit with movement will help him better feel your side-to-side rein aids.
Skills your horse will need: Your horse needs to know how to stop with just a seat cue, go forward off your leg cue, and back up on cue (using more leg than rein).
Step #1. Learn the Cues
Tack up (see bit recommendation, above), and warm up as usual. Practice starting, stopping, and turns to make sure your horse is listening to your cues.
In this step, you’ll learn how to use your body to ask your horse for this precise cue. In the next step, you’ll introduce him to the training process by using the cue.
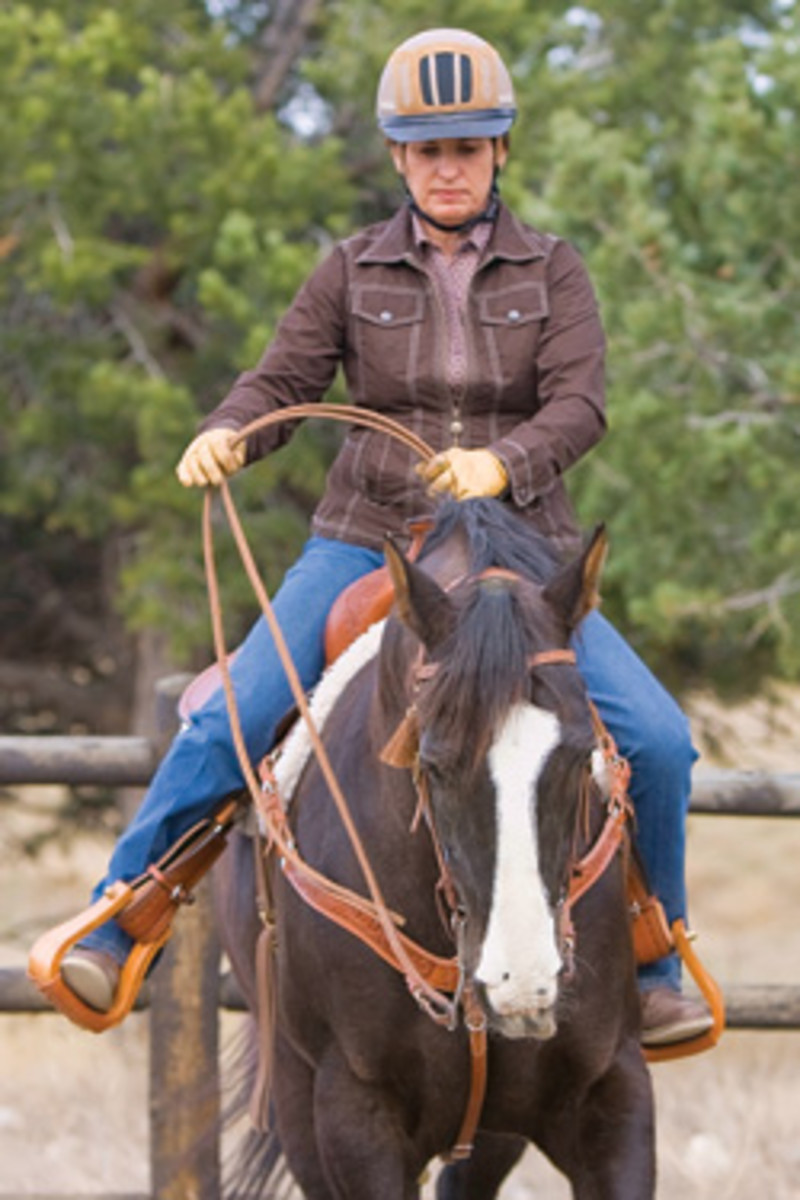
Keep in mind that there are only six ways a horse can move: forward, back, through the right shoulder, though the right hip, through the left shoulder, and through the left hip. Imagine these directions as the “doors” that you can open and close with your leg and rein aids. To start, we’ll open the doors to the right and close the doors to the front, back, and left.
Pick up the reins, and slightly shift your weight back to block your horse’s forward motion (that is, close the door to the front). For a sidepass to the right (shown), open the right rein (lift it slightly to encourage your horse to lift his shoulder), and slide your left hand to his neck’s midline (closing the “door” to movement to the left and opening a passageway to the right).
Open your right leg by stretching your foot to the right. (Be careful not to stiffen or brace this leg.) Close your left leg on his rib cage, and bump your lower leg against his side.
By disallowing forward movement with your hands, opening your right aids, and closing with your left aids, your horse will move toward the opening, that is, to the right (Photo 1).
Step #2. Use a Fence Line
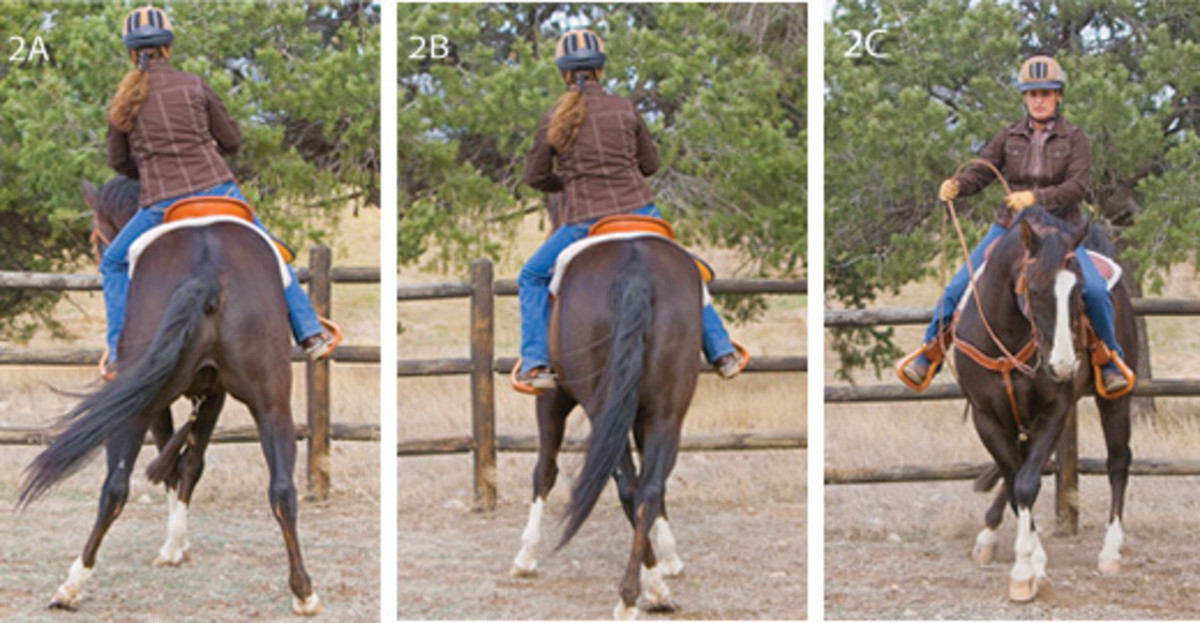
Now that you know how to position your body, it’s time to teach your horse to move sideways. For this, you’ll need the help of a fence. Use a safe, solid fence to remind him to move sideways and that there’s no chance of moving forward.
Fence work will give you a visual guide to work with and provide a natural barrier to block your horse’s forward movement. You’ll also make sure that you’re truly moving to the left or right and quickly make any corrections.
Walk your horse up to a fence, and stop him with his nose to the rail and his body perpendicular to the fence. Keeping his body straight and perpendicular to the fence, ask him to sidepass using your opening and closing aids.
As soon as any movement occurs, release the cue, and return to a neutral sitting position. Reward your horse with a release and a pet no matter how small of a sidestep he takes. This lets him know that he moved in the correct direction.
Pause briefly, then ask your horse to move to the right once again. As soon as he steps to the side, however small, reward him with a quick release of cues
and a pet. When he associates your new cue with moving sideways, you can begin to ask for more steps before rewarding him.
Repeat these steps to ask for a sidepass to the left. That is, open the doors to the left, while closing the doors to the right, front, and back.
When your horse understands your sidepass cue and is responding well (that is, he’ll easily walk two or three steps before needing encouragement), ask him to sidepass a longer distance.
Troubleshooting tips: As you begin to teach your horse to sidepass, he may (1) move forward or back too much; (2) move his shoulder in front of his hips (this is most common and causes a turn instead of a sidepass), or (3) move his hip before his shoulder.
To fix these problems, use your aids either to block movement of a body part or to encourage more movement of another body part. For instance, if your horse moves his shoulders too far and lags with his hip, block his shoulder a little by closing with your right rein.
To do so, bring your hand back toward his neck (don’t pull back), and bring your left hand back and up toward your belly button in an “indirect rein.” At the same time, reach back more with your outside leg, and bump his side to encourage his hip to move. Apply slight, backward, equal rein pressure to close the door to forward movement.
Any time your horse moves correctly, or tries extra hard, reward him with a release and a pet. Moving laterally isn’t easy for him, so don’t overdo it. Once you get a few steps, reward him, and end on a good note.
If your horse gets nervous when working on this, he’s feeling too much pressure. Slow down, shorten your training sessions, and reward him for a smaller amount of steps.
Work on a sidepass to the right until your horse is compliant (Photos 2A and 2B). Repeat to the left. Then gradually increase the number of steps until he can sidepass 10 to 15 steps while staying fairly straight through his body.
When your horse is moving well off your aids, try sidepassing away from the fence, with his tail near the fence and his nose pointed away (Photo 2C). Focus on keeping him straight through his body so that his shoulders and hips are fairly even. In this position, he won’t have the fence to guide him visually, but you can easily note and correct any straightness problems.
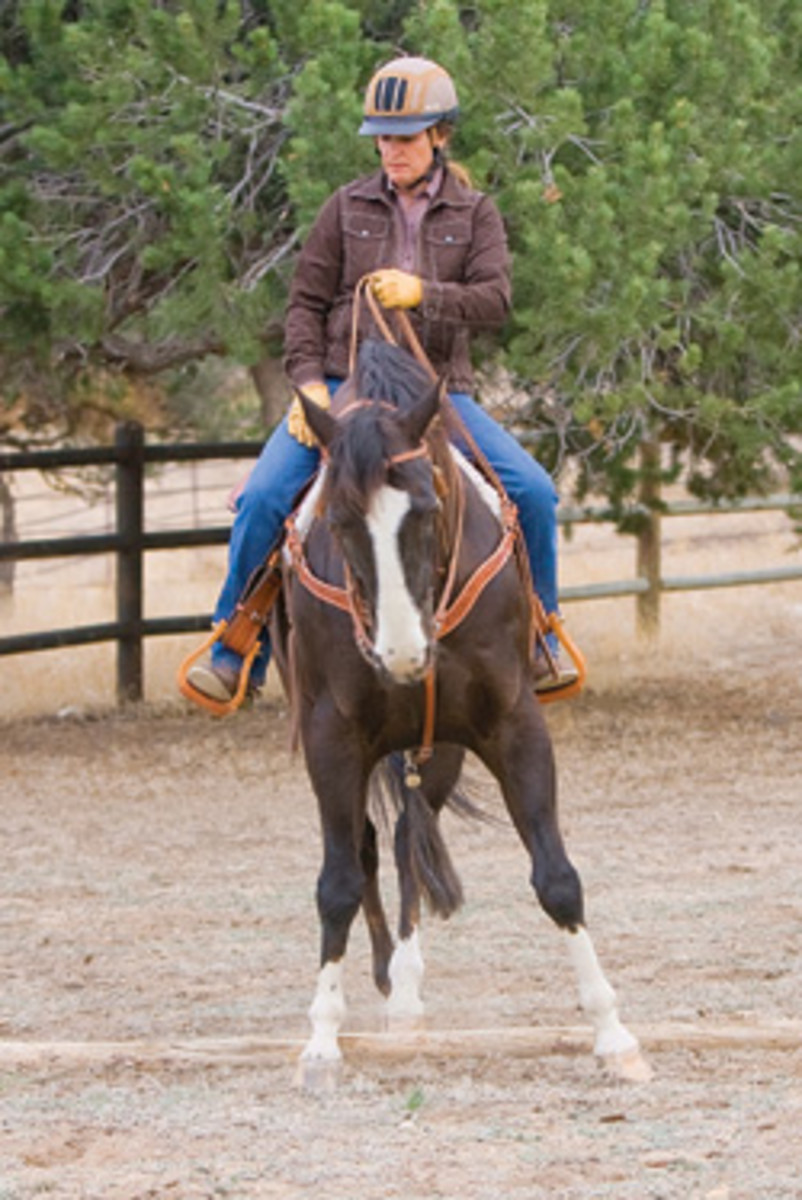
Step #3. Add a Ground Pole
As your horse progresses, test your sidepassing skills over a ground pole. Work to keep the pole between your horse’s front and back feet. You’ll quickly notice any idiosyncrasies if your horse steps forward or back.
Work to the left and right, and always remember to stop and praise your horse for his efforts. Ride around the pole, then return to sidepass over it, in front of it, or behind it. Then he won’t learn that his feet must always be over a pole.
When your horse easily sidepasses over a ground pole, progress to sidepassing over larger logs on the trail. Look for other opportunities to sidepass, such as moving toward a post to pick up a slicker or rope.
Julie Goodnight (www.juliegoodnight.com) lives in central Colorado, home to miles of scenic trails. She trains horses and coaches horse owners to be ready for any event, on the trail or in the performance arena. She shares her easy-to-understand lessons on her weekly RFD-TV show, Horse Master, and through appearances at clinics and horse expos held throughout the United States. She’s also the international spokesperson for the Certified Horsemanship Association (www.cha-ahse.org).
Heidi Nyland (www.wholepicture.org) is a lifelong horsewoman, equine journalist, and photographer based in Longmont, Colorado.