Q I’m having trouble coordinating my split reins. I admit that I’m a little clumsy, but with some explanation and instruction, I feel like I could “get it.” Can you provide me any tips or tricks for the how and why of different arrangements of split reins?
Cassi Morgen, Utah
A You’re right that there are quite a few different ways to use split reins when training your horse. The positions are more limited in competition, depending on the class you enter and the association’s rules, so be sure to check those before you compete. But before I cover four different ways to hold your reins, I’d like to discuss the importance of using your reins correctly. Without correctness in terms of use, how you hold your reins doesn’t matter.
[READ MORE WITH AL: The Lost Art of Standing Tied]
Here are three skills to master before you try different ways to handle your reins. You can practice these by hooking your reins to a chair, a fence rail, or any horizontal anchor. By practicing out of the saddle, you won’t annoy your horse with your learning curve, nor make him less responsive to your cues.
Take slack and give it back. For good rein management, you must be effective at taking the slack out of your reins and knowing when to stop before you pull too hard on your horse’s face. This requires understanding what it means to have a feel on your horse’s mouth (you can feel the bit make slight contact with his mouth’s bars) so you don’t pull so hard that you startle him with an unexpected—and unnecessary—jerk on his mouth. Practice being smooth and quiet when you gather up your reins’ slack as well as when you feed it back.
Keep your hands in ‘the box.’ The ultimate goal, in most cases, is to ride one-handed. To be consistent in your training, you must ride two-handed as similarly as possible to how you’ll ride one-handed. You should rein inside an invisible box that’s no higher than a few inches above your saddle horn, no lower than your horse’s withers, no more than 1 foot in front of your horn, and no farther just a few inches behind the horn.
Pretend there’s a stick between your hands. Most of the time when you ride, imagine that there’s a 12-inch stick that you have to keep between your hands. The stick not only keeps your hands from getting too close together or too far apart, it ensures that your reins work in equal and opposite directions. When your right hand goes forward, your left hand goes back, and vice versa. When both hands are centered, they’re level.
Four Rein Positions
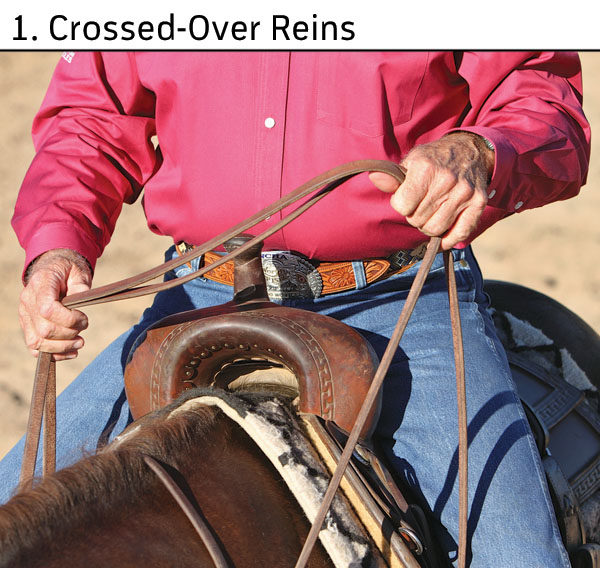
1: Crossed-Over Reins
Here I have the reins crossed over my horse’s withers, with one tail on each side. I have my left hand in the air to show you that I have my little fingers between the reins. This is only for illustrative purposes—my hands should be level. The length of reins between my two hands—called the bight—can easily be lengthened and shortened as needed. This is a functional and common rein arrangement. It’s perfect for a novice or green rider. If you drop a rein, it’ll lie on your horse’s neck rather than fall to the ground, where your horse could step on it and cause a wreck.
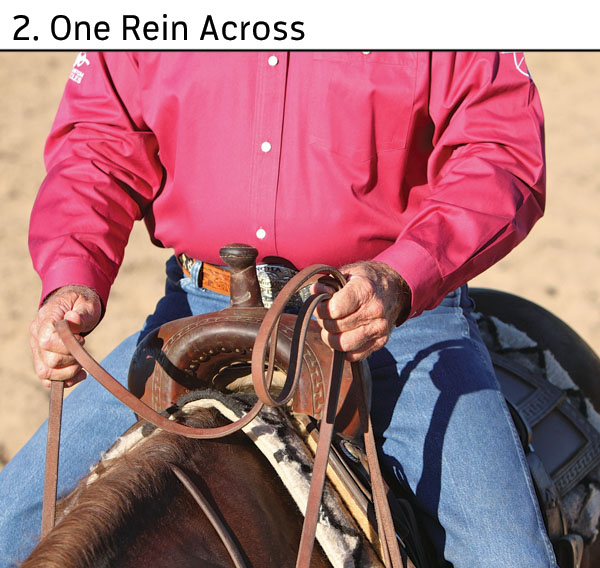
2: One Rein Across
You can swap these instructions for the left rein, but in this photo, I have only my right rein across my horse’s neck. The left rein is looped in my left hand to keep it from dragging on the ground on the left side. The bight that comes across the horse’s neck shortens my right rein sufficiently. Many trainers prefer this rein arrangement because they can easily go back and forth between one-handed and two-handed riding, which is helpful when schooling an aged horse or training a young horse for one-handed reining.
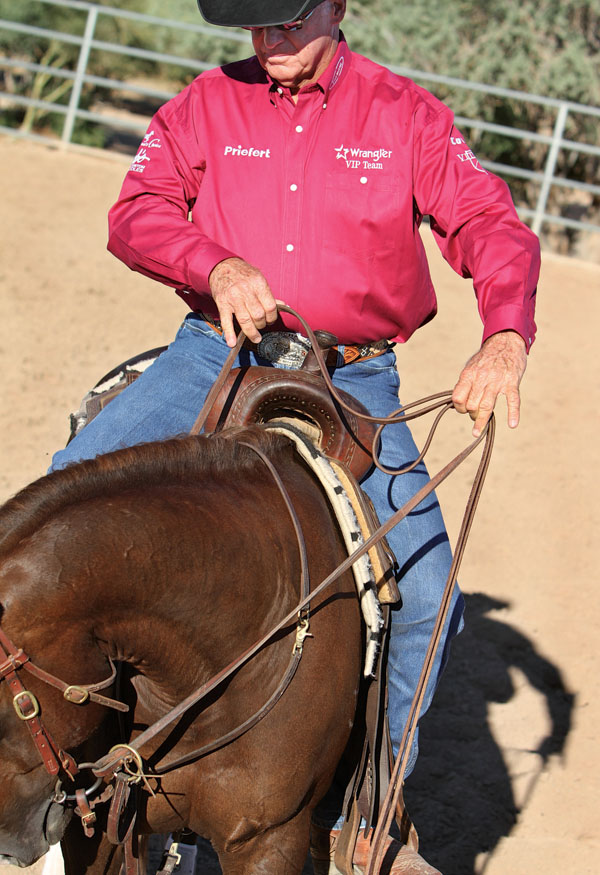
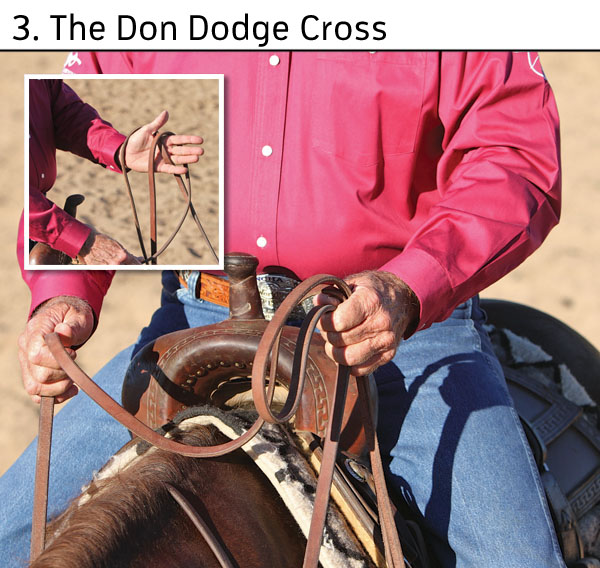
3: The Don Dodge Cross
This rein arrangement is named for Don Dodge, the horseman of many hall-of-fame honors. It requires experience and practice to master, but for professionals, it’s the most effective way to carry reins and use them properly in training. In the inset photo, you can see that the reins crisscross my hand. I can switch that cross from one hand to the other very quickly. The key is to remember to drop your left hand and get slack in that rein when you reach down and start pulling on the right rein.
[MORE WITH AL: Draw Reins]
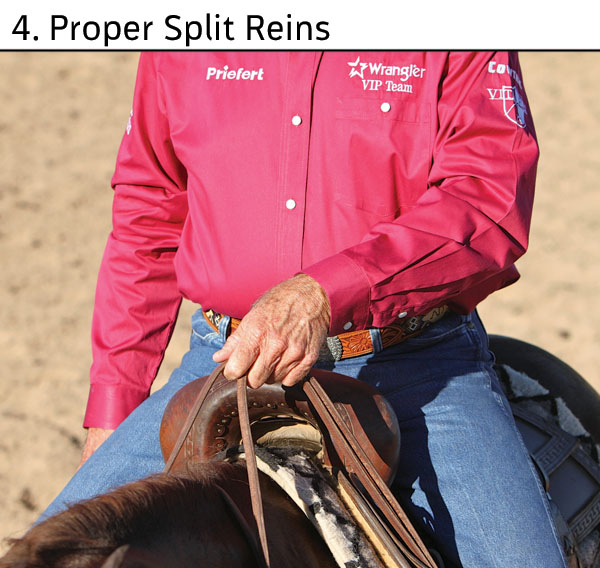
4: Proper Split Reins
Here’s the correct way to ride one-handed with split reins. The flatness of my hand helps keep my reins even on both sides of my horse’s neck. My hand is above my horse’s mane line, slightly forward of the horn, up off my horse’s neck. This is the riding position; if I tried to guide my horse from this position, I’d be shoulder-reining instead of neck-reining. The reining position for correct neck reining requires you to place your hand slightly up and forward. Whenever you move your hand, remember to keep your shoulders, hips, and seat square. Don’t cock your body in one direction, because your reins won’t be even, not to mention that the uneven weight will cause other problems with your horse and your riding.
Al Dunning, Scottsdale, Arizona, has produced world champion horses and riders in multiple disciplines. He’s been a professional trainer for more than 40 years, and his expertise has led him to produce books, DVDs, and his own online mentoring program, Team AD International (teamadinternational.com).